
Patriot 4WD L4-2.4L VIN W (2007)
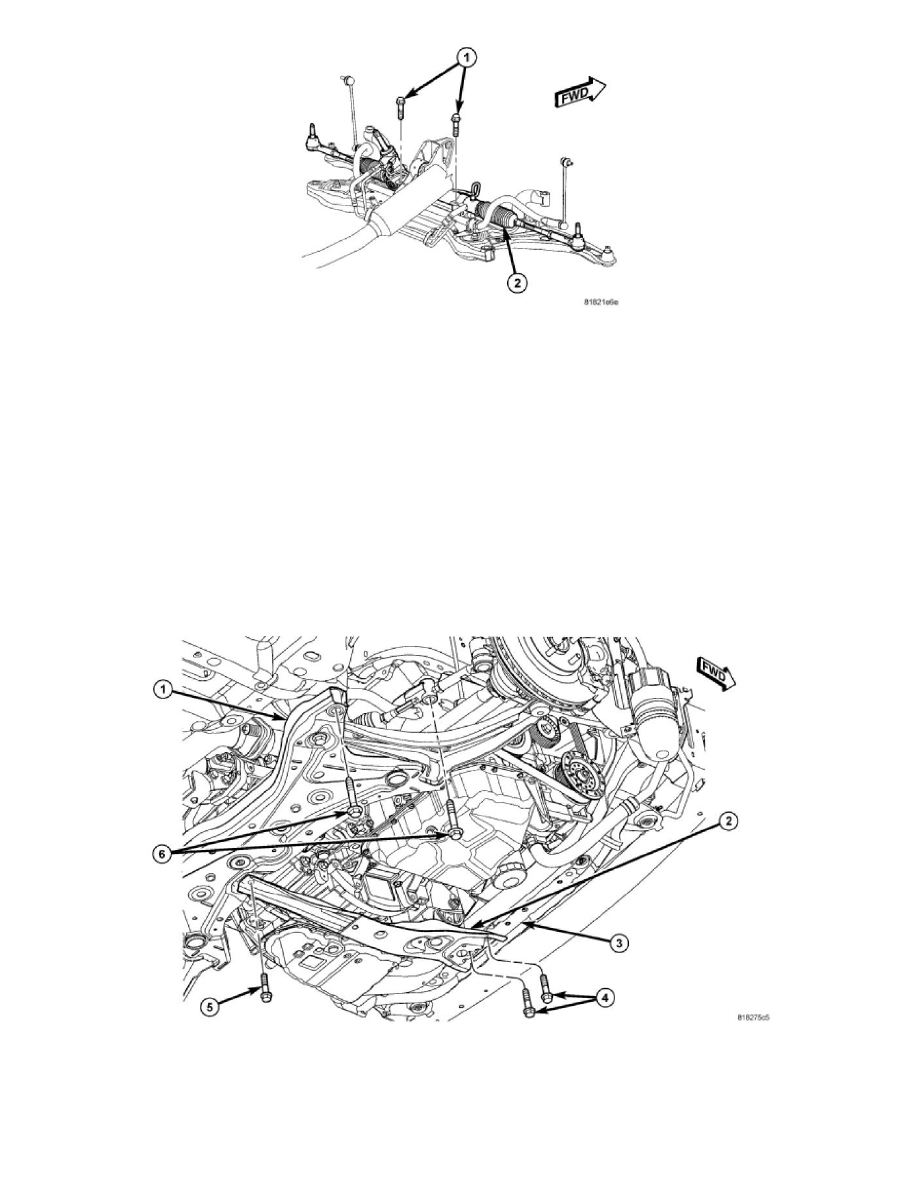
13. Remove the two bolts (1) securing the steering gear (2) to the crossmember.
14. Support the steering gear using a bungee cord or other to keep the steering gear from lowering when the crossmember is lowered.
15. Slowly lower the crossmember until there is enough space present to remove the stabilizer bar between the rear of the crossmember and the body.
Due to the fact that the fore-and-aft crossmember is still attached, do not lower crossmember any more than necessary to remove the stabilizer bar.
16. Remove the stabilizer bar out over rear of crossmember.
Installation
INSTALLATION
NOTE: Before stabilizer bar installation, inspect the cushions and links for excessive wear, cracks, damage and distortion. Replace any pieces
failing inspection.
NOTE: Before installing the stabilizer bar, make sure the bar is not upsidedown. The stabilizer bar (1) must be installed so that when in
mounted position, the ends of the bar curve over the top of the steering gear before attaching to the links.
1. Install the stabilizer bar, link ends first, from the rear over top of the crossmember. Curve the ends of the bar over the steering gear.
2. Slowly raise the crossmember (1) into mounted position using the transmission jack matching the crossmember to the marked locations on the
body made during removal.
3. Install the four mounting bolts (6) securing the front crossmember (1) to the body. Tighten the crossmember mounting bolts to 190 Nm (140 ft.
lbs.).
4. Remove the transmission jack.