
Wagoneer L6-242 4.0L VIN L FI (1989)
Trunk / Liftgate Shock / Support: Service and Repair
LIFTGATE SUPPORT CYLINDER REPLACEMENT
WARNING: NEVER REMOVE THE SUPPORT CYLINDERS WITH THE LIFTGATE CLOSED. THE SUPPORTS ARE
OPERATED BY HIGH PRESSURE GAS AND MAY CAUSE DAMAGE OR PERSONAL INJURY IF REMOVED WHILE STILL
COMPRESSED. DO NOT ATTEMPT TO DISASSEMBLE OR REPAIR THE SUPPORTS. WHEN SUPPORT REPLACEMENT IS
NECESSARY, THEY MUST BE DEPRESSURIZED AS DESCRIBED IN THE DISPOSAL PROCEDURE INCLUDED IN THIS
SECTION.
1. Open the liftgate.
2. Prop the liftgate in the open position.
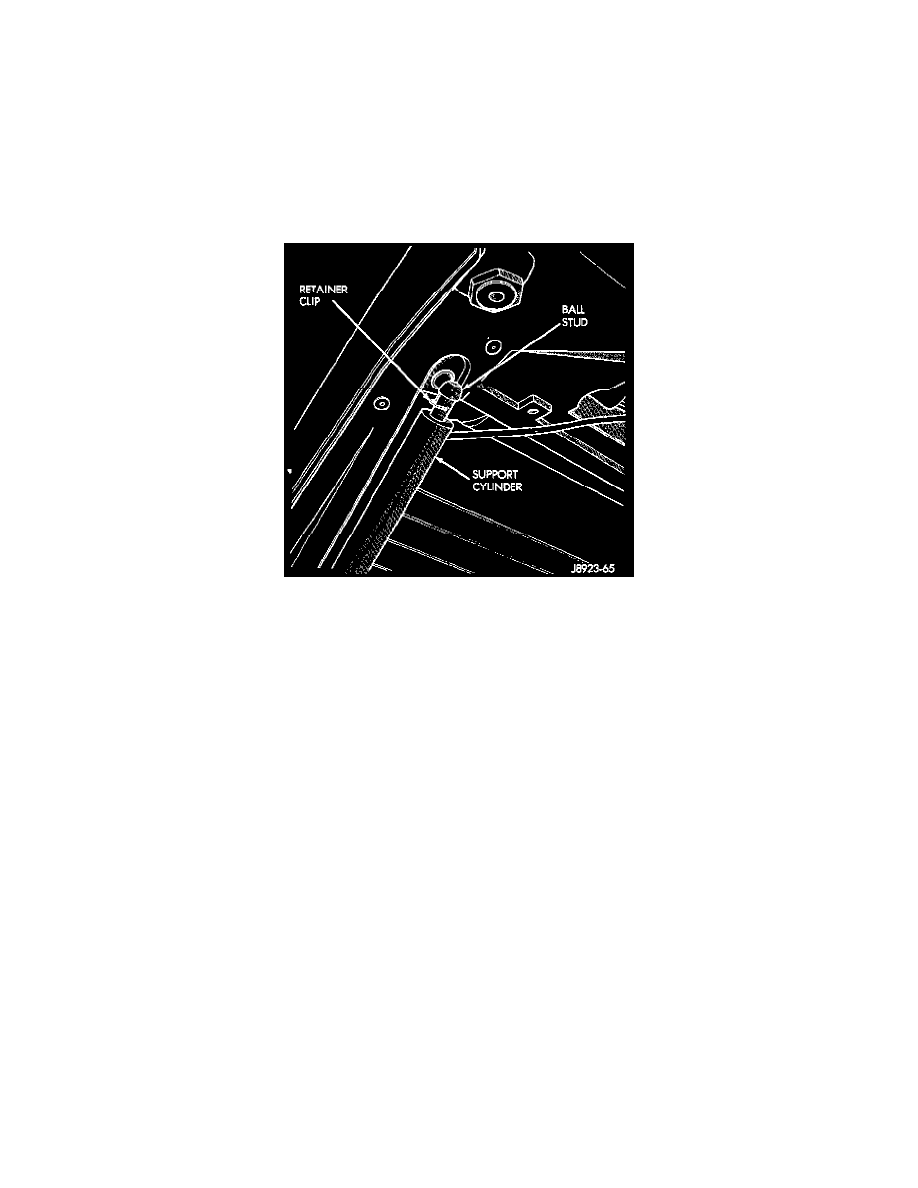
Removing/Installing Support Cylinder Retainer Clips
3. Remove the retainer clips that attach the cylinders to the ball studs.
4. Disconnect the cylinders from the ball studs and remove the supports.
5. Depressurize the old cylinders before disposal. Refer to the procedure in this section.
6. Connect the new cylinders to the ball studs.
7. Secure the cylinders to the ball studs with the retainer clips.
SUPPORT CYLINDER DISPOSAL PROCEDURE
WARNING: SAFETY GOGGLES MUST BE WORN DURING THE DISPOSAL PROCEDURE. THE HIGH PRESSURE GAS
CHARGE IN THE SUPPORT CYLINDERS WILL BE RELEASED (DEPRESSURIZED) AS PART OF THE PROCEDURE. DO NOT
ATTEMPT DEPRESSURIZATION WITHOUT WEARING SAFETY GOGGLES OR WITHOUT WRAPPING THE CYLINDER
WITH 4-5 LAYERS OF SHOP TOWELS BEFOREHAND.
1. Remove the support cylinder(s).
2. Position the cylinder horizontally in a vise and clamp the cylinder securely.
3. Wrap the cylinder with 4-5 layers of shop towels. Tape the towels in place.
4. Measure 1-1/2 inches in from the fixed end of the cylinder. Mark this point on the towels with chalk. The cylinder will be punctured at this point to
release the gas charge.
5. Using a sharpened punch hammer, drive the punch through the towels and into the cylinder at the 1-1/2 inch mark. Continue striking the punch
until gas begins to escape but do not remove the punch.
6. Hold the towels and punch in position until all gas has escaped. Depressurizing should take about 4-10 seconds. Then, slowly remove the punch.
Escaping oil will be absorbed by the towels.
7. Hold a towel over the hole in the cylinder and press the cylinder rod all the way into the cylinder to purge the remaining oil.
8. Remove the cylinder from the vise and discard the cylinder.