
Wagoneer L6-242 4.0L VIN M FI (1988)
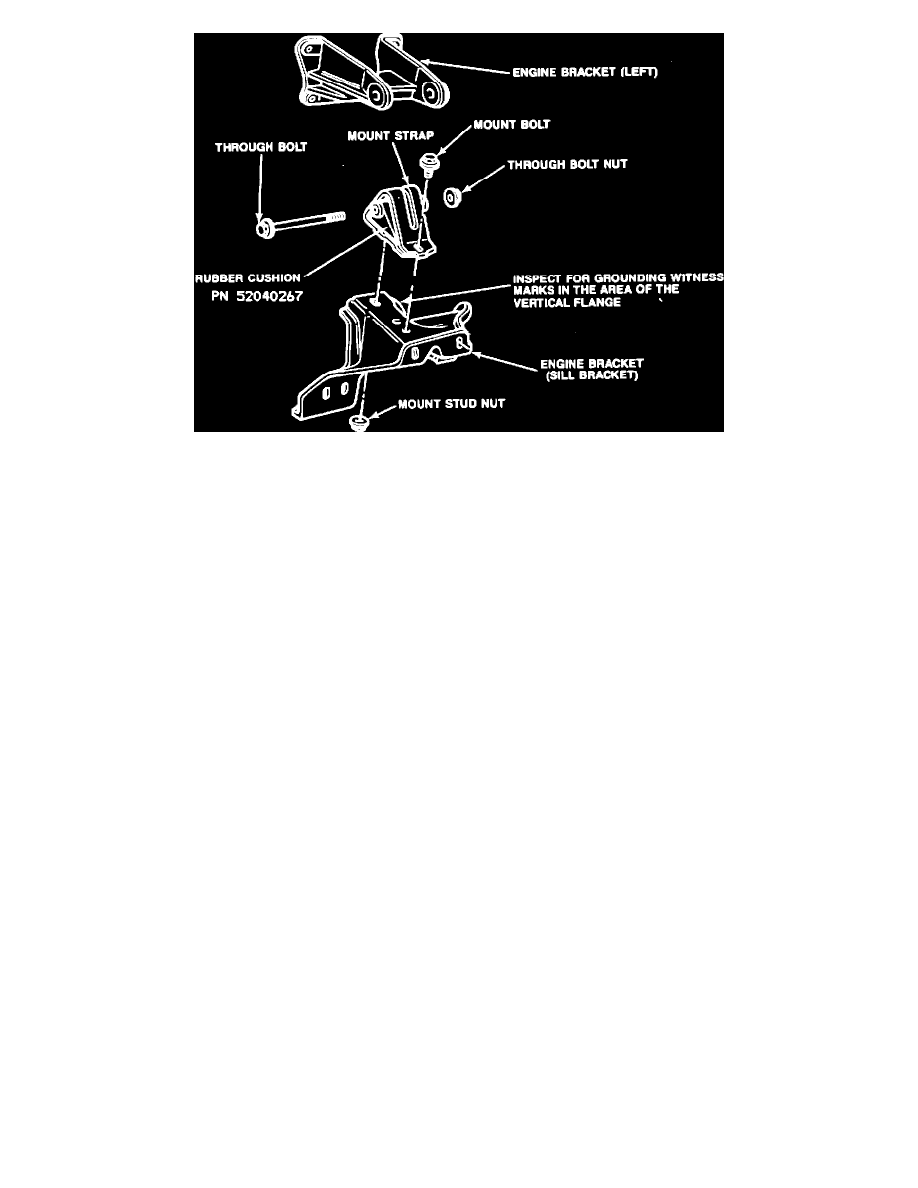
FIGURE 1
REPAIR PROCEDURE
This repair involves the removal and replacement of the left engine mount and inspection of the left engine bracket.
1.
Disconnect the battery negative cable at the battery.
2.
Using a long extension and universal socket, loosen the left engine mount outboard bolt.
3.
Raise vehicle.
4.
Remove the engine splash shield.
5.
Support the engine.
6.
Remove the engine mount through bolt nut, mount stud nut and mount bolt. Figure 1
7.
Raise the engine carefully, remove the through bolt, remove the engine mount.
CAUTION:
DO NOT ALLOW THE FAN BLADES TO CONTACT THE SHROUD.
8.
Inspect the left engine bracket (sill bracket) for witness marks of contact on the rear flange area. If contact is apparent, replace the left engine
bracket and tighten engine bracket bolts to 32 ft.lbs (43 N-m) torque. Figure 1
9.
Position the engine mount in the engine bracket, install the through bolt and nut.
10.
Carefully lower the engine while guiding the engine mount stud into the sill bracket hole. Install the stud nut and mount bolt.
11.
Tighten the through bolt to 48 ft.lbs (65 N-m) torque. Tighten the mount stud nut to 30 ft.lbs (41 N-m) torque.
12.
Install the engine splash shield.
13.
Remove engine support and lower the vehicle.
14.
Using a long extension and universal socket, tighten the outboard mount bolt to 30 ft.lbs (41 N-m) torque.
15.
Connect the negative battery cable.
POLICY:
Reimbursable within the provisions of the warranty.
TIME ALLOWANCE: