
Wagoneer L6-242 4.0L VIN M FI (1988)
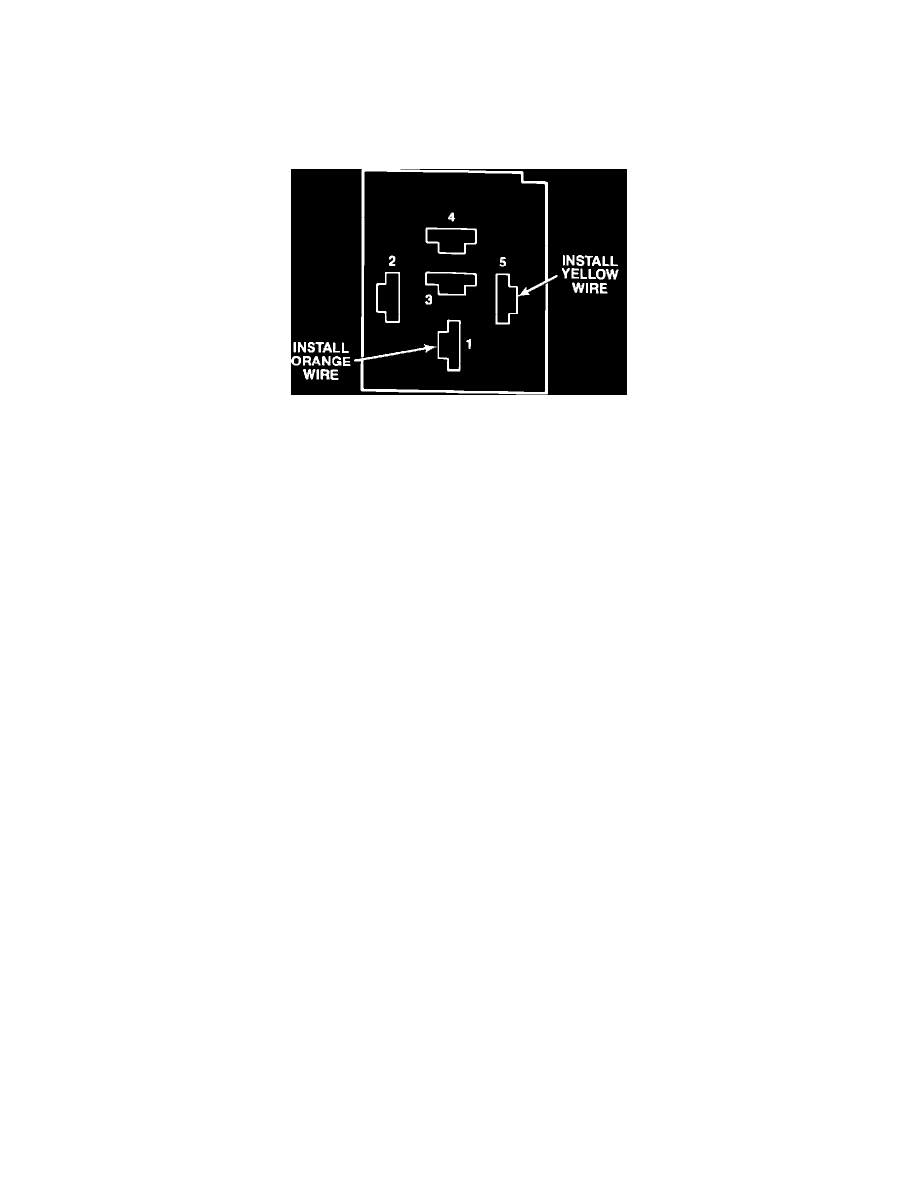
FIGURE 1
4.
Separate the O2 sensor heater relay (A) and connector from the rest of the relays. Figure 1
NOTE:
THE O2 SENSOR HEATER RELAY MAY BE IDENTIFIED AS THE ONLY RELAY WITH A GRAY WIRE.
5.
Remove the O2 relay from its connector.
6.
Pry the white plastic retaining clip (B) from the relay connector. Figure 1
FIGURE 2
7.
Insert a paper clip into cavities 1 and 5 from the relay side, to release the locking tab of the terminals. Switch the wires in the cavity holes. The
orange wire (fuel pump feed) goes into cavity 1 and the yellow (ignition) wire goes into cavity 5. Figure 2
8.
Install the white plastic retaining clip.
9.
Install the O2 relay into its connector.
10.
Attach the O2 relay assembly to the other three relay assemblies and install them to the fender bracket.
11.
Connect the battery negative cable.
12.
Verify the repair with the MS 1700 Diagnostic Tester before installing the relay cover.
POLICY:
Reimbursable within the provisions of the warranty.
SRT/TIC INFORMATION:
OPERATION
OPERATION DESCRIPTION
NUMBER
TIME
TIC
FAILURE CODE
CO. WIRES, RELAY-CHANGE
0103
0.3
1-838
CO. MS 1700 TEST
0103
0.3
08-65-18-90
0.6
51