
Wrangler L6-4.0L VIN S (2000)
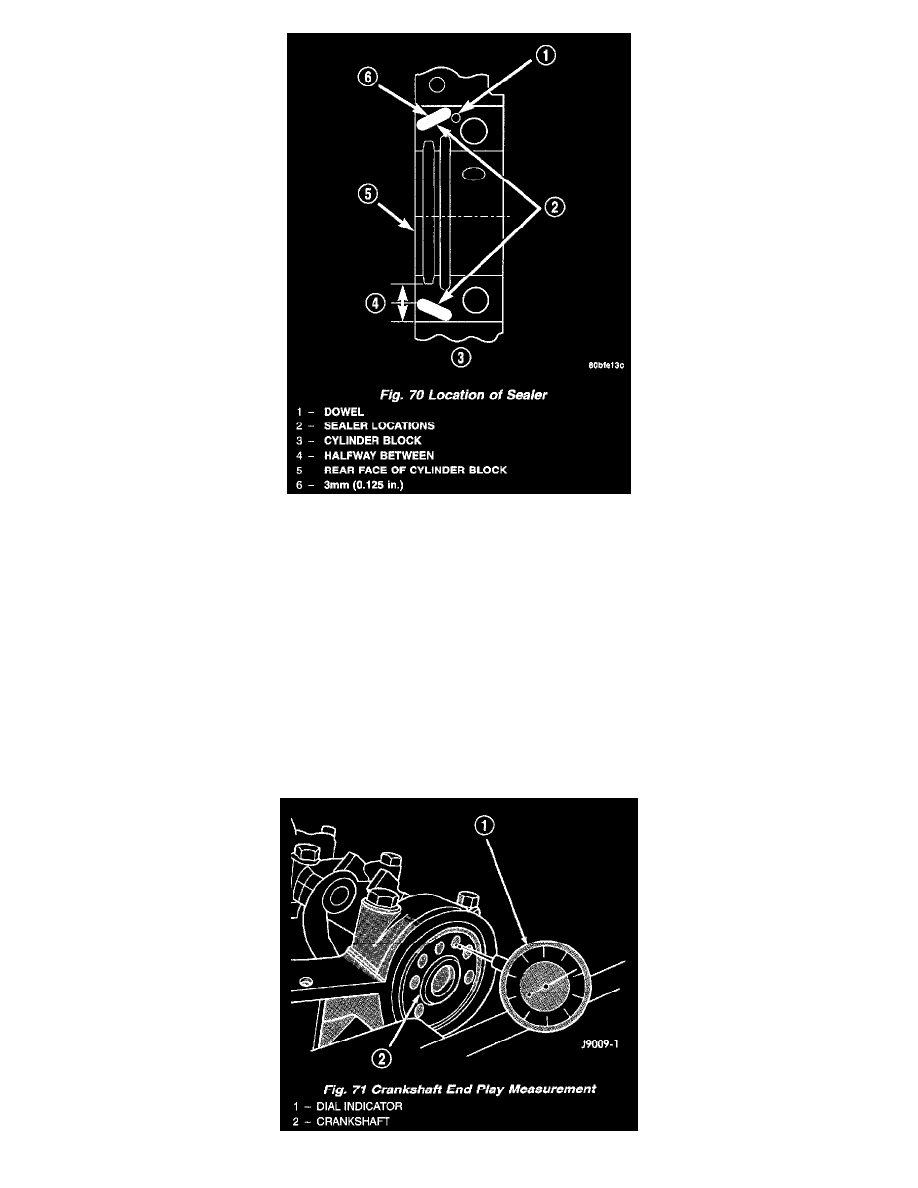
Fig. 70
4. On the rear main cap, apply Mopar Gasket Maker sealer on both sides of cylinder block as shown in (Fig. 70). The dab of sealer should be 3 mm
(0.125 inch) in diameter.
5. Apply Mopar Gasket Maker on the rear bearing cap. The bead should be 2.3 mm (0.09 inch) in diameter. DO NOT apply sealer to the lip of the
seal.
6. Install the main bearing cap(s) and lower insert(s).
7. Tighten the bolts of caps 1, 2, 4, 5, 6, and 7 to 54 Nm (40 ft. lbs.) torque. Now tighten these bolts to 95 Nm (70 ft. lbs.) torque. Finally, tighten
these bolts to 108 Nm (80 ft. lbs.) torque.
8. Push the crankshaft forward and backward. Load the crankshaft front or rear and tighten cap bolt No.3 to 54 Nm (40 ft. lbs.) torque. Then tighten
to 95 Nm (70 ft. lbs.) torque and finally tighten to 108 Nm (80 ft. lbs.) torque.
9. Rotate the crankshaft after tightening each main bearing cap to ensure the crankshaft rotates freely.
10. Check crankshaft end play. Crankshaft end play is controlled by the thrust bearing which is flange and installed at the No.2 main bearing position.
a. Attach a magnetic base dial indicator to the cylinder block at either the front or rear of the engine.
b. Position the dial indicator rod so that it is parallel to the center line of the crankshaft.
c. Pry the crankshaft forward, position the dial indicator to zero.