
Wrangler L6-4.0L VIN S (2000)
Crankshaft Position Sensor - Two-Nut Mounting
-
with two nuts.
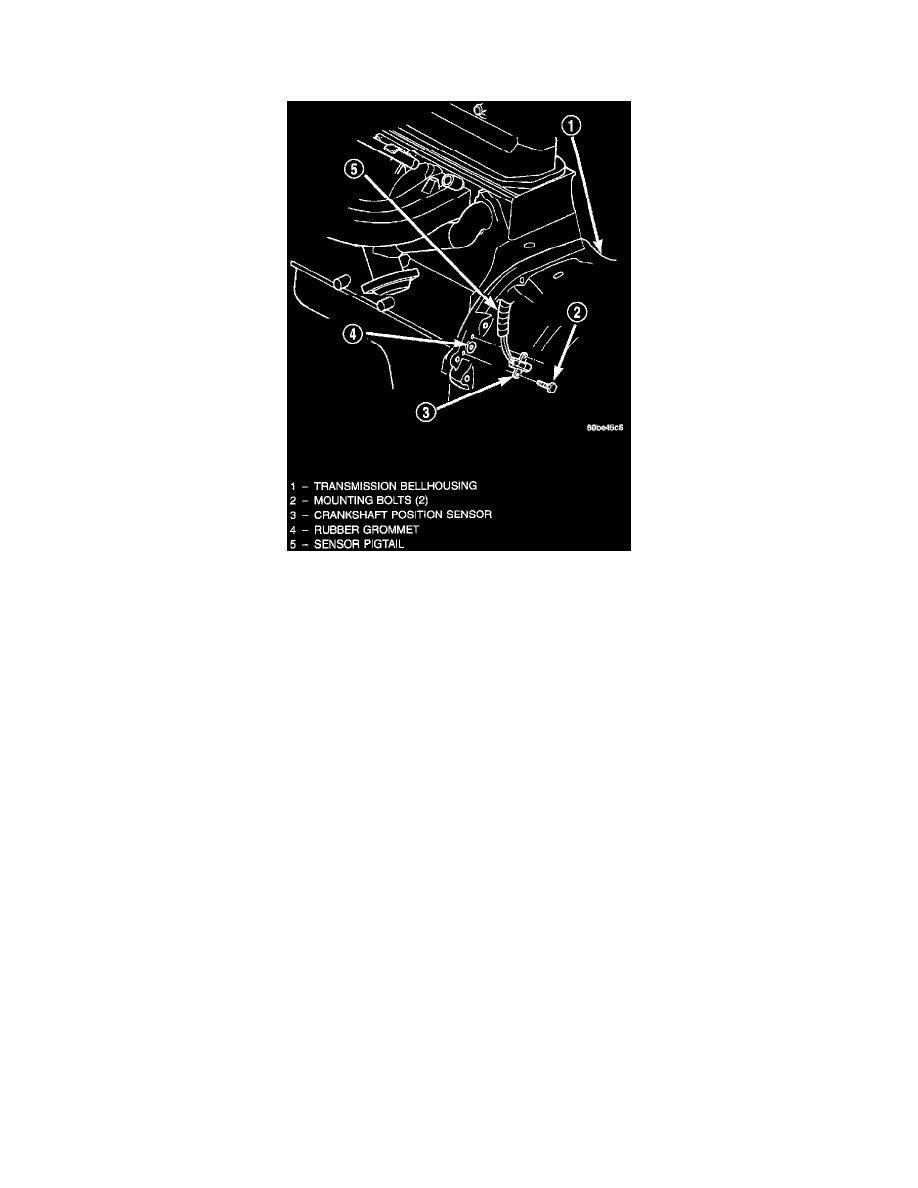
Crankshaft Position Sensor - Two-Bolt Mounting
-
with two bolts.
1. Near right-rear side of engine, disconnect sensor pigtail harness (electrical connector) from main electrical harness.
2. Depending upon application, remove either sensor mounting bolt(s) or nuts.
3. Remove sensor from engine.
INSTALLATION
Sensor With 2-Bolt Mounting:
1. Install sensor flush against opening in transmission housing.
2. Install and tighten two sensor mounting bolts to 19 Nm (14 ft. lbs.) torque. The two sensor mounting bolts are specially machined to correctly
space unit to flywheel. Do not attempt to install any other bolts.
Sensor With 2-Nut Mounting:
3. Install and tighten two sensor mounting nuts to 19 Nm (14 ft. lbs.) torque.
Sensor With One-Bolt Mounting:
New replacement sensors will be equipped with a paper spacer glued to bottom of sensor. If installing (returning) a used sensor to vehicle, a new
paper spacer must be installed to bottom of sensor. This spacer will be ground off the first time engine is started. If spacer is not used, sensor will
be broken the first time engine is started.
4. New Sensors: Be sure paper spacer is installed to bottom of sensor. If not, obtain spacer PN05252229.
5. Used Sensors: Clean bottom of sensor and install spacer PN05252229.
6. Install sensor into transmission bellhousing hole.
7. Push sensor against flywheel/drive plate. With sensor pushed against flywheel/drive plate, tighten mounting bolt to 7 Nm (60 in. lbs.) torque.
8. Connect sensor pigtail harness electrical connector to main wiring harness.