
Wrangler 2WD V6-3.8L (2008)
1.
Have an assistant apply a slow flow of water across the top header joint with a hose for approximately 3-5 minutes while inspecting the interior of
the hard top for water leaks to determine general leak source location(s). Do not use a hard spray of water. Do not stop inspection when one leak
source is located, there may be more than one water leak source.
NOTE:
Dripping that occurs at the center of the windshield header may be the result of a Freedom Top seal leaking and running forward. The following step
verifies leak origination point.
2.
If leak occurs at the front of the top near the A-Pillar, remove the sun visors, upper and lower trim covers to gain visual access to the header seal.
Water leaks originating from the header seal will generally run towards the outside ends of the header, (toward the A-Pillar) and drip in at the
corner(s).
3.
If a water leak is originating at the header seal, then perform the Repair Procedure in this Service Bulletin and refer to DealerCONNECT > eFiles
> Service > Star Center > Misc. Documents > JK A Pillar Water Leaks, for additional information.
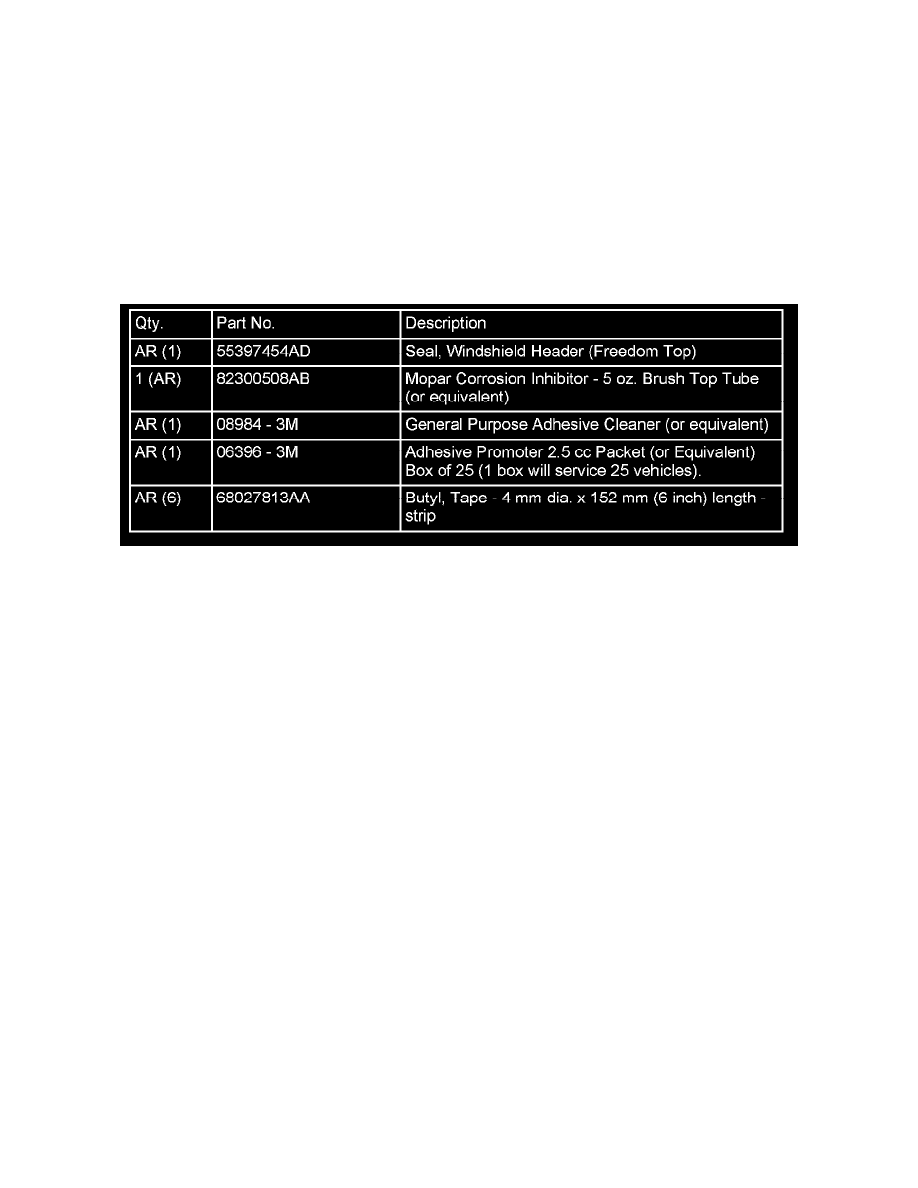
PARTS REQUIRED:
REPAIR PROCEDURE:
NOTE:
Do not use RTV as a sealer. Over time RTV will not remain attached to the hard top material.
1.
Remove both Freedom Top Panels from the hard top. Perform the following steps in order:
a.
Fold both sun visors down and out of the way.
b.
Turn both left panel center L-shaped locks (2) 50 that they disengage from the right side panel.
c.
Turn the left panel rear L-shaped lock (located above the shoulder belt anchorage) so that it disengages from the hard top.
d.
Turn the left panel rear fastener knob (located on the overhead speaker bar assembly) counter-clockwise until it can be removed.
e.
Unlatch the left panel header panel latch located at the top of the windshield.
f.
Carefully remove the left side panel from the hard top.
g.
Turn the right panel rear L-shaped lock (located above the shoulder belt anchorage) so that it disengages from the hard top.
h.
Turn the right panel rear fastener knob (located on the overhead speaker bar assembly) counter-clockwise until it can be removed.
i.
Unlatch the right panel header panel latch located at the top of the windshield.
j.
Carefully remove the right side panel from the hard top.
2.
Set the Freedom Top panels on a well PROTECTED WORK SURFACE. Protect the Freedom Top panel edges & top surface from damage.
NOTE:
THE PAINTED TOP SURFACE OF THE FREEDOM TOP CAN EASILY BE DAMAGED IF CARE IS NOT TAKEN TO PROTECT IT.