
Wrangler 2WD V6-3.8L (2008)
8.
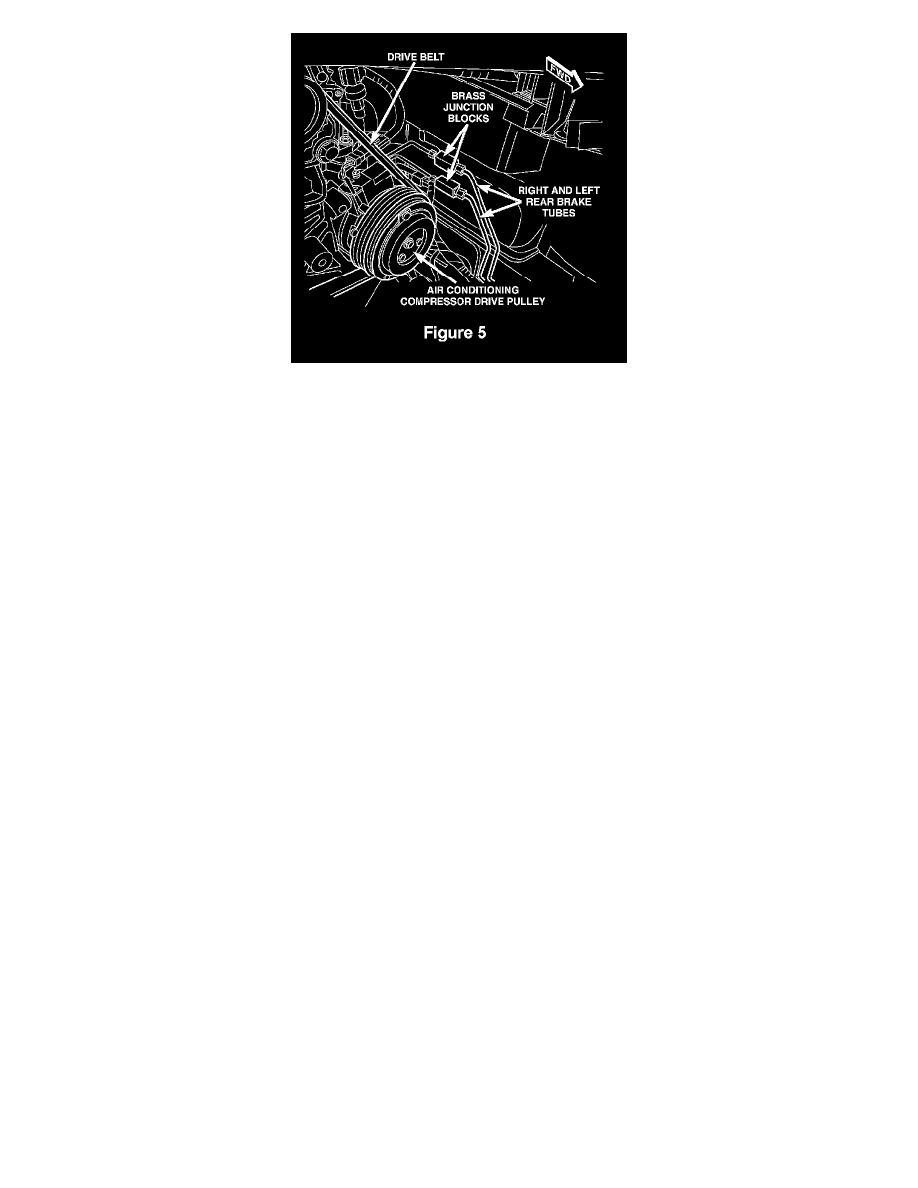
Disconnect the brake tube(s) from the brass junction block(s) located next to the left frame rail (Figure 5).
9.
Remove the brake tube(s) from the plastic routing clips.
10.
Carefully remove and discard the original brake tube(s) from the vehicle.
CAUTION:
Use extreme care not to allow residual brake fluid in the brake tube to spill onto any painted surfaces while removing the brake tube(s) from
the vehicle. Paint damage may occur.
11.
Place the new brake tube(s) into position.
12.
Connect the brake tube(s) to the brake hydraulic control unit aluminum body (Figure 4). Hand tighten the tube nut(s).
13.
Connect the other end of the brake tube(s) to the brass junction block(s) (Figure 5). Hand tighten the tube nut(s).
CAUTION:
Each brake tube has a unique tube nut size. Be sure to install the correct size tube nut into the corresponding brass junction block threaded
hole.
14.
Snap the brake tube(s) into the plastic routing clips.
15.
Tighten the brake hydraulic control unit tube nut(s) to 220 in. lbs. (25 N.m) (Figure 4).
16.
Tighten the brass junction block tube nut(s) to 195 in. lbs. (22 N.m) (Figure 5).
17.
Install the coolant overflow bottle onto the radiator.
18.
Install the power steering reservoir to the core support.
19.
Attach the main wiring harness connector to the body support beam (Figure 3).
20.
Connect the electrical connector at the canister purge solenoid (Figure 4).
21.
Remove the brake pedal prop rod from the vehicle.
22.
Connect the negative battery cable.
23.
Bleed the brake system using the following procedure:
a.
Fill the brake master cylinder reservoir with DOT 3 brake fluid.