
Wrangler 2WD V6-3.8L (2008)
rubber O-ring seals and metal gaskets could result in a refrigerant system leak.
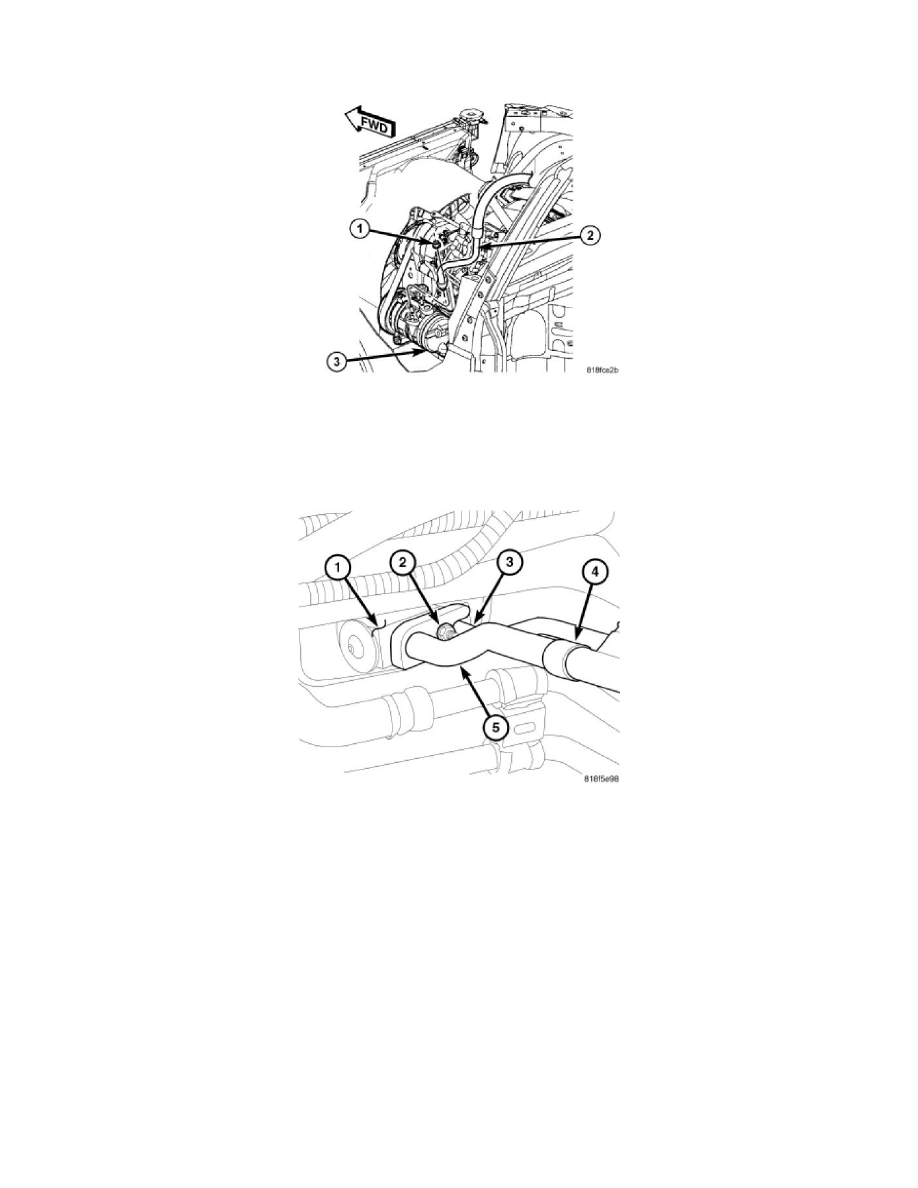
NOTE: 3.8L engine shown in illustrations. 2.8L engine similar.
1. Position the A/C suction line (2) into the engine compartment.
2. Remove the tape or plugs from the opened liquid and suction line fittings and the compressor and expansion valve ports.
3. Lubricate new rubber O-ring seals with clean refrigerant oil and install them and a new gasket onto the liquid and suction line fittings. Use only the
specified O-ring seals as they are made of a special material for the R-134a system. Use only refrigerant oil of the type recommended for the A/C
compressor in the vehicle.
4. Connect the A/C suction line to the A/C compressor (3) and install the retaining nut (1). Tighten the nut to 23 Nm (17 ft. lbs.).
5. If removed, install the A/C liquid line (3) into the tapping block of the A/C suction line (5).
6. Connect the A/C liquid line and A/C suction line to the A/C expansion valve (1) and install the retaining nut (2). Tighten the nut to 8 Nm (70 in.
lbs.).
7. If removed, install the bracket (4) that secures the A/C liquid line to the A/C suction line.
8. Reconnect the negative battery cable.
9. Evacuate the refrigerant system See: Service and Repair/Refrigerant System Evacuate.
10. Adjust the refrigerant oil level See: Service and Repair/Refrigerant Oil Level.
11. Charge the refrigerant system See: Service and Repair/Refrigerant System Charge.