
Wrangler 2WD V6-3.8L (2008)
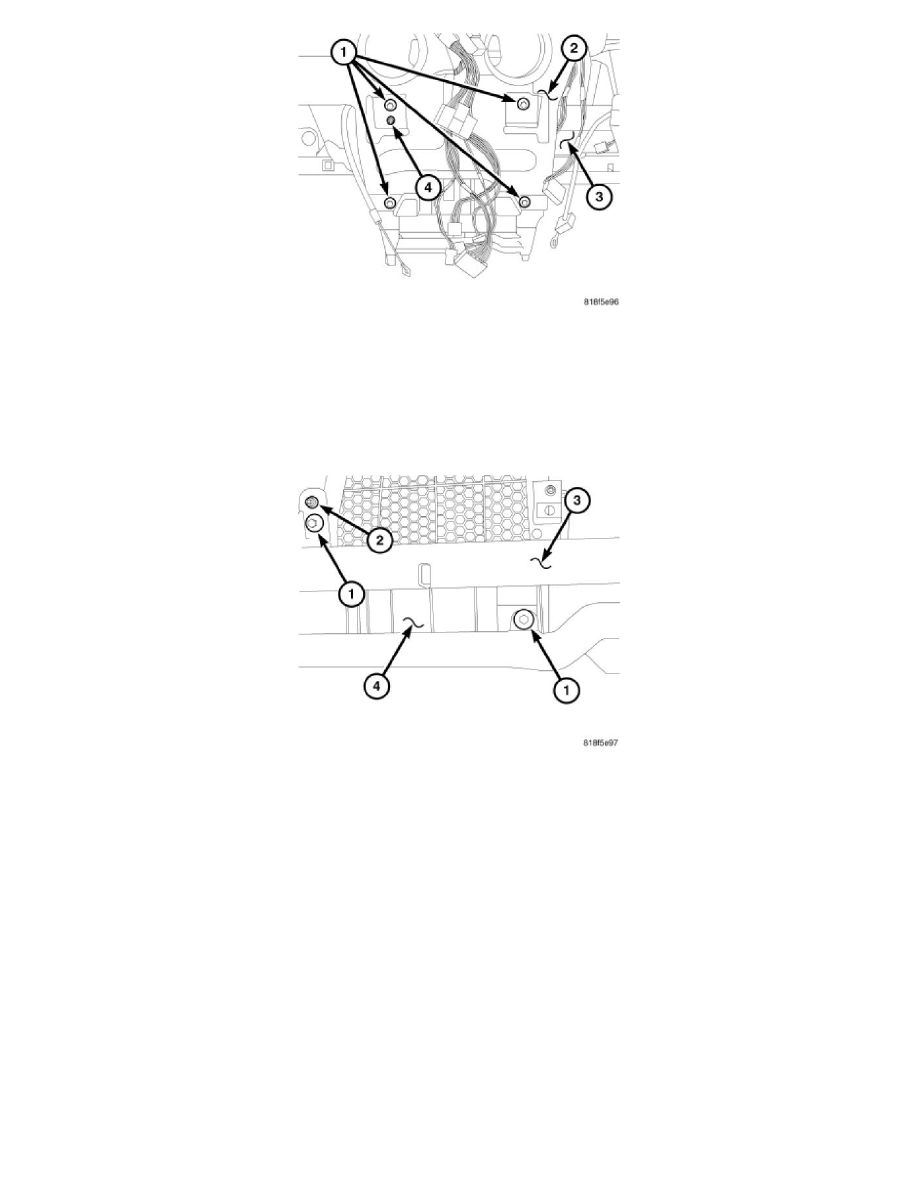
1. Position the HVAC housing assembly (3) into the instrument panel support (2). Be certain that the housing alignment pin (4) is correctly located.
2. Install the four bolts (1) that secure the HVAC housing assembly to the center of instrument panel support. Tighten the bolts to 4 Nm (35 in. lbs.).
NOTE: If a foam seal on the top of the HVAC housing is deformed or damaged, the seal must be replaced.
3. Install the instrument panel ducts See: Air Duct/Service and Repair/Instrument Panel Ducts/Installation.
4. Install the defroster duct See: Air Duct/Service and Repair/Defroster Ducts/Installation.
5. Install the demister ducts See: Air Duct/Service and Repair/Instrument Panel Demister Ducts/Installation.
6. Verify that the housing alignment pin (2) is correctly located in the passenger side of the instrument panel support (3).
7. Install the two bolts (1) that secure the air inlet housing (4) to the instrument panel support. Tighten the bolts to 4 Nm (35 in. lbs.).
8. Connect the instrument panel wire harness connectors to the evaporator temperature sensor, blower motor resistor, blower motor and the
recirculation door actuator.
9. Install the instrument panel cover.
10. Install the instrument panel See: Body and Frame/Interior Moulding / Trim/Dashboard / Instrument Panel/Service and Repair/Instrument Panel -
Installation.