
Wrangler 2WD V6-3.8L (2008)
Ultrasonic Sensor: Service and Repair
Removal
Console
CONSOLE
NOTE: An intrusion sensor is installed within the center floor console only on four-door vehicles equipped with the export premium version of
the Vehicle Theft Alarm (VTA).
1. Disconnect and isolate the battery negative cable.
2. Remove the center console from the vehicle. See: Body and Frame/Interior Moulding / Trim/Console/Service and Repair/Center Console -
Removal.
3. Place the center console on a suitable work surface. Be certain to take the proper precautions to protect the console from receiving cosmetic
damage during the service procedure.
4. Remove the screws at each rear side of the console that secure the rear trim cover to the console.
5. Remove the rear trim cover from the console.
6. Remove the fasteners securing the intrusion sensor to the rear outer surface of the center console bin.
7. Remove the intrusion sensor from the center console bin.
Instrument Panel
INSTRUMENT PANEL
WARNING: To avoid serious or fatal injury on vehicles equipped with airbags, disable the Supplemental Restraint System (SRS) before
attempting any steering wheel, steering column, airbag, seat belt tensioner, impact sensor, or instrument panel component diagnosis or service.
Disconnect and isolate the battery negative (ground) cable, then wait two minutes for the system capacitor to discharge before performing
further diagnosis or service. This is the only sure way to disable the SRS. Failure to take the proper precautions could result in accidental
airbag deployment.
NOTE: An intrusion sensor is installed within the instrument panel only on vehicles equipped with the export premium version of the Vehicle
Theft Alarm (VTA).
1. Disconnect and isolate the battery negative cable.
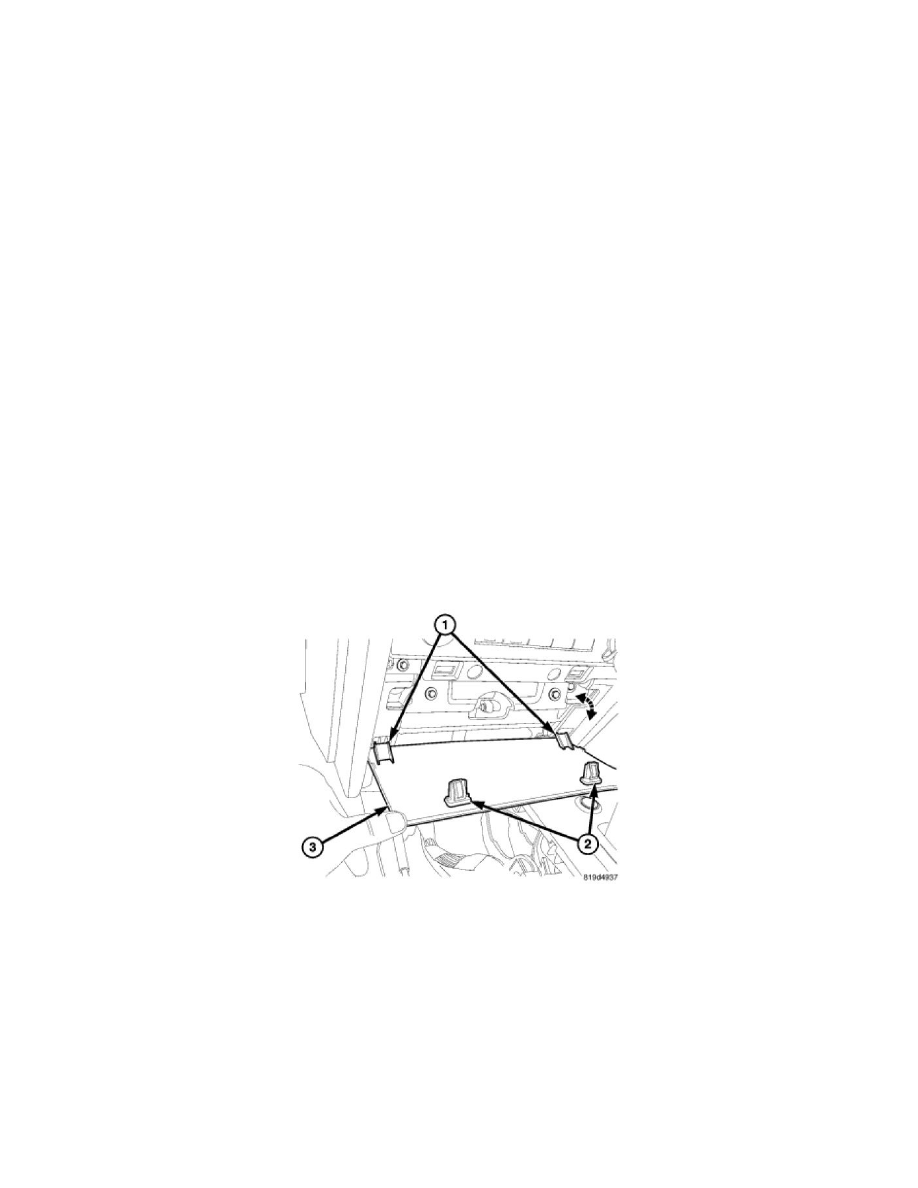
2. Using a trim stick or another suitable wide flat-bladed tool, gently and evenly pry the upper edges of the lower center trim panel (3) away from the
instrument panel far enough to disengage the two snap clips (2) that secure the top of the panel to the base trim of the instrument panel center
stack.
3. Rotate the lower center trim panel downward far enough to disengage the two tabs (1) at the bottom of the panel from the base trim of the
instrument panel center stack.
4. Disconnect the intrusion sensor pigtail wire from the instrument panel wire harness.
5. Remove the fasteners securing the intrusion sensor to the base trim of the instrument panel center stack.
6. Remove the intrusion sensor from the instrument panel.
Swing Gate
SWING GATE
NOTE: An intrusion sensor is installed within the swing gate only on vehicles equipped with the export premium version of the Vehicle Theft