
Wrangler 2WD V6-3.8L (2008)
Check Valve: Service and Repair
Removal
Front
FRONT
1. Unlatch, open and support the hood.
2. Locate the front check valve (4) in the washer supply hose (3) for the front washer nozzle. The check valve is installed in the washer supply hose
just outboard from the front washer nozzle (2) near the rear hood panel reinforcement (1).
3. Disconnect the washer supply hose for the front washer nozzle from the barbed outlet nipple on the front washer system check valve. A small
quantity of washer fluid may drain from the disconnected hose.
4. Disconnect the washer supply hose for the reservoir from the barbed inlet nipple of the front check valve. Either install a temporary plug in the
washer supply hose for the reservoir or secure the loose end of this hose at a point higher than the washer reservoir to prevent the contents of the
washer reservoir from draining through this hose.
5. Remove the front check valve from the engine compartment.
Rear
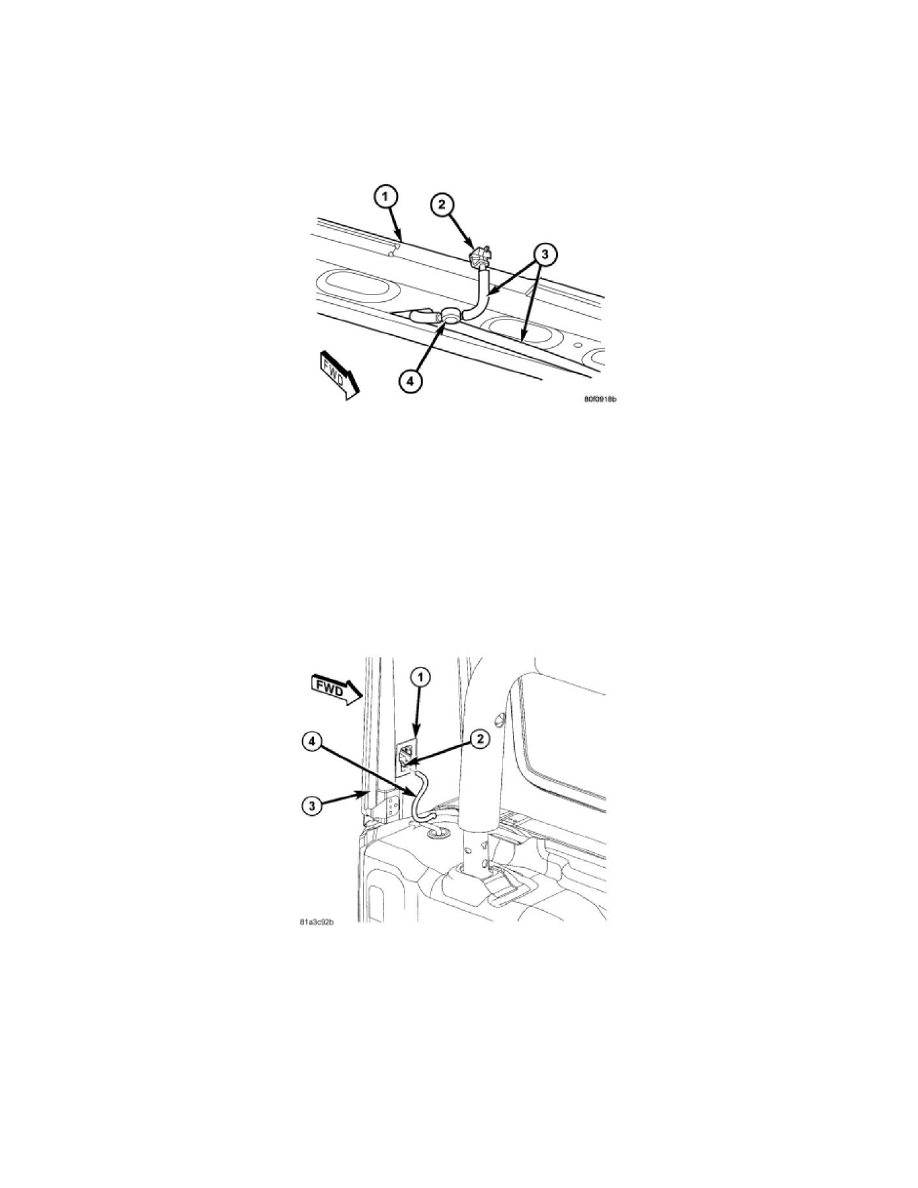
REAR
1. Disconnect and isolate the battery negative cable.
2. Unlatch and disconnect the body wire harness connector from the hardtop disconnect plate (1) connector receptacle located above the rear washer
check valve (2) on the inner D-pillar (3) of the hardtop.
3. Disconnect the rear washer supply hose (4) from the straight inlet nipple of the rear check valve. A small quantity of washer fluid may drain from
the disconnected hose.
4. Use a small screwdriver or a pocket knife to gently pry the latch features within each side of the disconnect plate pocket while pulling the plate
away from the D-pillar.
5. Pull the hardtop disconnect plate away from the D-pillar far enough to access and disconnect the hardtop washer hose from the barbed outlet
nipple on the back of the check valve. A small quantity of washer fluid may drain from the disconnected hose.
6. From the face of the disconnect plate, firmly grasp the straight nipple of the check valve and rotate it counterclockwise about 30 degrees to unlock
it.
7. Pull the check valve straight out of the keyed opening in the disconnect plate.