
Wrangler 4WD L4-150 2.5L VIN P MFI (1998)
Radiator Cap: Component Tests and General Diagnostics
Radiator Cap - Pressure Testing
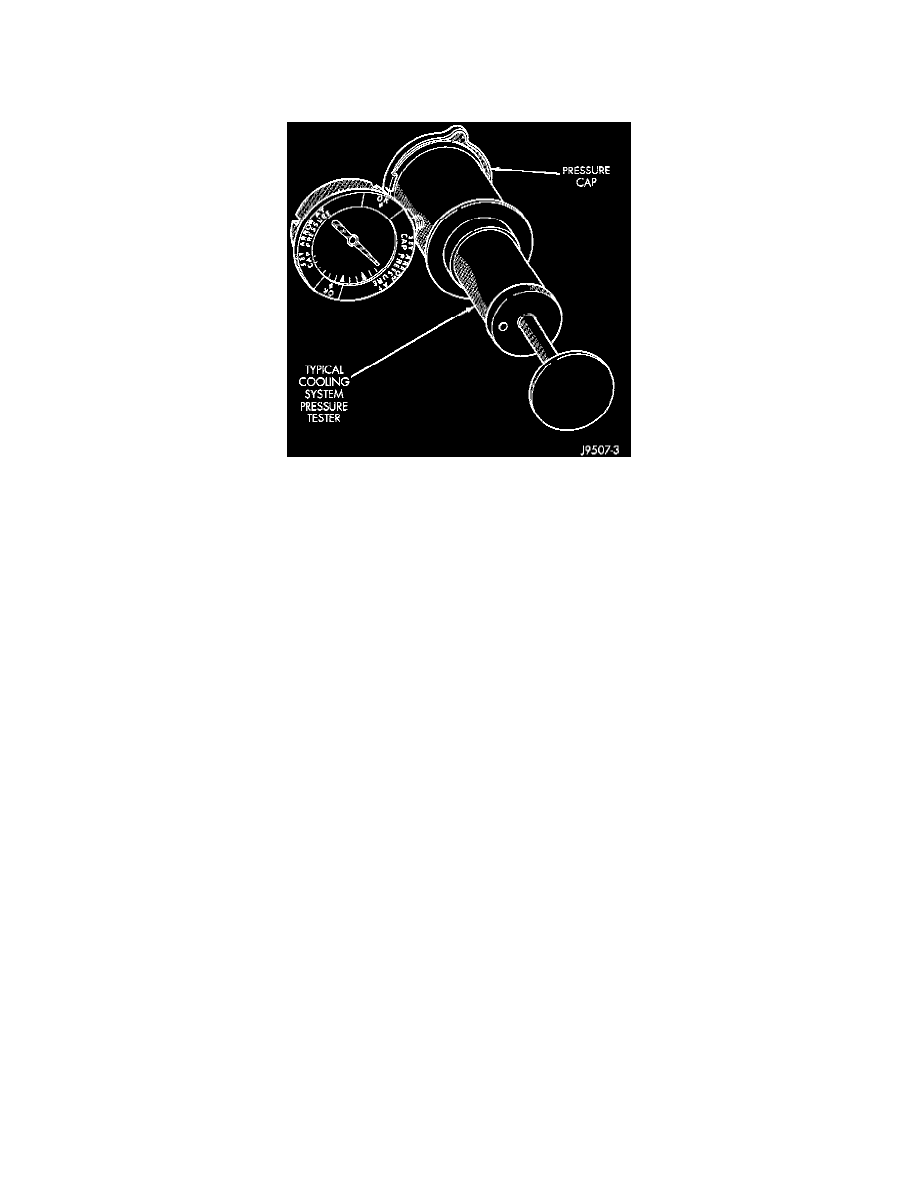
Pressure Testing Radiator Pressure Cap-Typical
Remove cap from radiator. Be sure that sealing surfaces are clean. Moisten rubber gasket with water and install the cap on pressure tester (tool 7700
or an equivalent).
Operate the tester pump and observe the gauge pointer at its highest point. The cap release pressure should be 83 to 124 kPa (12 to 18 psi). The cap is
satisfactory when the pressure holds steady. It is also good if it holds pressure within the 83 to 124 kPa (12 to 18 psi) range for 30 seconds or more. If
the pointer drops quickly, replace the cap.
CAUTION: Radiator pressure testing tools are very sensitive to small air leaks, which will not cause cooling system problems. A pressure cap that
does not have a history of coolant loss should not be replaced just because it leaks slowly when tested with this tool. Add water to tool. Turn tool
upside down and recheck pressure cap to confirm that cap needs replacement.
Visually inspect the pressure valve gasket on the cap. Replace cap if the gasket is swollen, torn or worn. Inspect the area around radiator filler neck for
white deposits that indicate a leaking cap.
Radiator Cap to Filler Neck Seal - Pressure Relief Check
With radiator cap installed on filler neck, remove coolant reserve/overflow tank hose from nipple on filler neck. Connect a hand operated vacuum
pump to nipple. Operate pump until a reading of 47 to 61 kPa (14 to 18 inch Hg) appears on gauge. If the reading stays steady, or drops slightly and
then remains steady, the pressure valve seal is good. Replace radiator cap if reading does not hold.