
Wrangler 4WD L4-150 2.5L VIN P MFI (1998)
14. Remove the three screws that secure the wiper motor to the wiper module mounting bracket.
15. Remove the wiper motor from the wiper module bracket.
16. Reverse the removal procedures to install. Tighten the mounting hardware as follows:
-
Wiper motor screws - 6 N.m (53 in. lbs.)
-
Crank arm nut - 11.5 N.m (101 in. lbs.)
-
Wiper module bracket screws - 7.9 N.m (70 in. lbs.)
-
Cowl plenum cover/grille panel screws - 1.7 N.m (15 in. lbs.).
Rear
1. Disconnect and isolate the battery negative cable.
2. From the outside of the lift-glass, remove the rear wiper arm as described.
Rear Wiper And Washer System
3. From the outside of the lift-glass, remove the rear wiper motor output shaft nut and bezel unit.
4. From the outside of the lift-glass, remove the rear wiper motor output shaft rubber gasket.
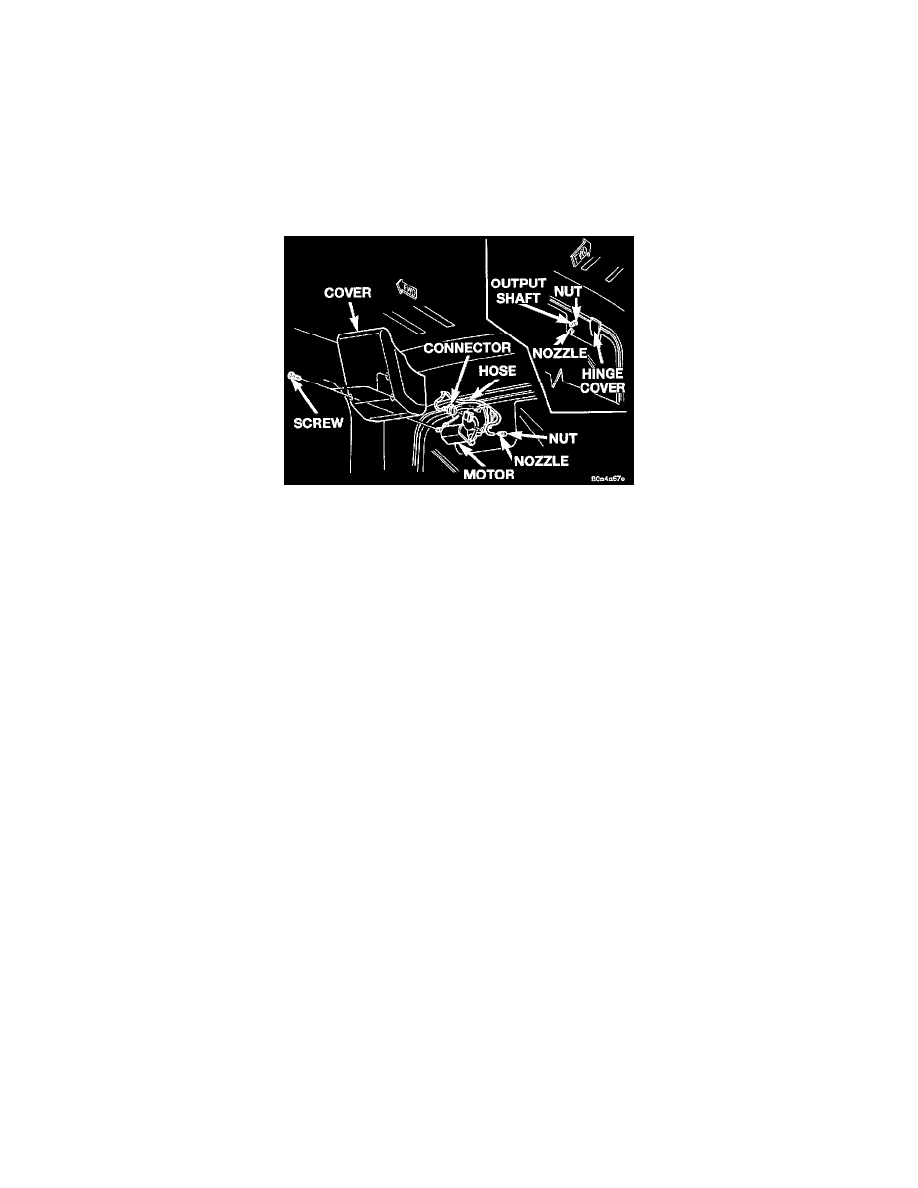
5. From the inside of the lift-glass, remove the three screws that secure the rear wiper motor cover to the motor.
6. Unplug the rear wiper motor wire harness connector.
7. Loosen, but do not remove, the right lift-glass hinge nut.
8. From the inside of the lift-glass, gently pull the rear wiper motor away from the lift-glass until the output shaft clears the hole in the lift-glass.
9. Move the motor towards the right side of the vehicle until the slotted hole in the motor mounting bracket clears the grommet under the right
lift-glass hinge nut.
10. Remove the rear wiper motor from the vehicle.
11. Reverse the removal procedures to install. Tighten the mounting hardware as follows:
-
Wiper motor output shaft nut - 3.3 N.m (30 in. lbs.)
-
Liftglass hinge nut - 6 N.m (53 in. lbs.)
-
Wiper motor cover screws - 1.1 N.m (10 in. lbs.).