Wrangler 4WD V6-3.8L (2009)

7. Remove the tape or plugs from the opened refrigerant line fittings and condenser ports.
8. Lubricate a new rubber O-ring seals with clean refrigerant oil and install them and new gaskets onto the refrigerant line fittings. Use only the
specified O-ring seals as they are made of a special material for the R-134a system. Use only refrigerant oil of the type recommended for the A/C
compressor in the vehicle.
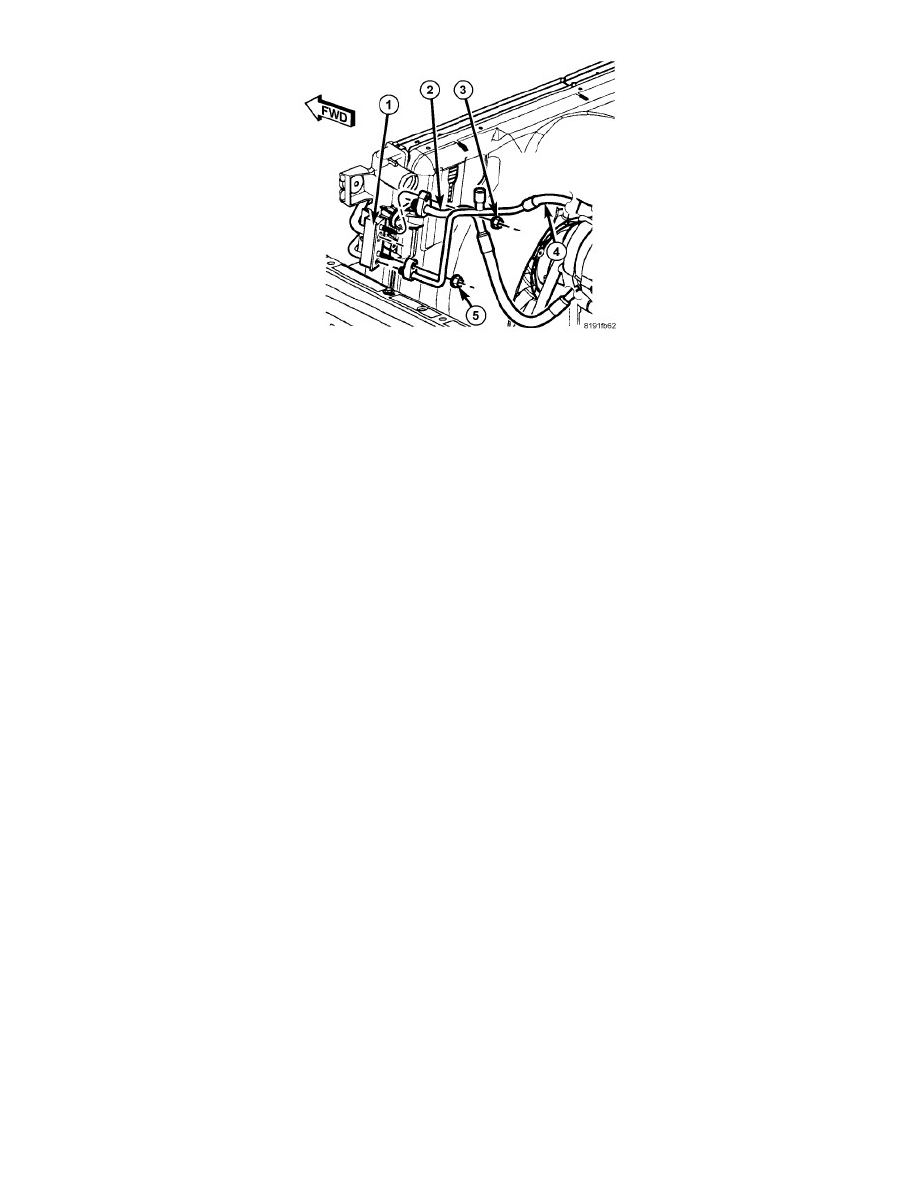
9. Connect the A/C discharge line (2) and the A/C liquid line (4) to the A/C condenser (1). Install the retaining nuts (3 and 5). Tighten the nuts to 23
Nm (17 ft. lbs.).
10. If equipped with 2.8L Diesel engine, connect the air outlet hose to the CAC .
11. Install the coolant recovery container See: Engine, Cooling and Exhaust/Cooling System/Coolant Reservoir/Service and Repair/Coolant Recovery
Bottle - Installation.
12. Reconnect the negative battery cable.
13. Evacuate the refrigerant system See: Service and Repair/Refrigerant System Evacuate.
14. If the A/C condenser is being replaced, add 60 milliliters (2 fluid ounces) of refrigerant oil to the refrigerant system. When replacing multiple A/C
system components, see the Refrigerant Oil Capacities chart to determine how much oil should be added to the refrigerant system See: Service and
Repair/Refrigerant Oil Level. Use only refrigerant oil of the type recommended for the A/C compressor in the vehicle.
15. Charge the refrigerant system See: Service and Repair/Refrigerant System Charge.
16. If equipped with automatic transmission, check the automatic transmission fluid level and fill as required.
