
Amanti V6-3.5L (2006)
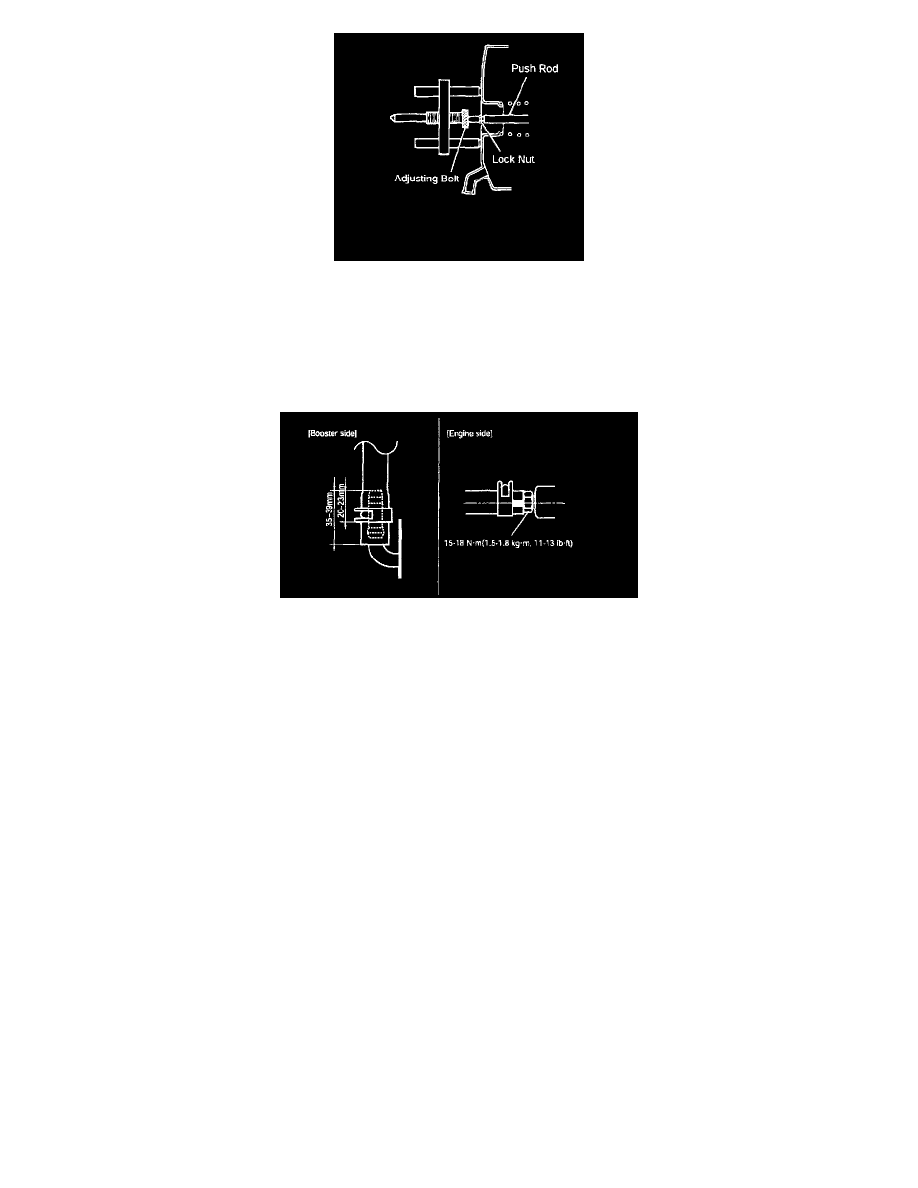
5) Check whether the clearance between the edge of the adjusting bolt and the push rod of the booster is 0 - 0.1 mm (0 - 0.004 inch)
If it is not standard clearance, loosen the lock nut of the push rod, and turn the push rod to make the adjustment.
Standard clearance: 0 - 0.1 mm (0 - 0.004 inch)
5. Install the master cylinder.
Tightening torque: 8 - 12 Nm (0.8 - 1.2 kg-m, 5.8 - 8.8 ft. lbs.)
6. Connect the vacuum hose to the brake booster.
1) Connect the vacuum hose insertion part into the brake booster tube as illustrated.
2) Insert it tightly until the fitting hexagonal end meets engine side vacuum hose, and clamp it with the hose clip.
NOTE:
^
Do not make vacuum hose twisted upon assembly.
^
Do not make air-leak at the vacuum hose connection.
7. After filling the brake reservoir with brake fluid, bleed the system.
8. Check for fluid leakage.
9. Check and adjust the brake pedal for proper operation.
10. After installing, apply grease to the contact parts of the joint pin and brake pedal.