
Amanti V6-3.5L (2006)
1. Disconnect the upper and lower hoses and overflow tube after marking the radiator hose and the hose clamp to easy reinstall.
2. For vehicles with automatic transaxles, disconnect the oil cooler hoses from the automatic transaxle.
CAUTION: Cover or plug the hose and inlets of the radiator so that dust and other foreign material etc. can not enter after the hose is
disconnected from the radiator.
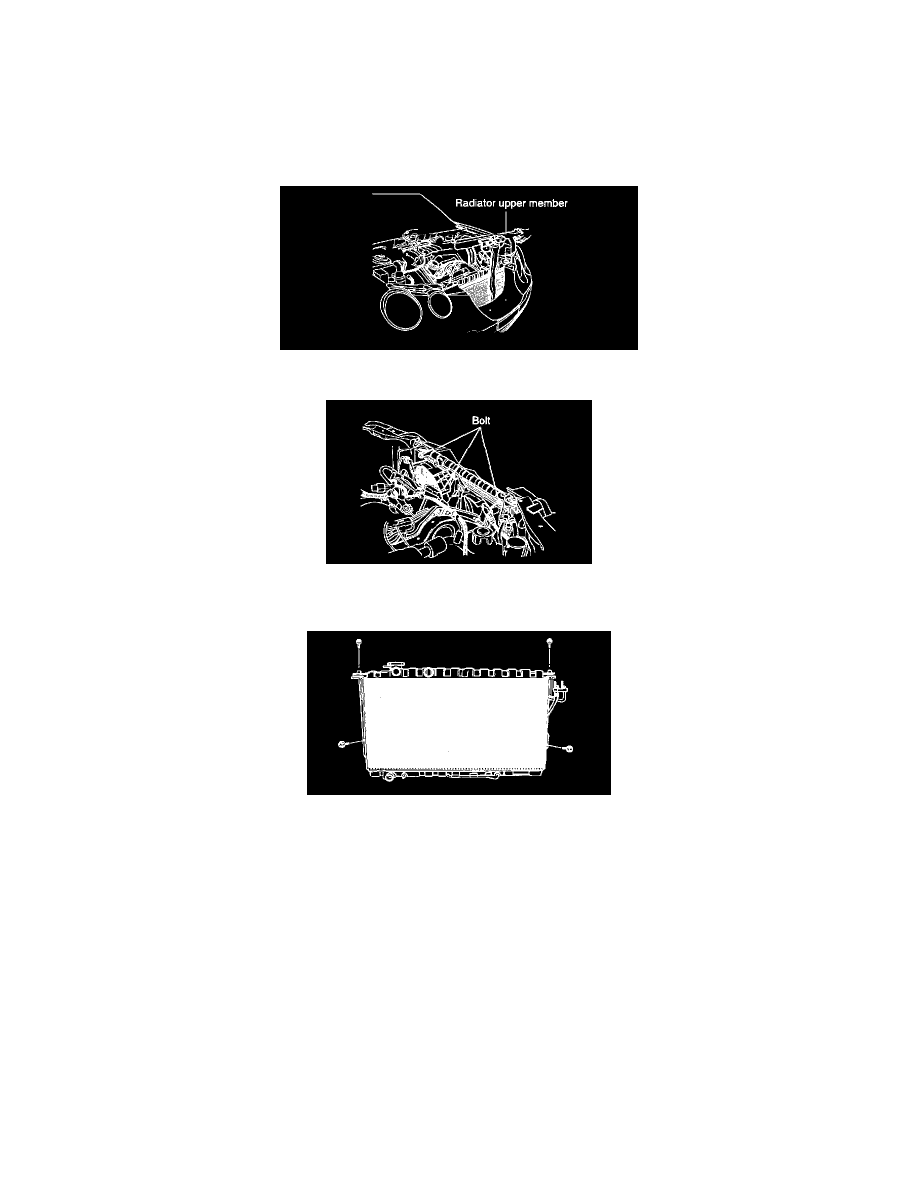
3. Remove the radiator upper member mounting bolt and disconnect the bonnet release cable.
4. Remove the radiator upper member from engine room, after disconnecting the horn connector.
5. Disconnect the cooling fan connector and the air condenser fan connector. Remove the fan assembly from engine room, after removing the fan
assembly mounting bolt.
6. Remove the radiator mounting bolt (4ea) from the air conditioner condenser.
7. Remove the radiator from engine room, after disconnecting the radiator reserve hose.
INSPECTION
1. Check for foreign material between the radiator fins.
2. Check the radiator fins for damage and straighten if necessary.
3. Check the radiator for corrosion, damage, rust or scale.
4. Check the radiator hoses for cracks, damage or deterioration.
5. Check the reservoir tank for damage.
6. Check the automatic transaxle oil cooler hoses for cracking, damage or deterioration (only A/T).
INSTALLATION
1. Fill the radiator and reservoir tank with a clean coolant mixture.
2. Run the engine until the coolant warms up enough so that the thermostat valve opens and then turn off the engine.
3. Remove the radiator cap and pour the coolant up to the filler neck of the radiator. Fill the reservoir tank to the upper level.
4. Check that there are no leaks from the radiator, hoses or connections.