
Amanti V6-3.5L (2006)
5. Install auto tensioner to oil pump case.
NOTE: At this time auto tensioner's set pin should be assembled completely.
6. Align the timing marks of each sprocket and install the timing belt in this order.
Crankshaft sprocket - Idler pulley - Exhaust camshaft sprocket (LH) - Intake camshaft sprocket (LH) - Water pump pulley - Intake camshaft
sprocket (RH) - Exhaust camshaft sprocket (RH) - Tensioner pulley
NOTE:
^
In this step, No. 1 is in TDC (Compression stroke)
^
Do not insert fingers.
7. After installing the timing belt, reconfirm the timing mark.
8. Rotate the crankshaft 1/4 rotation counterclockwise and then rotate the crankshaft clockwise with align the timing mark.
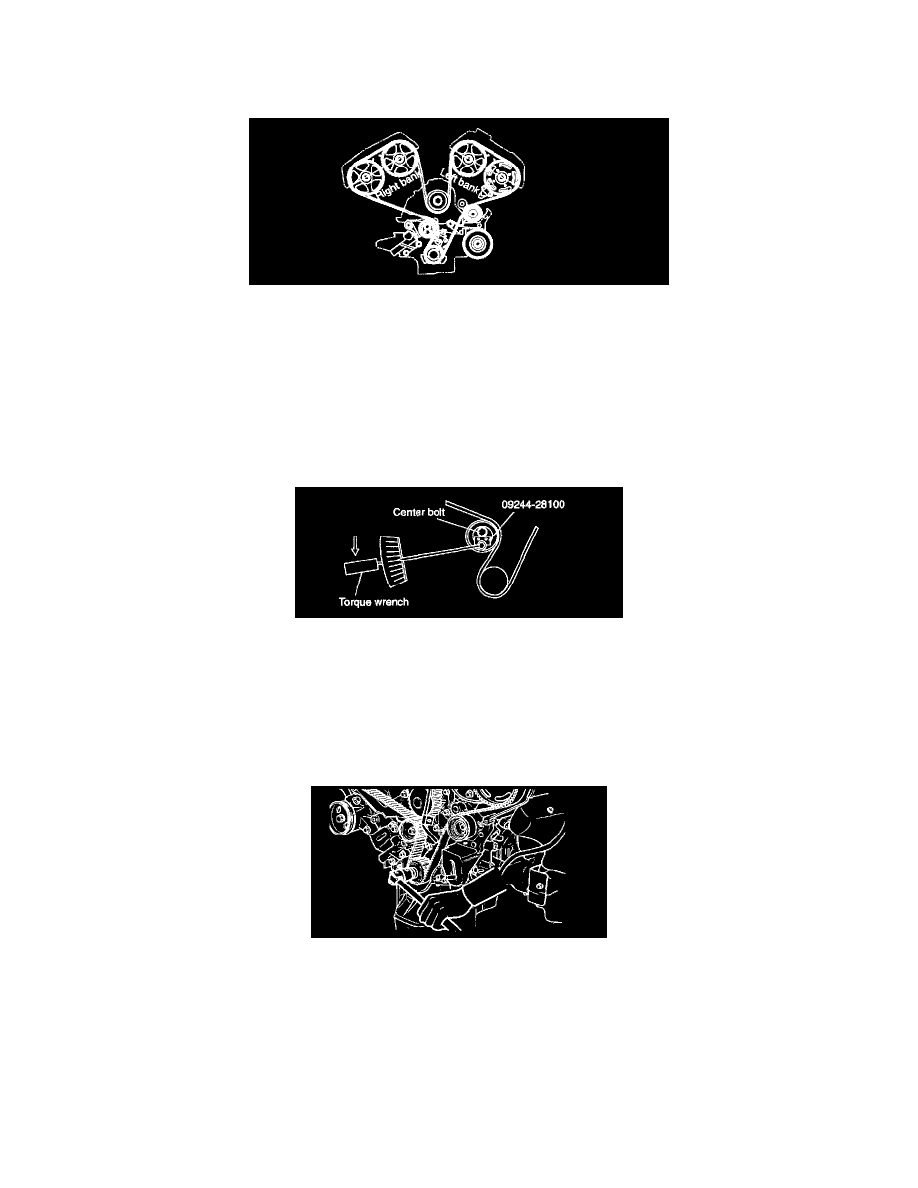
9. Loosen the center bolt of tensioner pulley. Apply tension for timing belt by rotating the tensioner pulley with SST(09244-28100) and torque
wrench.
Tension torque: 0.5 kg-m
10. Tighten the center bolt of tensioner pulley.
Tightening torque: 4.3 - 5.5 kg-m
11. Pull out the set pin of auto tensioner.
THE METHOD TO ADJUST THE TENSION OF TIMING BELT
1. Rotate the crankshaft 2 rotation clockwise and measure the projected load of auto tensioner in the TDC (# 1 Compression stroke) after 5
minutes.
2. Check the projected length is 3.8 - 4.5 mm (0.15 - 0.18 inch).