
Optima L4-2.4L (2001)
CAUTION: Leave the wire installed in the auto tensioner.
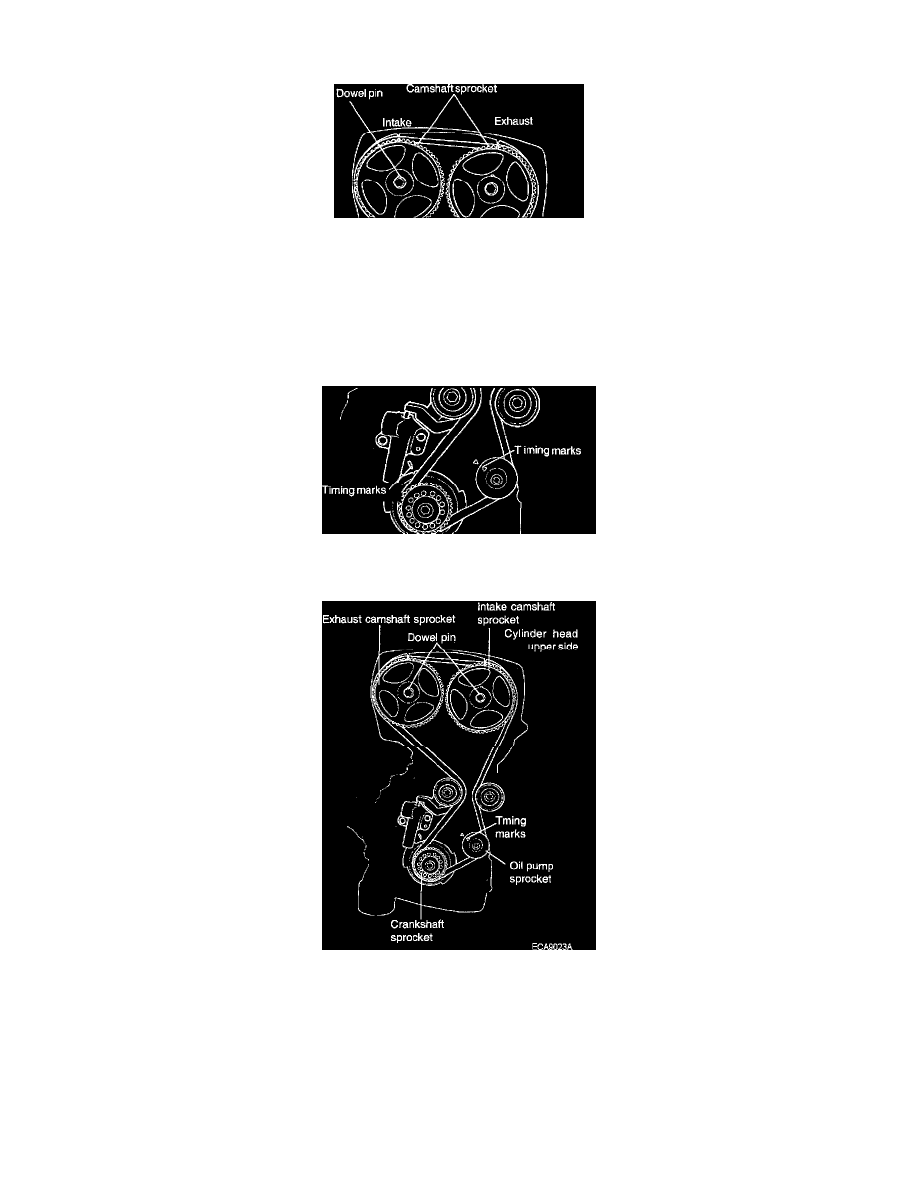
16. After installing the crankshaft sensor, set the timing mark of sprocket correctly.
NOTE:
1
Before installing the timing belt, If the timing mark of cam sprocket doesn't coincide with that of rocker cover, do not rotate the cam sprocket
more than 2 teeth of sprocket in any direction.
Rotating sprocket more than 2 teeth makes valve and piston touched each other.
2
In case of rotating the cam sprocket unavoidably more than 2 teeth, rotate the cam sprocket after rotating crank sprocket counter clock wise on
basis of timing mark.
17. Align the crankshaft sprocket timing marks.
18. Align the oil pump sprocket timing marks.
19. Install the timing belt around the tensioner pulley and crankshaft sprocket. Then secure the timing belt onto the tensioner pulley with your left
hand.
20. Pulling the belt with your right hand, install it around the oil pump sprocket.
21. Install the belt around the idler pulley.
22. Install it around the intake camshaft sprocket.
23. Turn the exhaust camshaft sprocket one tooth clockwise to align its timing mark with the cylinder head top surface. Then, pulling the belt with
both hands, install it around the exhaust camshaft sprocket.
24. Gently raise the tensioner pulley as shown by the arrow so that the belt can't sag, and temporarily tighten the center bolt.
25. Check again whether the timing mark of each sprocket is correct or not.
26. Remove the fixed wire that is attached to auto tensioner.