
Optima L4-2.4L (2001)
Remove the fuse and measure the resistance between the load side of the fuse and ground. Set the switches of all circuits which are connected to this fuse
to a condition of continuity. If the resistance is almost 0 W at this time, there is a short somewhere between these switches and the load. If the resistance
is not 0 W, there is no short at the present time, but a momentary short has probably caused the fuse to blow.
The main causes of a short circuit are the following.
-
Harness clamped by the vehicle body
-
Damage to the outer casing of the harness due to wear or heat.
-
Water getting into the connector or circuitry
-
Human error (mistakenly shorting a circuit, etc.).
Disconnection of Battery Cables
Before disconnecting connectors or replacing electrical parts, disconnect the negative (-) battery terminal.
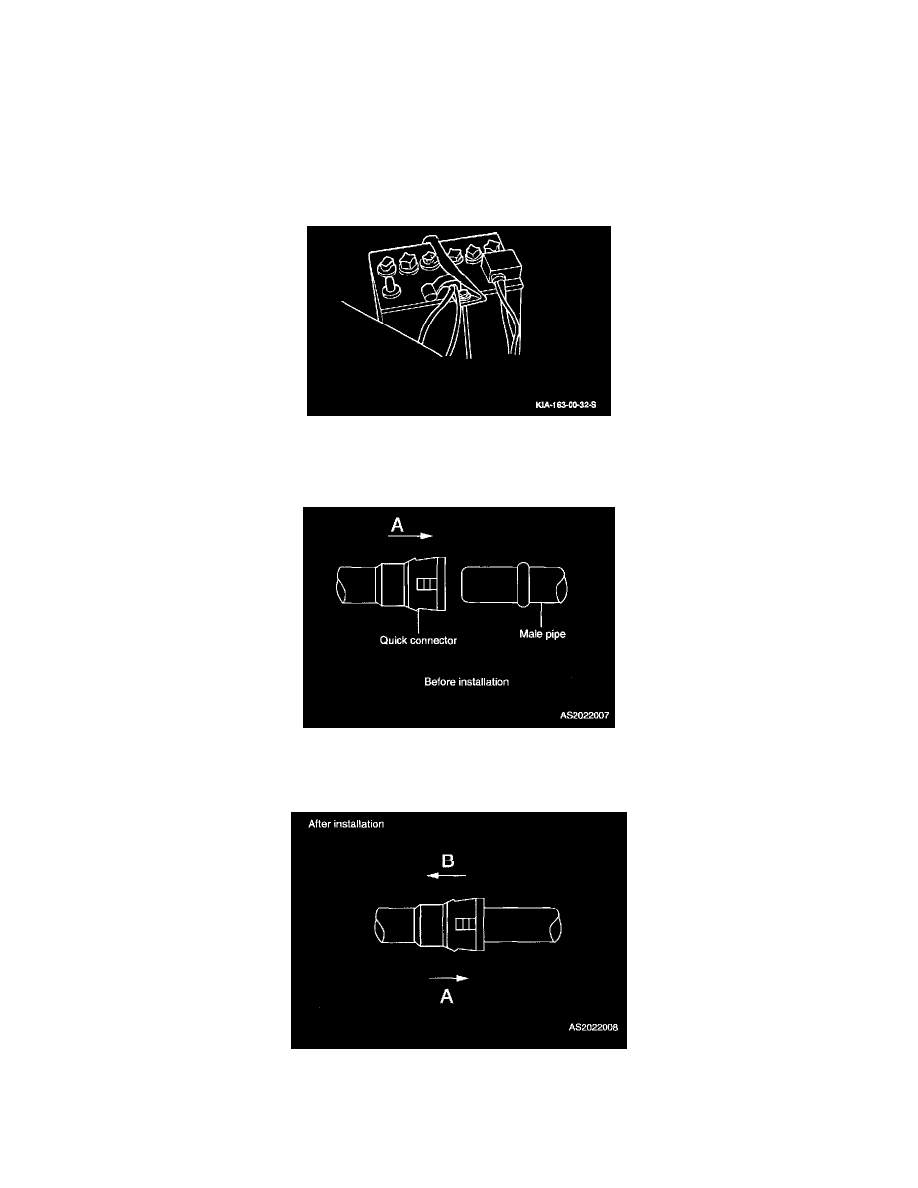
Quick Connector
Installation
Position quick connector to male pipe (direction "A") and push quick connector until retainer lock in and a click is heard.
Inspection
Once installed, pull and push quick connector to direction "A" and "B" to make sure the connection is secure.
NOTE: Don't press lock retainer.