Rio5 L4-1.6L (2006)

DISPOSAL
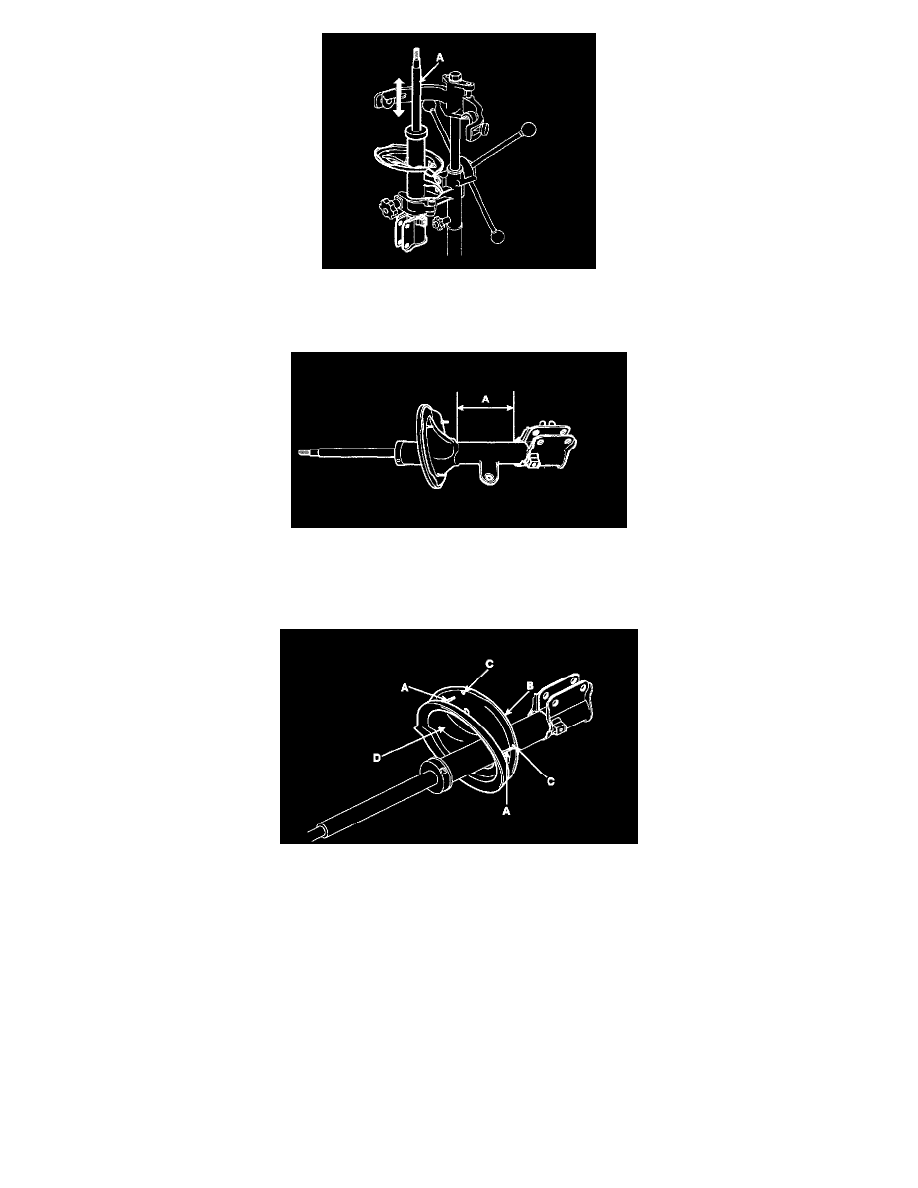
1. Fully extend the piston rod.
2. Drill a hole on the A section to remove gas from the cylinder.
CAUTION: The gas coming out is harmless, but be careful of chips that may fly when drilling.
REASSEMBLY
1. Install the spring lower pad (D) so that the protrusions (A) fit in the holes (C) in the spring lower seat (B).
2. Compress coil spring using special tool (09546-26000).
Install compressed coil spring into shock absorber.
NOTE:
a. Indicated two identification color marks on the coil spring one follows model option the other follows load classification according to the
below.
Pay attention to distinguish between the two marks and then install them.
b. Install the coil spring with the identification mark directed toward the knuckle.
3. After fully extending the piston rod, install the spring upper seat and insulator assembly.
4. After seating the upper and lower ends of the coil spring (A) in the upper and lower spring seat grooves (B) correctly, tighten new self-locking nut
temporarily.
