
Rio5 L4-1.6L (2006)
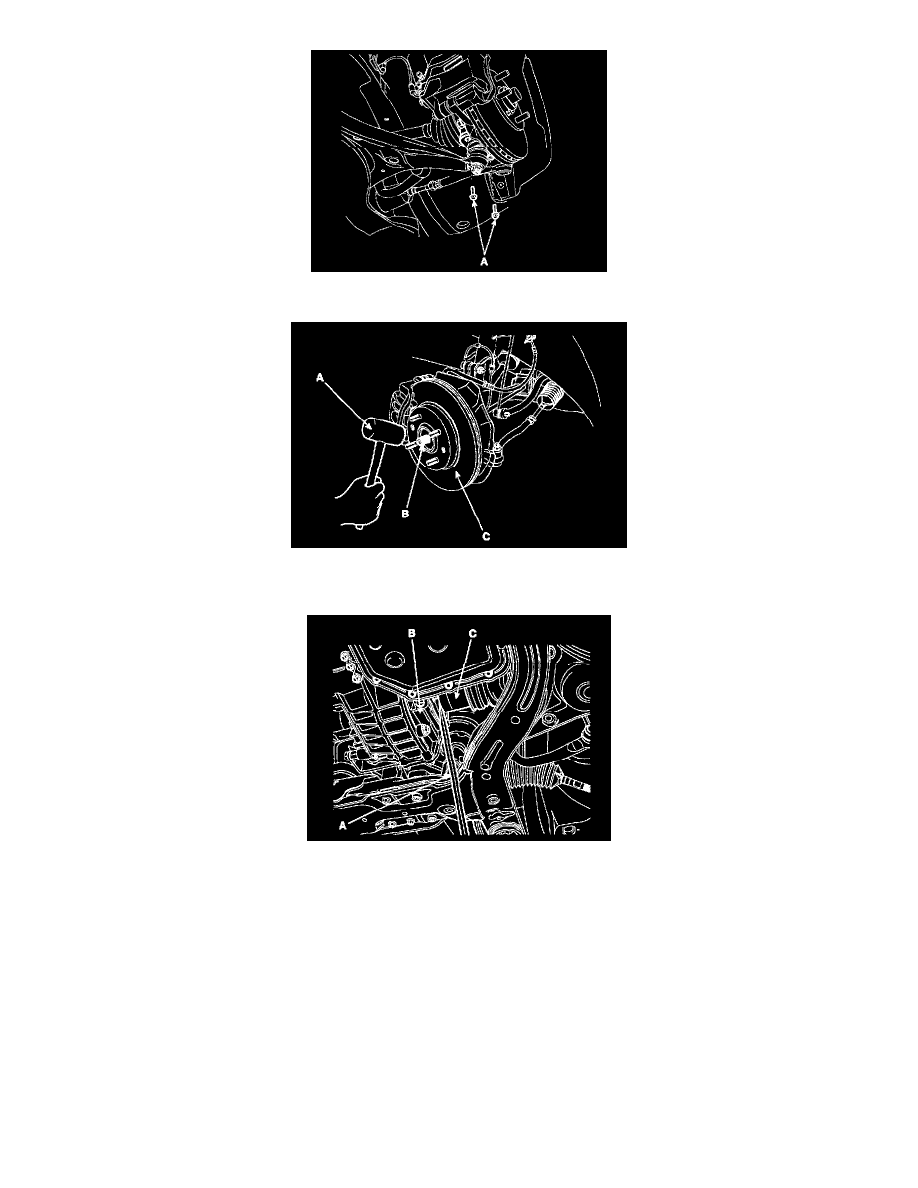
9. Using a plastic hammer (A) disconnect the drive shaft (B) from the axle hub (C).
10. Push the axle hub (C) outward and separate the drive shaft (B) from the axle hub (C).
11. Insert a pry bar (A) between the transaxle case (B) and joint case (C), and separate the drive shaft from the transaxle case (B).
CAUTION:
^
Use a pry bar (A) being careful not to damage the transaxle and joint.
^
Do not Insert the pry bar (A) too deep, as this may cause damage to the off seal. [max. depth: 7 mm (0.28 inch)]
^
Do not pull the drive shaft by excessive force it may cause components inside the BJ or TJ joint (C) kit to dislodge resulting in a torn boot (E)
or a damaged bearing.
12. Pull out the drive shaft (F) from the transaxle case (B).
CAUTION:
^
Plug the hole of the transaxle case with the oil seat cap to prevent contamination.
^
Support the drive shaft property.
^
Replace the retainer ring whenever the drive shaft is removed from the transaxle case.
INSPECTION
1. Check the drive shaft boots for damage and deterioration.
2. Check the ball joints for wear and damage.
3. Check the splines for wear and damage.