
Rio Cinco L4-1.6L DOHC 16V (2003)
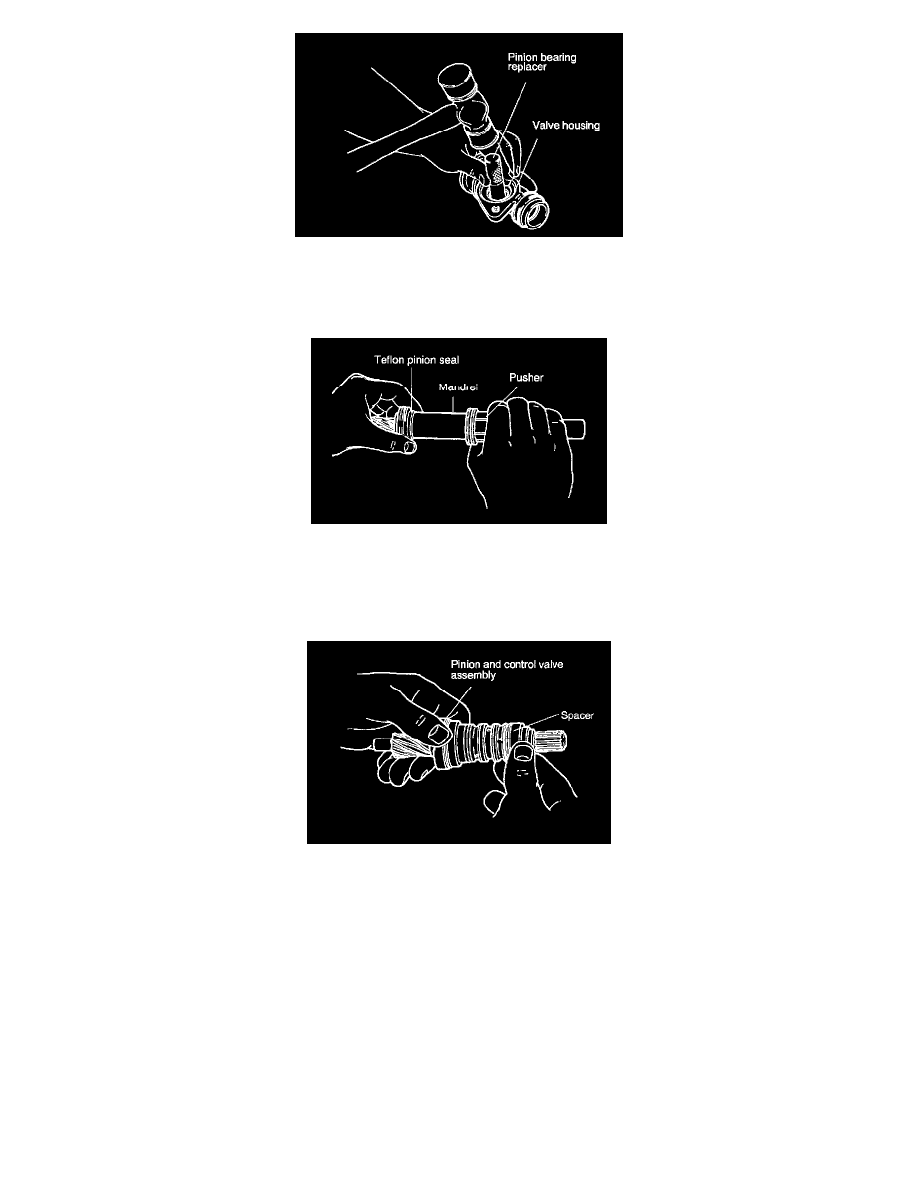
6. Use the Pinion Bearing Replacer to install the lower pinion bearing.
7. If the valve housing, steering gear housing, or pinion and control valve assembly have been replaced, perform the valve housing adjustment
procedure. If none of these components have been replaced, install any shims that were removed.
8. Use the Seal Installation Set to install a new Teflon (R) pinion seals on the pinion and control valve assembly.
a) Install the first seal (the seal closest to the bearing) by sliding the Mandrel over the valve assembly to the first seal groove. Push the seal into
the groove by using the Pusher.
b) Size the seal by sliding the large end of Sizer over the seal.
c) Before installing the second seal, place one Spacer, on the valve assembly as shown. Install and size the seal by using the Mandrel and the
Pusher.
d) Before installing the third seal, place two Spacers, on the valve assembly. Make sure both spacers are positioned on the valve assembly as the
one shown. Install and size the third seal.
e) To install the fourth seal, turn the second spacer around so the small ends of the spacers are facing each other on the valve assembly.
9. Insert the pinion and control valve assembly into the valve housing making sure that it seats properly.
10. Install a new O-ring.
11. Position the valve housing and the pinion and control valve assembly, then install the valve housing bolts. Tighten the valve housing bolts to 15 -
19 ft. lbs. (21 - 26 Nm, 2.1 - 2.6 kg-m).
12. Use the Pinion Seal Replacer / Torque Adapter to install the bearing.