
Sorento 4WD V6-3.3L (2008)
Control Arm: Service and Repair
Front Upper Arm
REMOVAL
1. Raise the front of the vehicle and support it with safety stands.
2. Remove the front wheels.
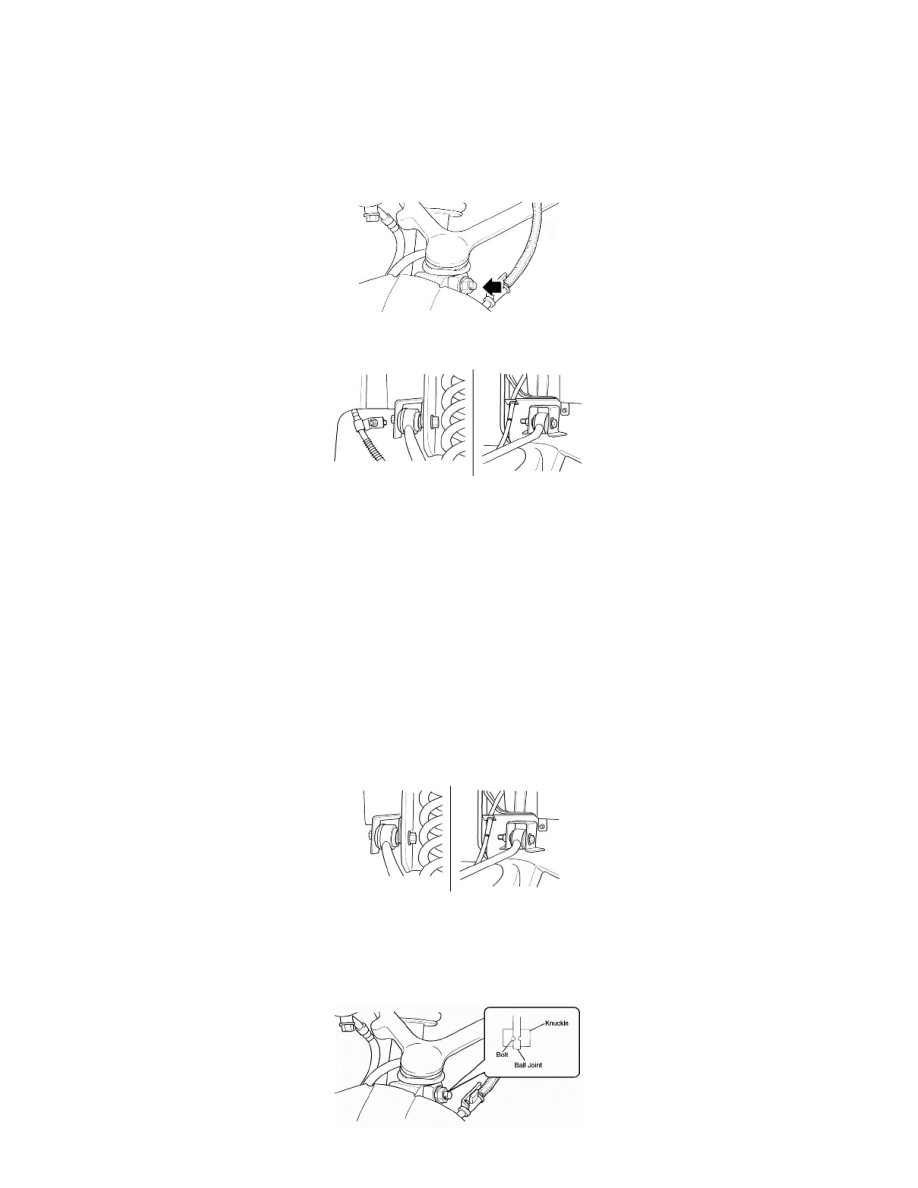
3. Remove the bolt on the steering knuckle side that secures the upper arm ball link.
4. Remove the brake hose bracket and then remove the upper arm bolts and nuts.
REPLACING THE BUSHING
1. Secure the upper arm in a suitable vise.
2. Using a standard bearing press, remove the old bushing.
3. Install the new bushing and then press it into the upper arm with a standard bearing press.
NOTE:
Apply lubricant to the new bushings to facilitate insertion into the upper arm.
The upper arm ball joint link and dust boot are non-replaceable items. Replace the upper arm if these items are damaged and/or deteriorated.
INSTALLATION
1. Raise the front of the vehicle and support it with safety stands.
2. Position the upper arm to the frame brackets, insert the bolts and hand tighten the nuts.
3. Install the upper arm ball joint into the top of the steering knuckle and tighten the side bolt and nut.
Tightening torque:
44-55 Nm (4.4-5.5 kg-m, 31-39 lb-ft).