
Sorento 4WD V6-3.8L (2009)
Differential Carrier: Overhaul
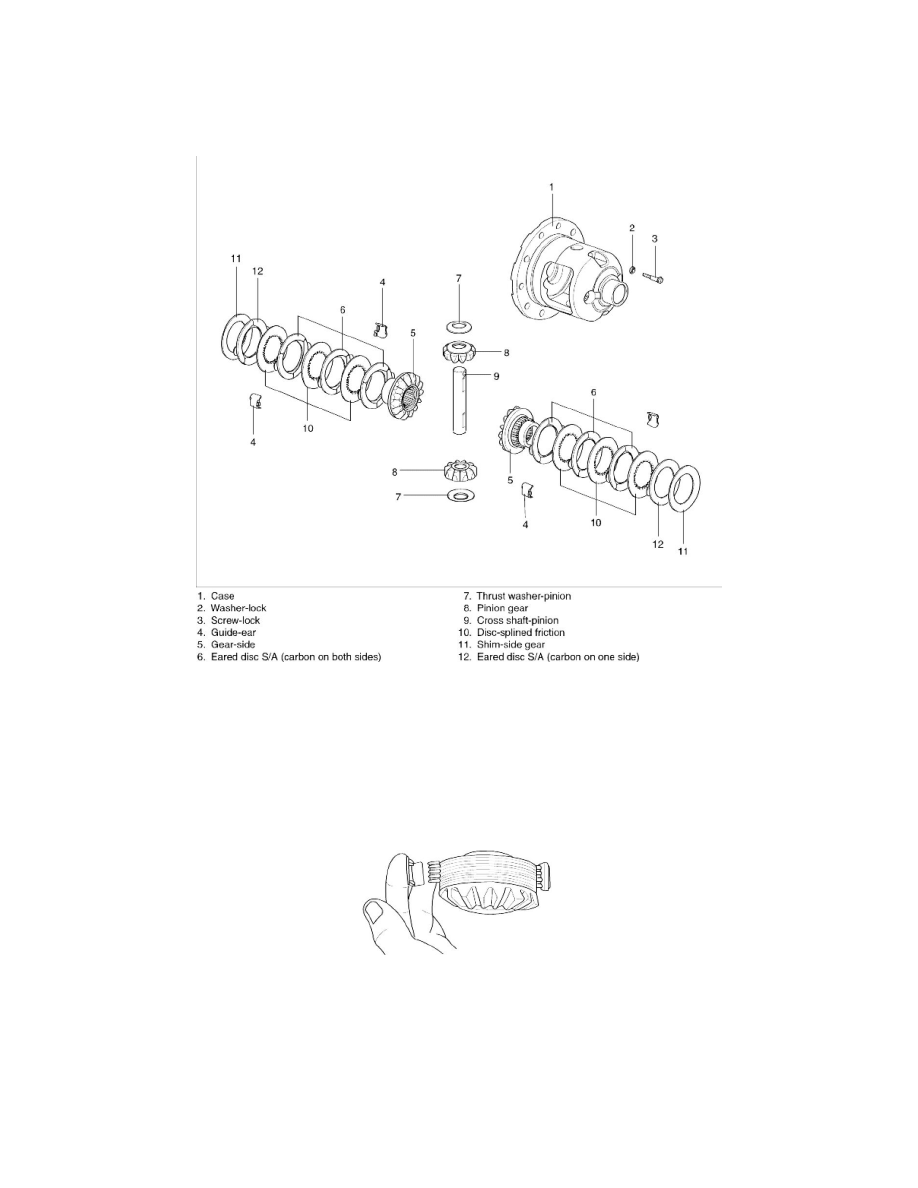
Components and Components Location
COMPONENTS
Reassembly
REASSEMBLY AND SHIM SELECTION
1. Apply axle lubricant to all sliding surfaces. Be especially careful to coat the mating surfaces of the friction discs.
2. Starting with a double sided eared disc next to the side gear, stack four eared discs and three splined discs on to the spline of side gear. A splined
disc goes in between each eared disc with the last eared disc being single sided and the carbon surface facing the side gear. Use a heavy bearing
grease in the ear guides to hold them in place during assembly.
3. Select a shim 0.76mm (0.030in.) thick and place on the hub side of the disc pack subassembly.
4. Lubricate and assemble the other side gears as above.
5. Install the flange end side gear subassembly and shim in the flange end of the differential case.
6. Position pinion gears and thrust washers on the side gears and install the cross shaft through the case and pinions.
7. Install a dial indicator on the case so that the indicator tip rests against a pinion tooth face.
8. Compress the clutch pack with a large screwdriver or pry bar as shown. Rotate the pinion gear back and forth to obtain backlash. Tooth backlash
should be 0 to 0.10mm (0 to 0.004in.). If required, change the 0.76mm (0.30in.) Shim to obtain the proper backlash.