
Spectra5 L4-2.0L (2005)
REMOVAL
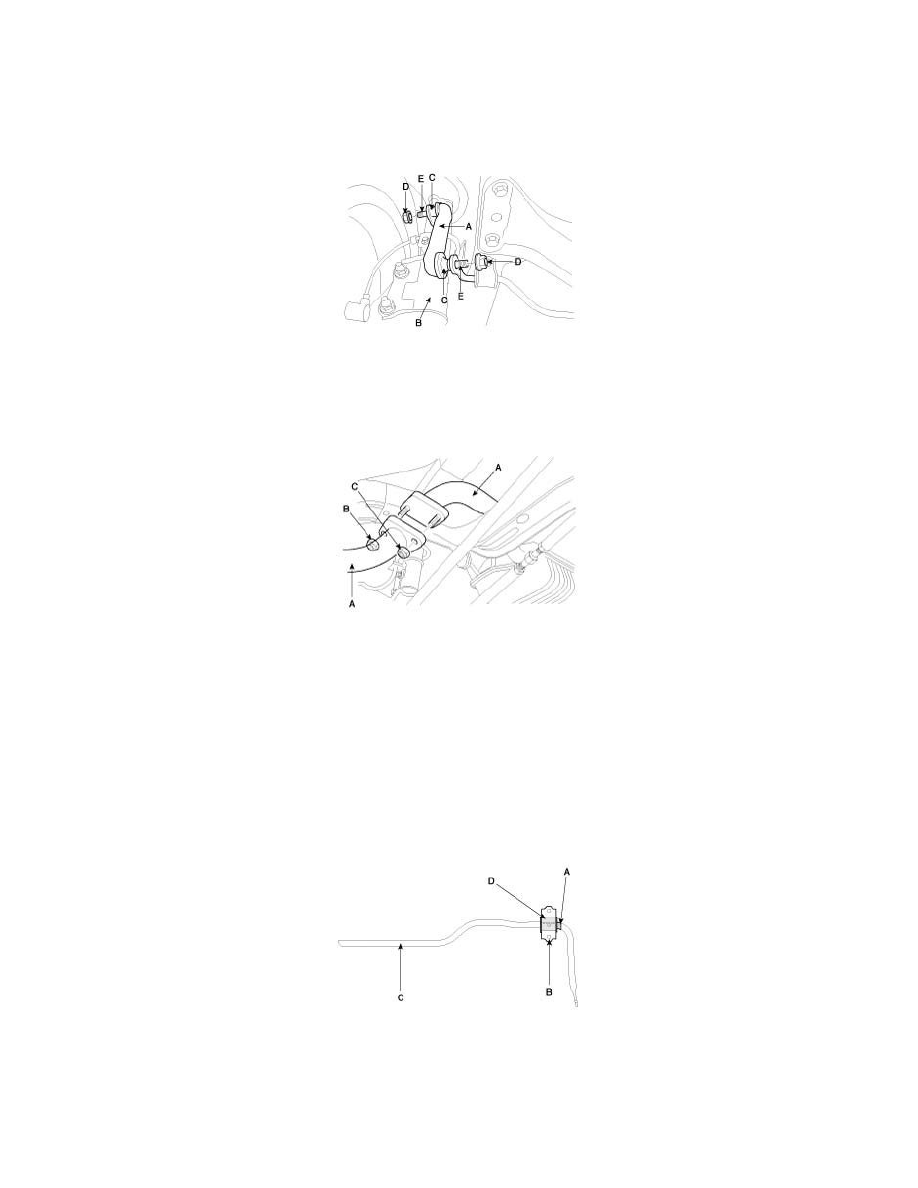
1. Remove the stabilizer bar link (A) from the rear strut assembly (B).
NOTE: If the ball joint (C) and nuts (D) turn altogether, use the pentagonal wrench to hold the stud (E).
2. Remove the rear stabilizer bar mounting brackets.
3. Remove the stabilizer bar link on the opposite side in the same way.
4. Remove the mounting nuts (B,C) of the exhaust pipe assembly (A).
5. Remove the stabilizer bar assembly.
Installation
Rear Stabilizer Bar
INSTALLATION
1. Install the bushing on the stabilizer bar.
NOTE: After matching the bushing (D) in the inside of the white painted part (A) on the stabilizer bar (C), install the assembly.
2. Install the bracket ( B) on the bushing (D).
3. Tighten the components below to the specified torque as follows.
Rear stabilizer bar mounting bracket bolts (A): 17 - 26 Nm (170 - 260 kgf-cm, 13 - 19 lbf-ft) Rear stabilizer bar link mounting nut (B): 35 - 45
Nm (350 - 450 kgf-cm, 26 - 33 lbf-ft)