
Sportage 2WD L4-2.0L SOHC (1995)
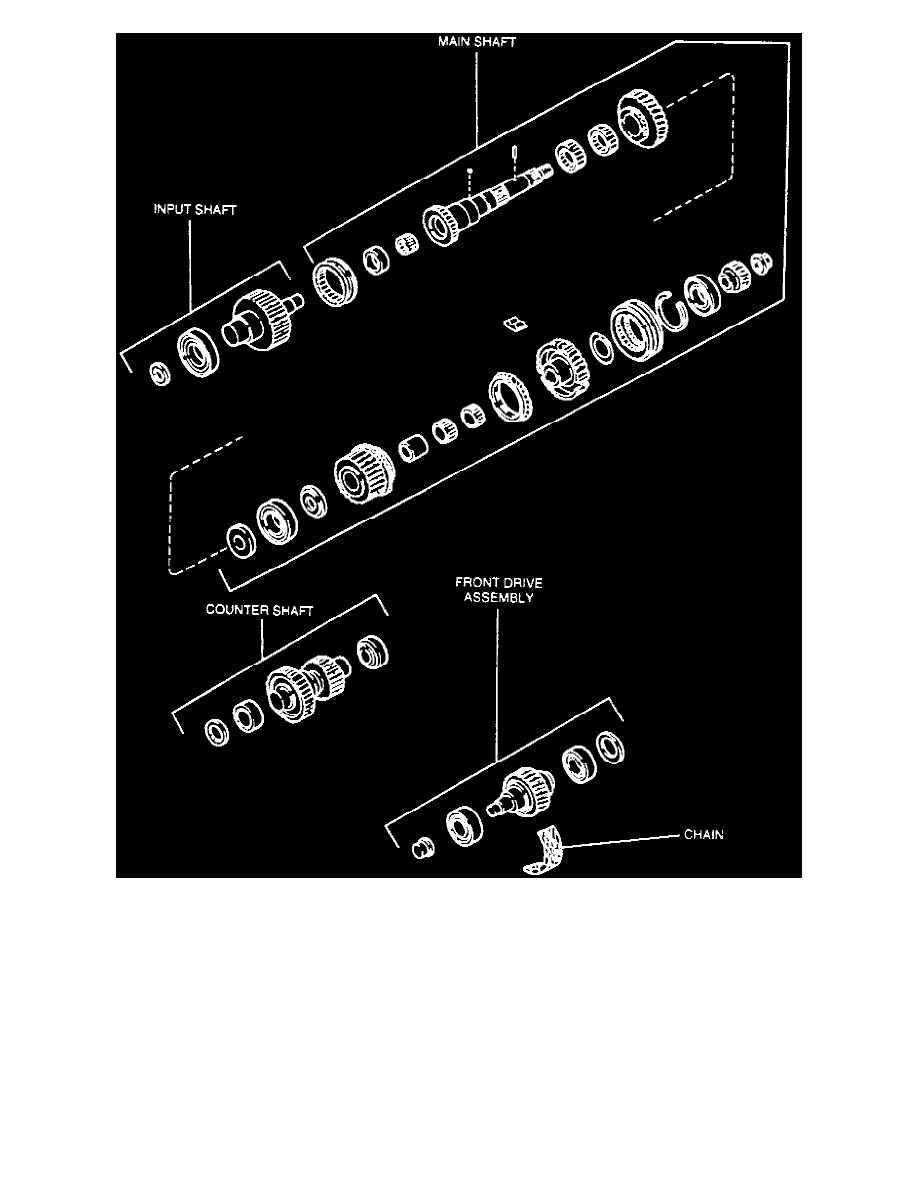
Fig. 2 Transfer Case Gear Assemblies
1. Assemble hub assembly, Figs. 1 and 2, as follows:
a. Insert three synchronizer springs, keys and balls into hub.
b. Slide sleeve down over assembly while pressing balls into place. Ensure teeth on sleeve and longer boss on hub, with chamfered edge on
splined portion, face same direction. chamfered edge of splined hub must go into hub first.
2. Install transfer case bearing and cover as follows:
a. Install bearing into transfer case.
b. Install bearing cover, then tighten to specifications.
3. Install two needle bearings and low gear onto output shaft.
4. Insert indexing ball and spacer/washer onto shaft.
5. Press output shaft into transfer case from front cover side using a suitable press.
6. Insert locking ball into hole in shaft and install spacer/washer with stepped side toward bearing.
7. Install steel bushing and press into place.
8. Assemble chain, 4WD sprocket assembly and front drive assembly on workbench, then install into transfer case as a unit: