
Sportage 2WD 2Dr L4-2.0L (2002)
Wheel Fastener: Service and Repair
Removal
1. Set parking brake and block diagonally opposite wheel. On vehicles with manual transmission, place the shift lever in reverse.
2. With the weight of the vehicle still on the wheels, break the lugnuts loose. Do not remove the lugnuts at this time.
3. Raise and support the vehicle with the tire clear of the floor/ground.
4. Remove the lugnuts, then remove the wheel-tire assembly.
Installation
WARNING: BEFORE INSTALLING A WHEEL ON THE VEHICLE, CLEAN THE MOUNTING SURFACES OF THE HUB OR DRUM THAT
CONTACTS THE WHEEL. THE MATING SURFACES MUST BE FREE OF IRREGULARITIES AND FOREIGN MATERIAL. WITHOUT
PROPER CONTACT OF THE MATING SURFACES, THE LUGNUTS COULD LOOSEN AND ALLOW THE WHEEL TO WOBBLE OR
COME OFF THE VEHICLE, CAUSING LOSS OF CONTROL. DO NOT USE LUBRICANT ON THE LUGNUTS OR STUDS TO AID IN
INSTALLATION OR FUTURE REMOVAL. USE OF LUBRICANT CAN CAUSE THE LUGNUTS TO LOOSEN.
1. Position the wheel on the hub or drum, as appropriate.
2. Install the lugnuts with the cone end facing inward. Do not tighten lugnuts at this time.
3. Turn the wheel until one lugnut is at top of the stud circle. Tighten this lugnut until snug (finger tight, with wheel held against mating surface while
tightening the lugnut).
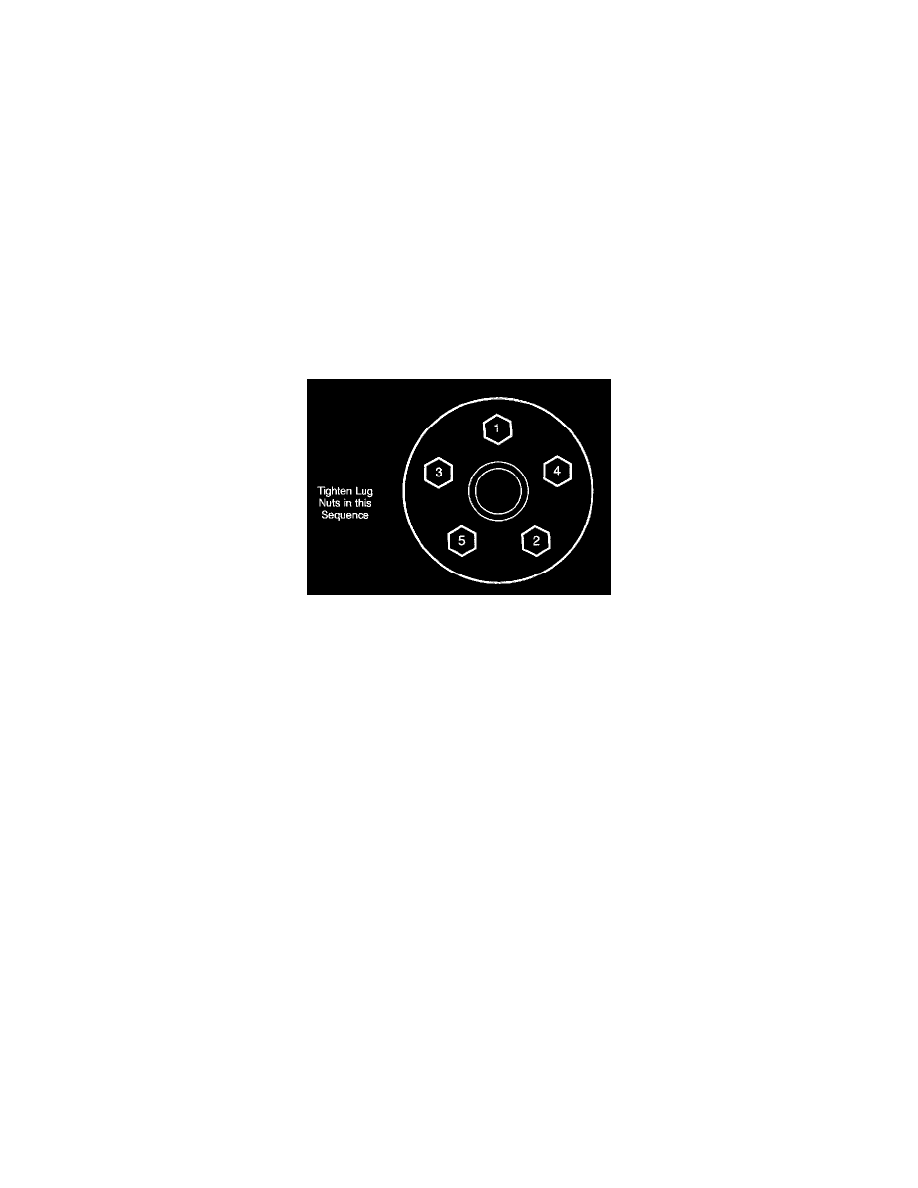
4. In a criss-cross pattern (as shown), tighten the remaining lugnuts until snug.
5. Lower the vehicle, or otherwise prevent rotation of the wheel.
6. Evenly tighten the lugnuts in the sequence shown.
Tighten the lugnuts to 74 ft. lbs. (100 Nm).
Notice: Tighten the lugnuts again after 500 miles (800 km). This is required to permit the wheels to seat properly and ensure that the lugnuts will
hold a uniform clamp load and remain fully tightened.