
Sportage 2WD 2Dr L4-2.0L (2002)
Idler Arm: Service and Repair
Replacement
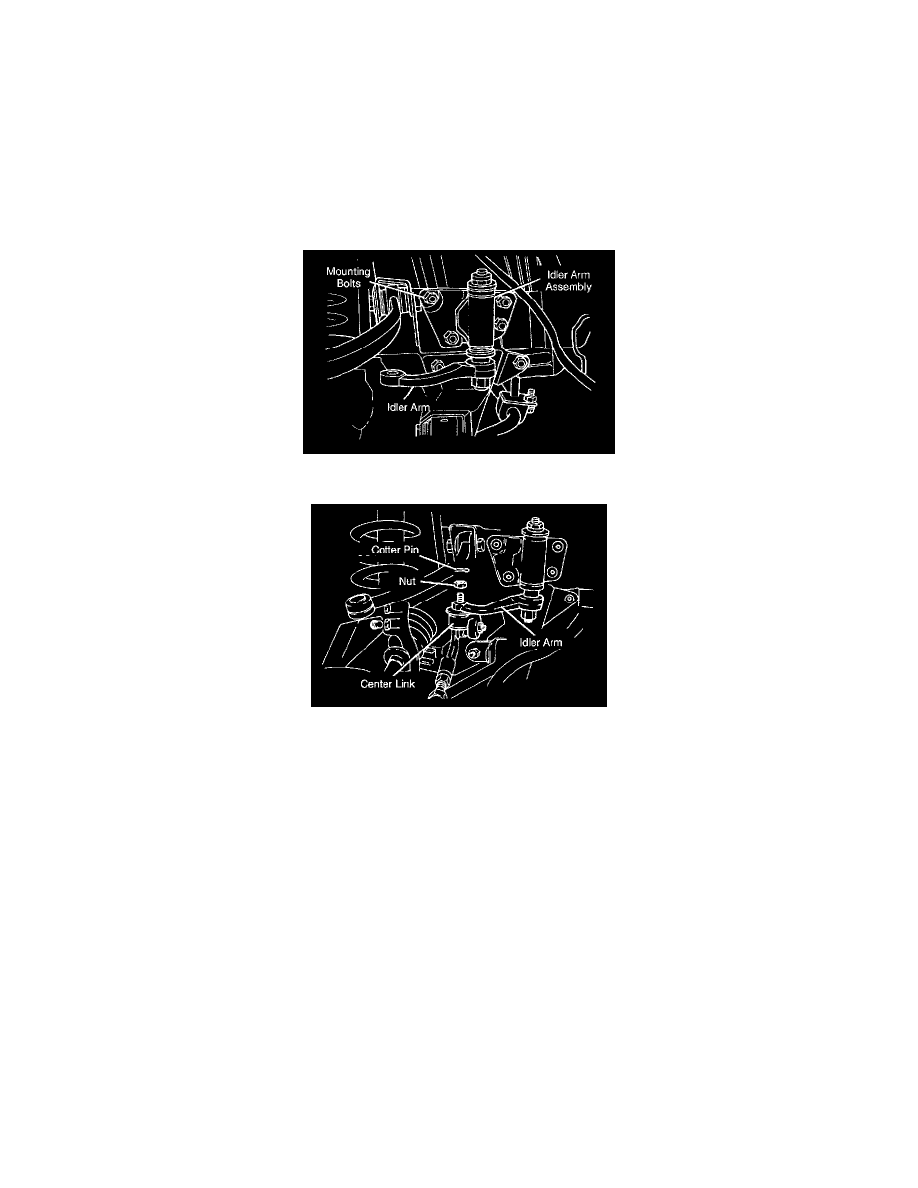
Removal
1. Raise and support vehicle.
2. Remove right tire and wheel assembly.
3. Remove cotter pin from nut at center link joint of idler arm.
4. Using ball joint puller, separate idler arm from center link.
5. Remove four nuts, washers and bolts that attach idler arm assembly to vehicle.
6. Remove idler arm assembly with idler arm installed.
Installation
1. Position idler arm assembly over mounting holes and install four bolts, washers, and nuts.
2. Install idler arm on center link and install nut.
Tighten center link nut to 36 ft. lbs. (49 Nm).
Tighten assembly mounting nuts to 159 ft. lbs. (215 Nm).
3. Install cotter pin through nut at center link joint.
4. Install right tire and wheel assembly.
5. Lower vehicle.