
Sportage 2WD 4Dr L4-2.0L (2000)
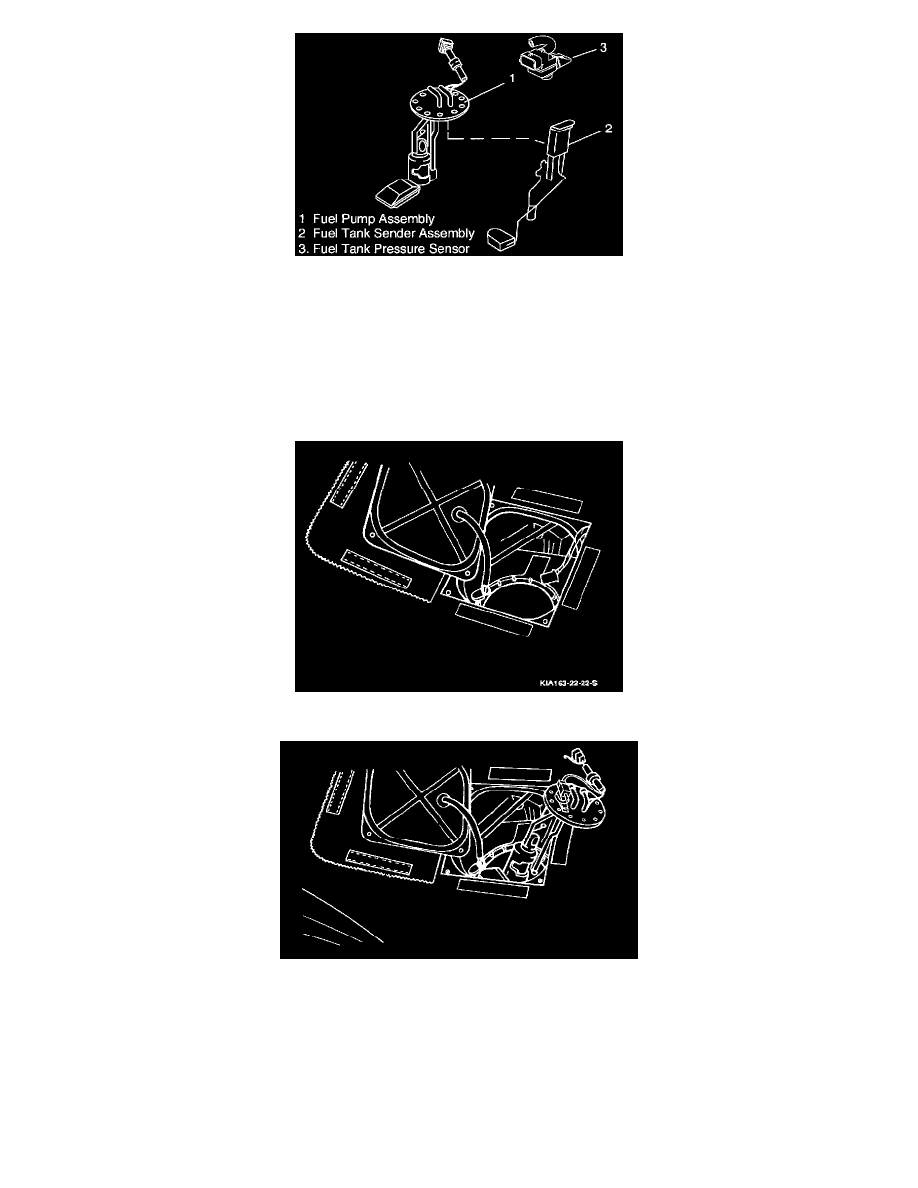
15. Remove retaining hardware that holds the fuel tank sender assembly to the fuel pump assembly.
Installation
WARNING: FUEL IS EXPLOSIVE. WHEN WORKING ON FUEL SYSTEM PARTS, MAKE SURE TO SUPPLY ADEQUATE
VENTILATION TO THE WORK AREA. DO NOT SMOKE AND KEEP SPARKS AND OPEN FLAMES AWAY.
1. Install the retaining hardware that holds the fuel sender assembly to the fuel pump assembly.
2. Remove any cap or protective cover from the port on the top of the fuel tank.
3. Holding the assembled fuel pump/fuel sender assembly, guide it into the access port on the top of the fuel tank as far as it will go.
NOTE: Do not force fuel pump assembly parts. The fuel screen is delicate, and can be damaged by improper installation to the fuel tank.
4. While twisting very carefully and tilting the fuel pump assembly, push gradually on the assembly until it goes in position in the fuel tank assembly.
5. Install eight screws around the top surface of the fuel pump assembly.
6. Connect the two fuel hoses assemblies to the fuel pump assembly.
7. Install the two fuel hose clamps to the two fuel hoses connected to the fuel pump assembly.
8. Connect fuel tank pressure sensor electrical connector.