
Sportage 2WD 4Dr L4-2.0L (2000)
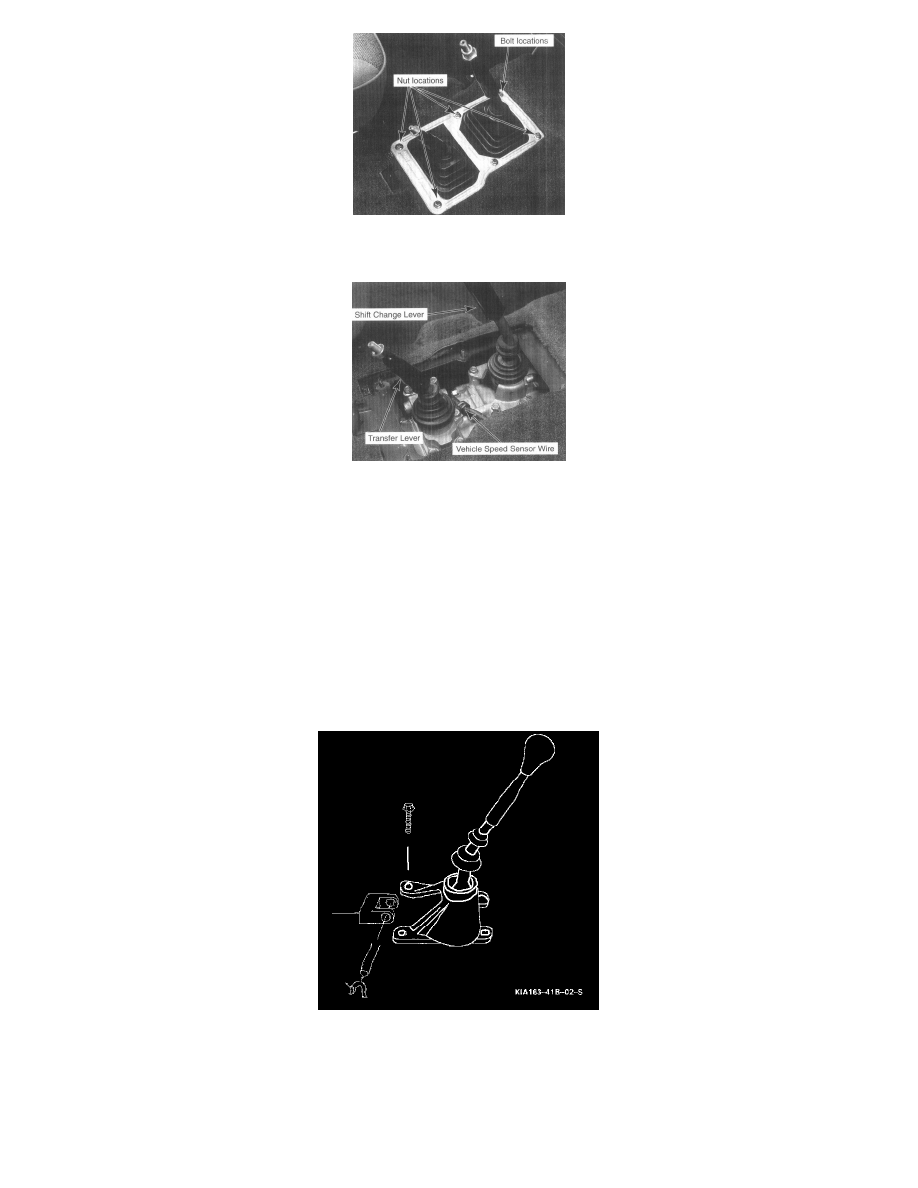
4. Remove the dust cover plate by removing five nuts and one bolt. Proceed to slide the boot of the dust cover over the handle of the shift change
lever (and over the transfer lever on the 4X4).
5. Remove the shift lever:
a. Separate the shift lever bracket from the transmission housing by removing four bolts.
b. Tilt the shift lever bracket back to allow access to the control rod.
c. Remove the clip from one side of the pin linking the shift lever to the control rod extension.
d. Remove the link pin from the shift lever and separate the lever from the control rod extension.
INSPECTION
1. Inspect the seals of the shift lever assembly for wear or damage. Replace if necessary.
2. Inspect the ball end of the shift lever, the fork of the control rod extension, the link pin, and the link pin clips for wear, damage, or binding.
Replace if necessary.
INSTALLATION
1. Reinstall the ball end of the shift lever into the fork of the control rod.
2. Reinstall the link pin into the control rod extension fork and reinstall the clip onto the link pin.
3. Reinstall the shift lever bracket onto the transmission housing using four bolts.
Tightening torque: 18 ft. lbs. (24 Nm).
4. Reinstall the boot of the dust cover over the handle of the shift lever (and transfer lever on the 4X4).
5. Reinstall the dust cover plate using five nuts and one bolt.