
Sportage 4WD V6-2.7L (2009)
Axle Shaft: Overhaul
Disassembly
DISASSEMBLY
DRIVESHAFT
CAUTION:
-
Do not disassemble the BJ assembly.
-
Special grease must be applied to the driveshaft joint. Do not substitute with another type of grease.
-
The boot band should be replaced with a new one.
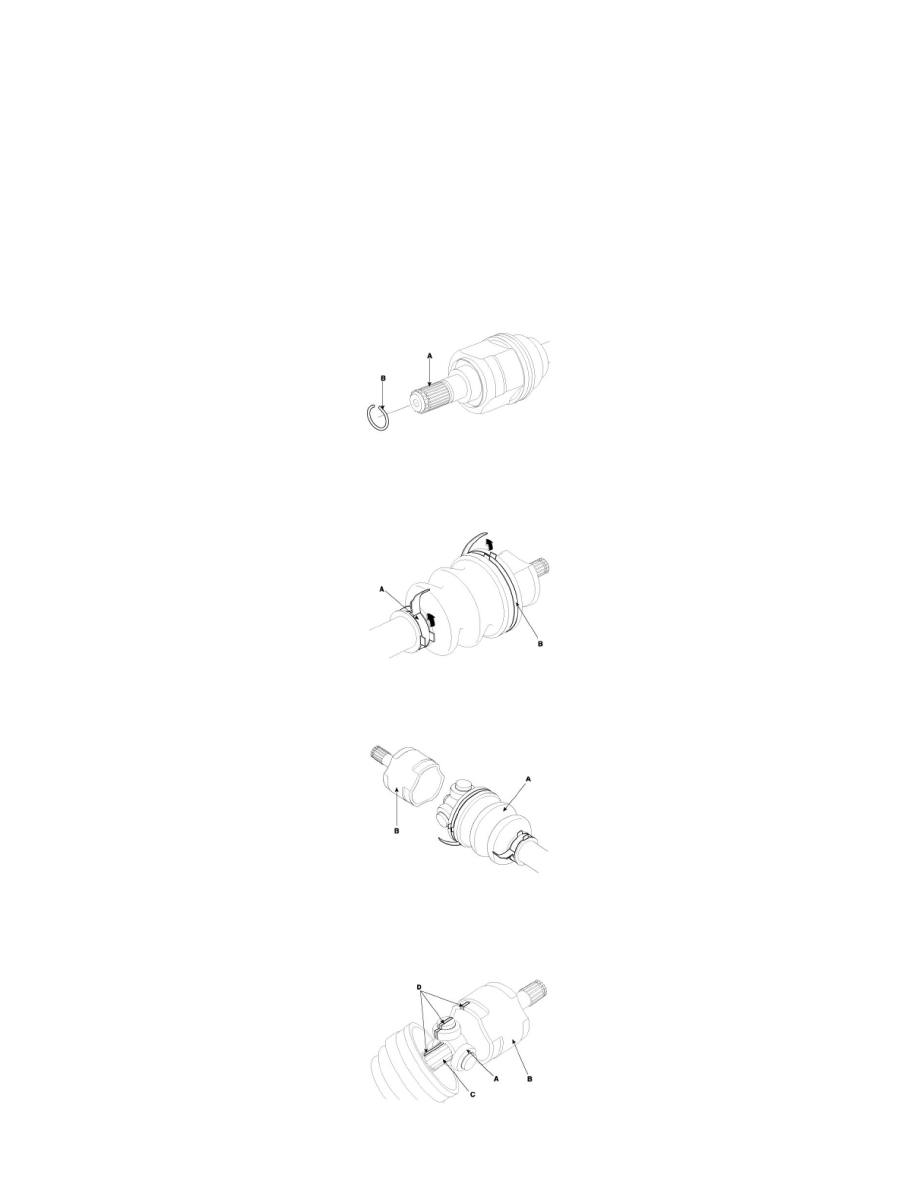
1. Remove the circlip(B) from driveshaft splines(A) of the transaxle side UTJ case.
2. Remove the both boot clamps from the transaxle side UTJ case.
A. Using a plier or flat-tipped (-) screwdriver, remove the both clamps(UTJ boot band(B), boot band(A)) of the transaxle side.
3. Pull out the boot from the transaxle side joint(UTJ).
4. While dividing joint(UTJ) boot(A) of the transaxle side, wipe the grease in UTJ case(B) and collect them respectively.
CAUTION:
-
Be careful not to damage the boot.
-
According to below the illustrated, put marks(D) on roller of turning on assembly(A), UTJ case(B) and spline part(C), for providing assembly.
5. Using a plier or flat-tipped (-)screwdriver, remove the circlip(A).