
Sportage EX 2WD L4-2.0L (1997)
Idler Arm: Service and Repair
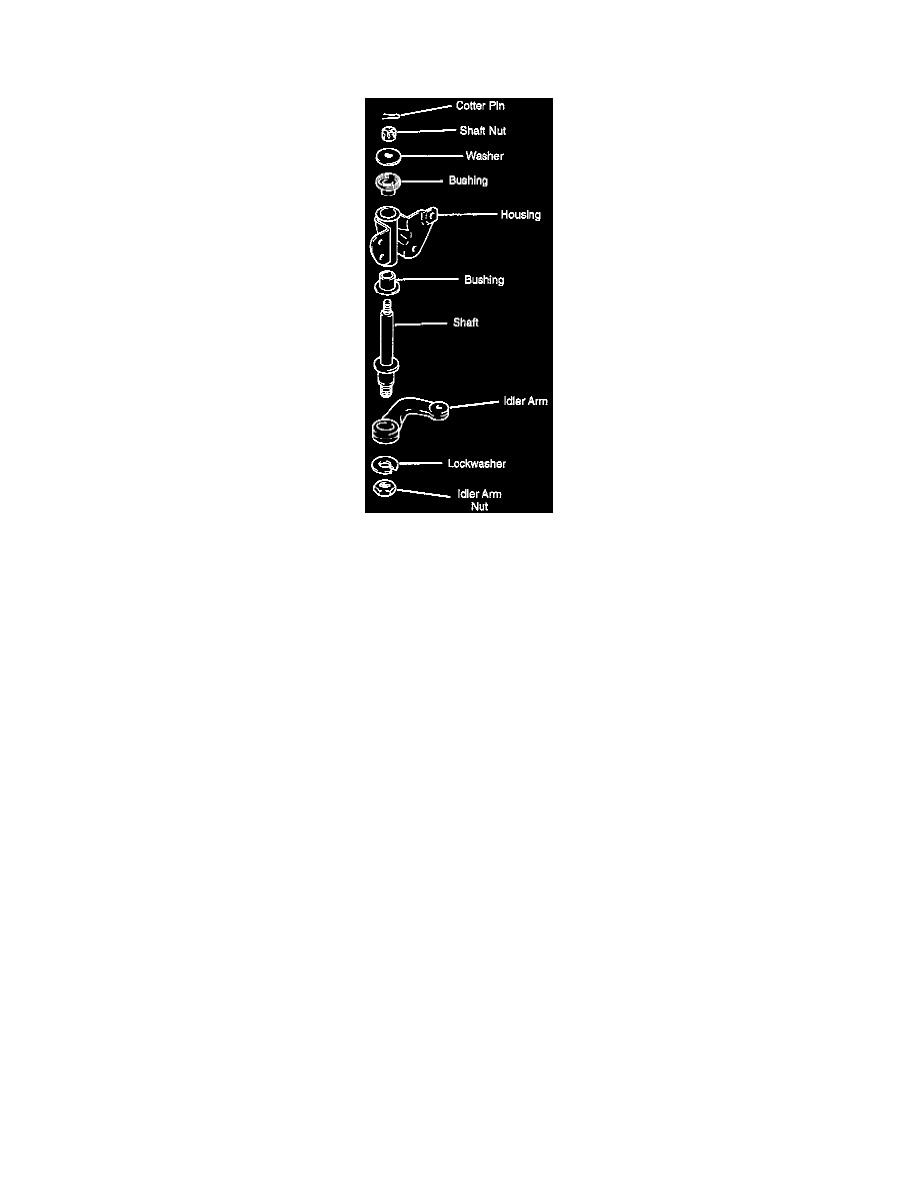
Overhaul
DISASSEMBLY
1. Place assembly in a vise having padded jaws.
2. Remove cotter pin from nut.
3. Remove nut and washer.
4. Using plastic mallet, gently tap end of shaft to loosen, then pull shaft (with idler arm attached) out of housing.
5. Install idler arm (with shaft) in vise. Remove nut and lockwasher attaching idler arm.
6. Using pitman puller, remove idler arm from shaft.
7. Remove bushings from each end of housing.
INSPECTION
1. Visually inspect shaft for deformation, scoring, rust, indications of excessive wear, damage to splines, and damage to threads.
2. Check idler arm for deformation, damage to splines, and damage to bore that interfaces with center link.