
Sportage EX 2WD L4-2.0L (1997)
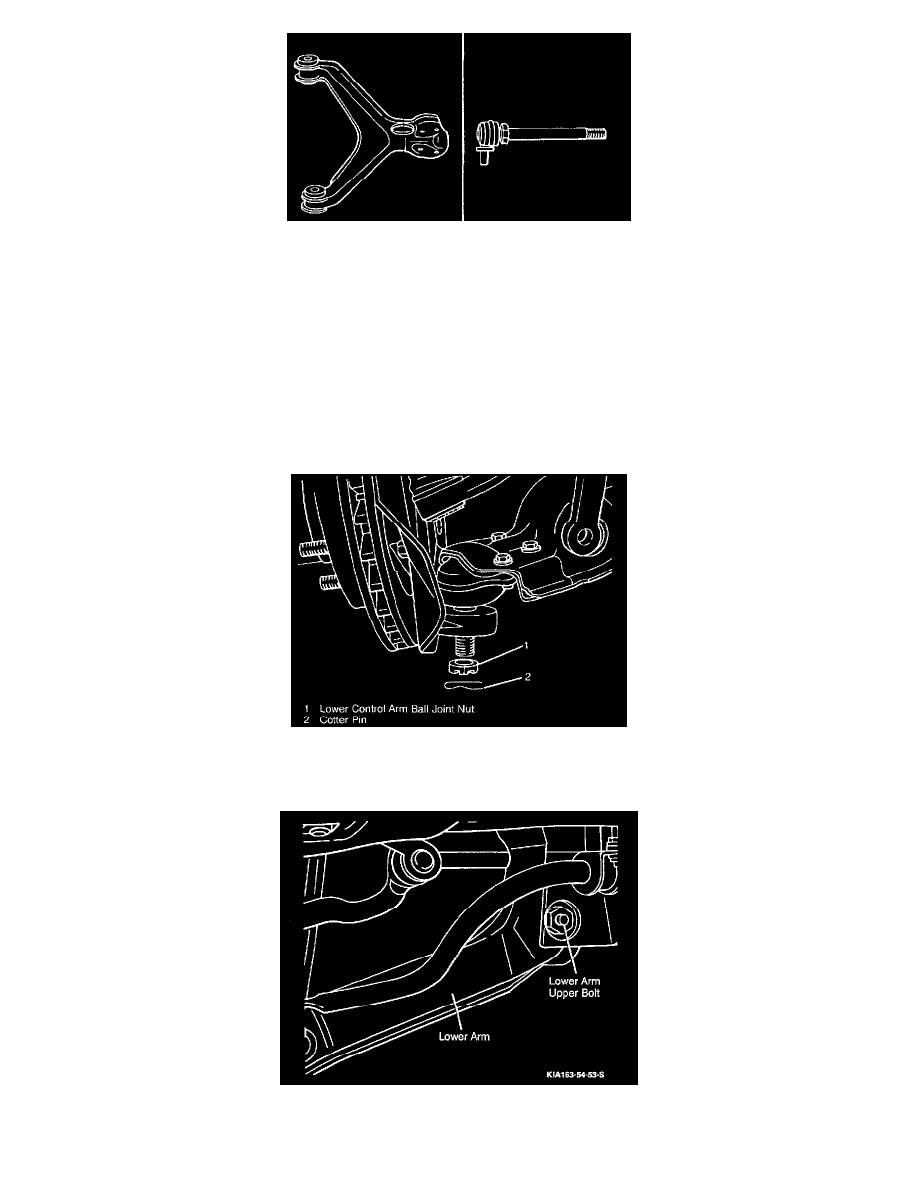
1. Inspect for worn or deteriorated lower arm bushings.
2. Inspect for bent, cracked or damaged lower control arm.
3. Inspect for bent or damaged drop link.
4. Inspect for worn or damaged ball joint.
5. Replace if damaged, deformed or cracked; replace bushing if worn or deteriorated. Refer to "Bushing Replacement" in the following procedure.
BUSHING REPLACEMENT
1. For bushing removal, utilize a standard bearing press.
2. Install the new bushing using a standard bearing press.
Apply lubricant to the new bushings prior to installation.
INSTALLATION
1. Position the lower control arm to the front frame crossmember brackets and loosely tighten the lower control arm upper bushing bolts.
2. Install the lower control arm ball joint and bolt to the steering knuckle.
Tighten the bolt to 87 ft. lbs. (118 Nm).
3. Install a new cotter pin through the castle nut.
4. Install the lower control arm upper bushing bolts.
Tighten the bolts to 221 ft. lbs. (300 Nm).