
300Tdi Defender
CLUTCH
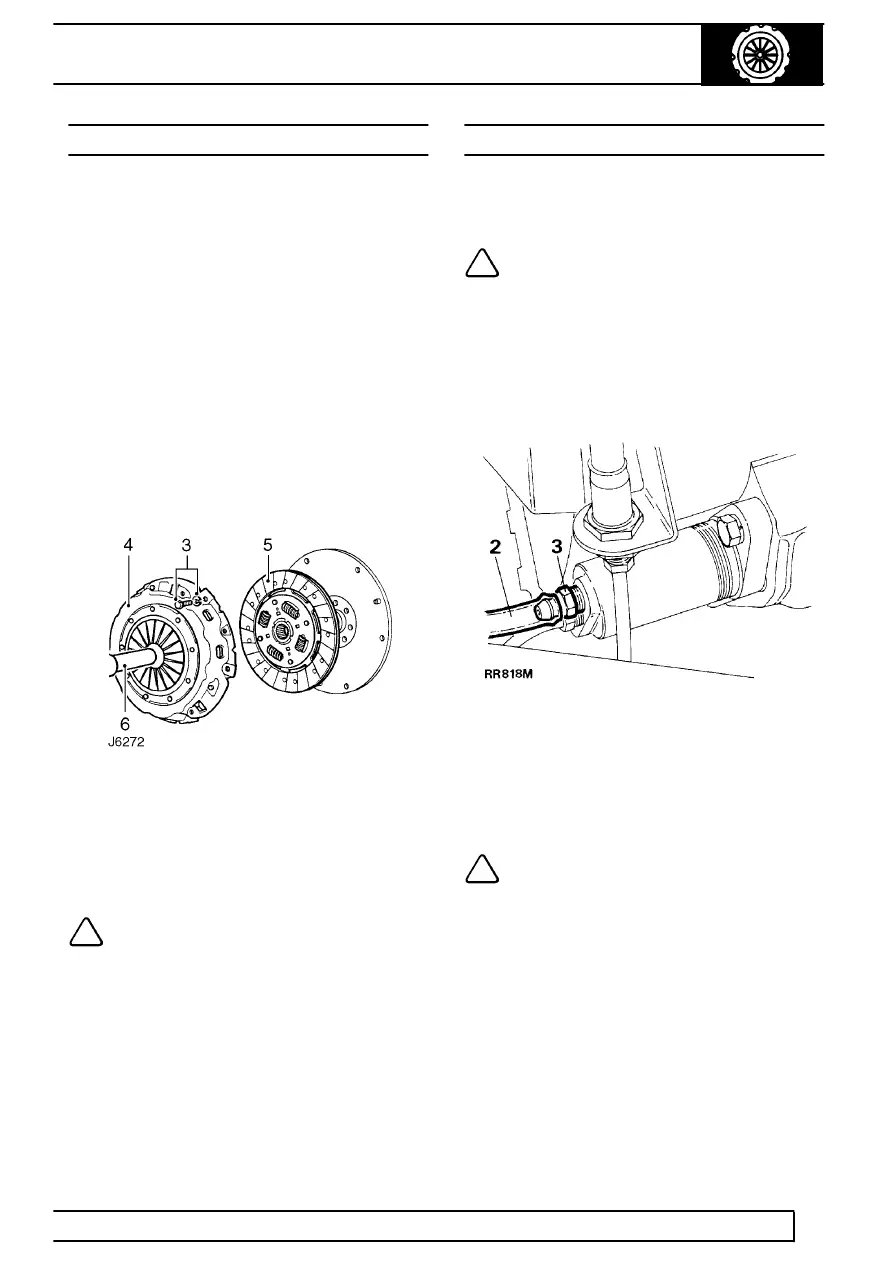
1
REPAIR
CLUTCH ASSEMBLY
Service repair no - 33.10.01
Clutch pressure plate
Renew pressure plate if diaphragm spring fingers are
worn or if pressure plate shows signs of wear, cracks
or burning.
Clutch driven plate
Renew driven plate if centre hub splines are worn or if
lining is contaminated, burned or unevenly worn.
Remove
1. Remove gearbox
See MANUAL GEARBOX,
Repair, R380 Gearbox .
2. Mark position of clutch pressure plate to flywheel
for reassembly.
3. Remove pressure plate securing bolts, working
evenly and diagonally.
4. Remove clutch assembly.
5. Withdraw clutch driven plate.
Refit
NOTE: To prevent driven plate sticking,
lubricate splines using Rocol MV 3 or
Rocol MTS 1000 grease.
6. Using centralising tool LRT-12-040 to support
clutch driven plate locate pressure plate on
flywheel dowels. If fitting original pressure plate,
align assembly marks.
7. Secure pressure plate cover fixings evenly,
working in a diagonal sequence. Tighten to
34Nm (25 lbf/ft).
8. Fit gearbox to engine
See MANUAL
GEARBOX, Repair, R380 Gearbox .
BLEED HYDRAULIC SYSTEM
Service repair no - 33.15.01
Procedure
NOTE: During bleed procedure, keep fluid
reservoir topped up to avoid introducing
air to system. For hydraulic fluid
recommendations
See LUBRICANTS, FLUIDS
AND CAPACITIES, Information, Recommended
lubricants and fluids .
1. Attach suitable tubing to slave cylinder bleed
screw.
2. Place free end of tube in a glass jar containing
clutch fluid.
3. Loosen bleed screw.
4. Pump clutch pedal, pausing at end of each
stroke, until fluid from tubing is free of air.
NOTE: Keep free end of tube below
surface of fluid.
5. Hold clutch pedal down, tighten bleed screw.
6. Top up fluid reservoir.