
300Tdi Defender
FUEL SYSTEM
9
REPAIR
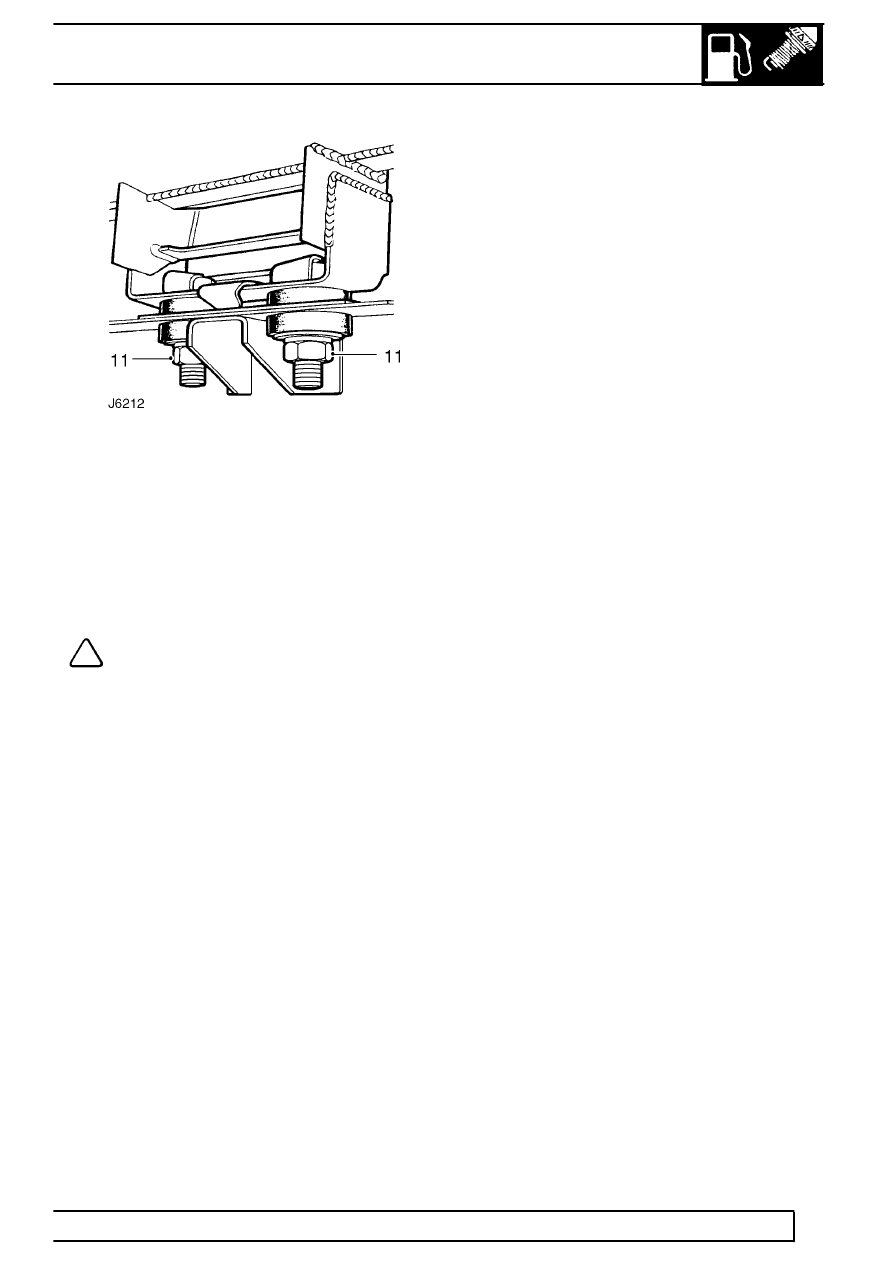
11. Remove 2 nuts that secure front fixing assembly
of the tank to chassis mounting bracket.
12. Remove tank rear mounting nuts.
13. With care, lower tank sufficiently to enable nut
and olive of spill return to be disconnected from
elbow in centre of tank.
14. Continue to lower tank until it can be removed
from vehicle.
NOTE: On later vehicles a separate stone
guard is fitted and is attached to the tank
with the existing front and rear fixings.
15. If required, remove tank gauge unit.
See
INSTRUMENTS, Repair, Fuel gauge tank unit
- side fuel tank or See INSTRUMENTS,
Repair, Fuel gauge tank unit - rear fuel tank,
110/130
Refit
16. If applicable, locate stone guard under tank.
17. Raise rear tank into position and connect spill
return pipe to the elbow with the nut and olive.
18. Continue to raise tank so that front and rear
mounting bolts locate in respective tank flange
holes.
19. Fit and tighten fixings to
20 Nm (15 lbf/ft).
20. Connect fuel suppnly pipe to the tank unit.
21. Fit fuel filler hose and breather pipe to filler tube
and secure with retaining clips.
22. Fit LH lashing eye to chassis.
23. Fit anti-roll bar chassis mountings.
See REAR
SUSPENSION, Repair, Anti-roll bar
24. Check that drain plug is secure and fill fuel tank.
25. Reconnect battery.
26. Prime fuel system.
See Adjustment, Priming
the fuel system and start engine.
27. Check system for leaks and operation of fuel
gauge.