
300Tdi Defender
19
FUEL SYSTEM
10
REPAIR
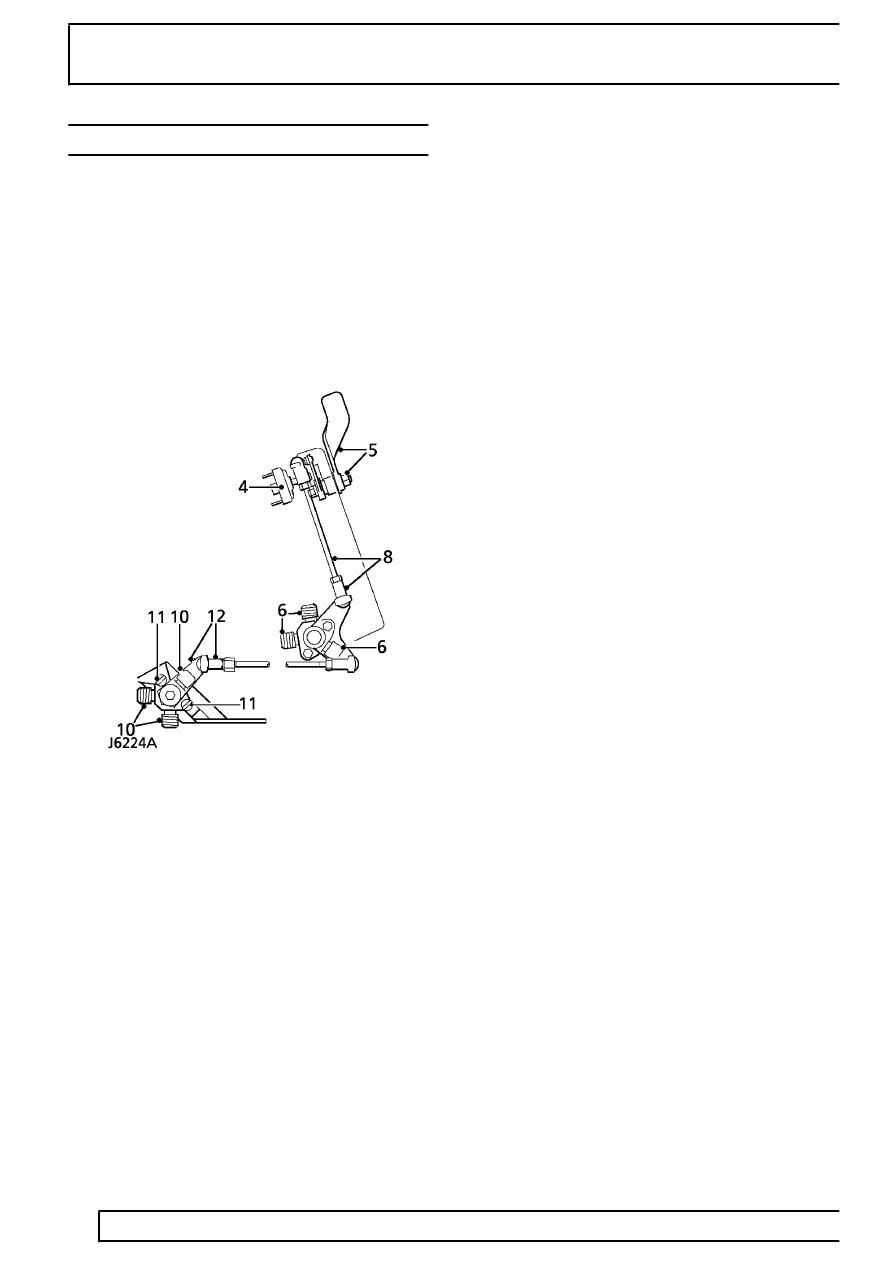
TWIN TANK CHANGE-OVER TAP ASSEMBLY
Service repair no - 19.43.50 - Fuel supply tap
Service repair no - 19.43.51 - Spill return tap
Service repair no - 19.43.52 - Fuel tank
change-over lever
Remove
1. Disconnect battery.
2. Remove RH front seat cushion.
3. Release retaining clip and remove access cover
from seat base.
4. Disconnect leads from fuel tank change-over
switch.
5. Unscrew retaining nut and withdraw change-over
lever and washers from pivot pin at heelboard.
6. Disconnect spill return pipes at spill change-over
tap.
7. Remove 4 bolts, washers and nuts securing tap
support bracket assembly to heel board.
8. Lift up support bracket assembly and disconnect
control rod from spill tap lever.
9. Remove support bracket assembly from vehicle.
10. Disconnect fuel supply pipes at fuel change-over
tap.
11. Remove 2 screws and release fuel tap from
chassis mounted support bracket.
12. Remove fuel tap, complete with operating rod
and lever.
13. Plug all connections to prevent ingress of dirt.
14. Dismantle spill return and fuel tap components
as necessary.
Refit
15. Fit fuel change-over tap, complete with operating
rod and lever, to chassis mounted support
bracket and fully tighten fixing screws.
16. Connect fuel supply pipes at fuel tap, ensuring
they are fitted to correct ports.
17. Position support bracket assembly behind
heelboard and connect operating rod to spill
change-over tap lever.
18. With pivot pin bush correctly seated, secure
support bracket assembly to heel board and
tighten fixings to
8 Nm (6 lbf/ft).
19. Connect spill return pipes to change-over tap,
ensuring they are fitted to correct ports.
20. Secure change-over lever to pivot pin.
21. Fit leads to fuel tank change-over switch.
22. Reconnect battery.
23. Prime vehicle fuel system,
See Adjustment,
Priming the fuel system if necessary and
check for leaks.
24. Fit access cover to seat base and seat cushion.