
Discovery II
AIR CONDITIONING
82-42
REPAIRS
Evaporator - rear
$% 82.26.20
Remove
1. Remove evaporator assembly.
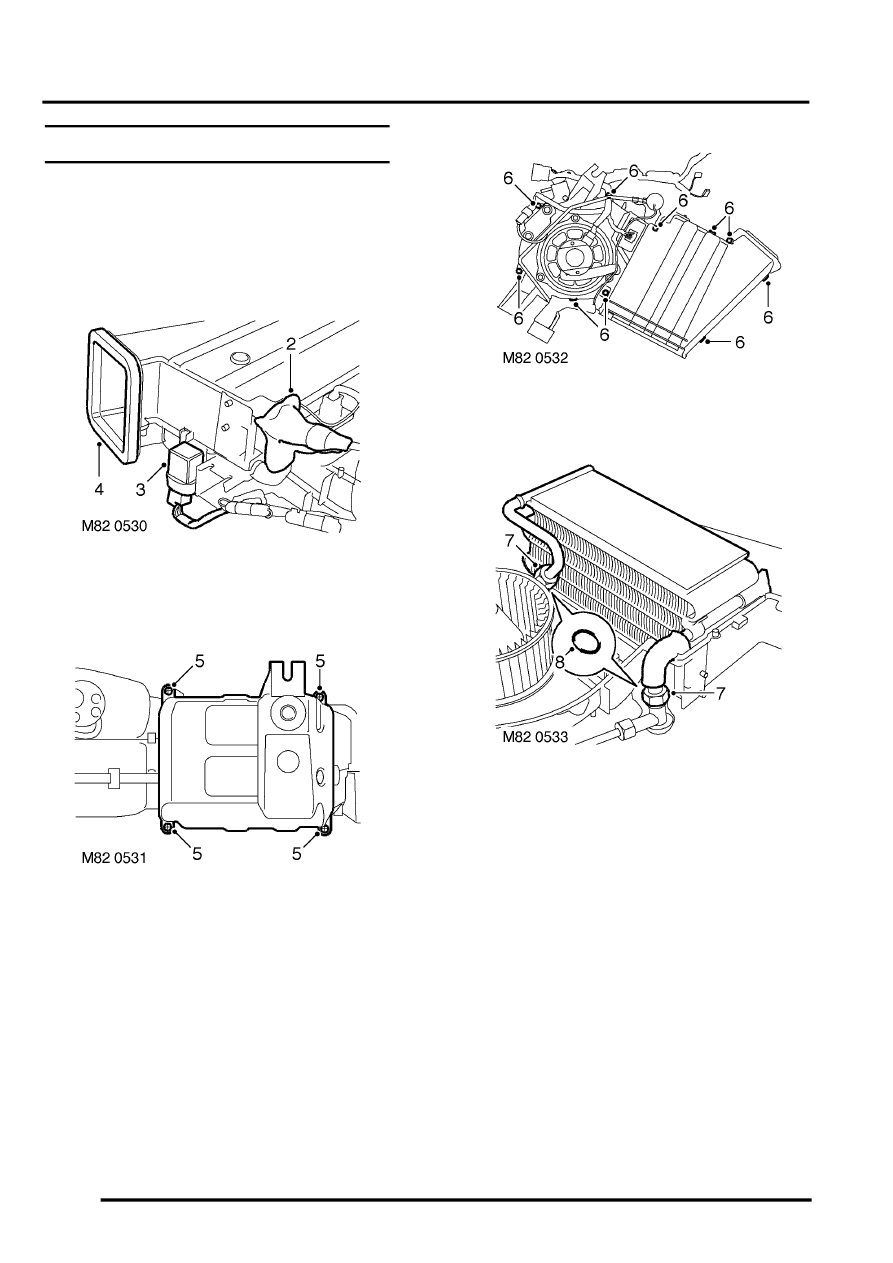
Evaporator and motor assembly - rear.
2. Remove insulation from TXV.
3. Release relay from support bracket.
4. Remove ducting seal.
5. Remove 4 screws securing lower part of
casing, release and remove lower casing.
6. Remove 6 screws and 4 clips securing main
casing and remove top half of casing.
7. Loosen and release evaporator pipes unions,
release pipes and remove evaporator.
8. Remove and discard evaporator pipe 'O' rings.
Refit
1. Lubricate new 'O' rings with clean refrigerant oil
and fit to evaporator pipes
2. Position evaporator, connect pipes and tighten
unions.
3. Position main casing and secure with clips and
screws.
4. Position lower part of casing and secure with
screws.
5. Fit ducting seal
6. Secure relay to support bracket.
7. Fit insulation to TXV.
8. Fit evaporator assembly.