
Discovery II
DOORS
REPAIRS
76-1-1
DOORS
REPAIRS
Door - front
$% 76.28.01.99
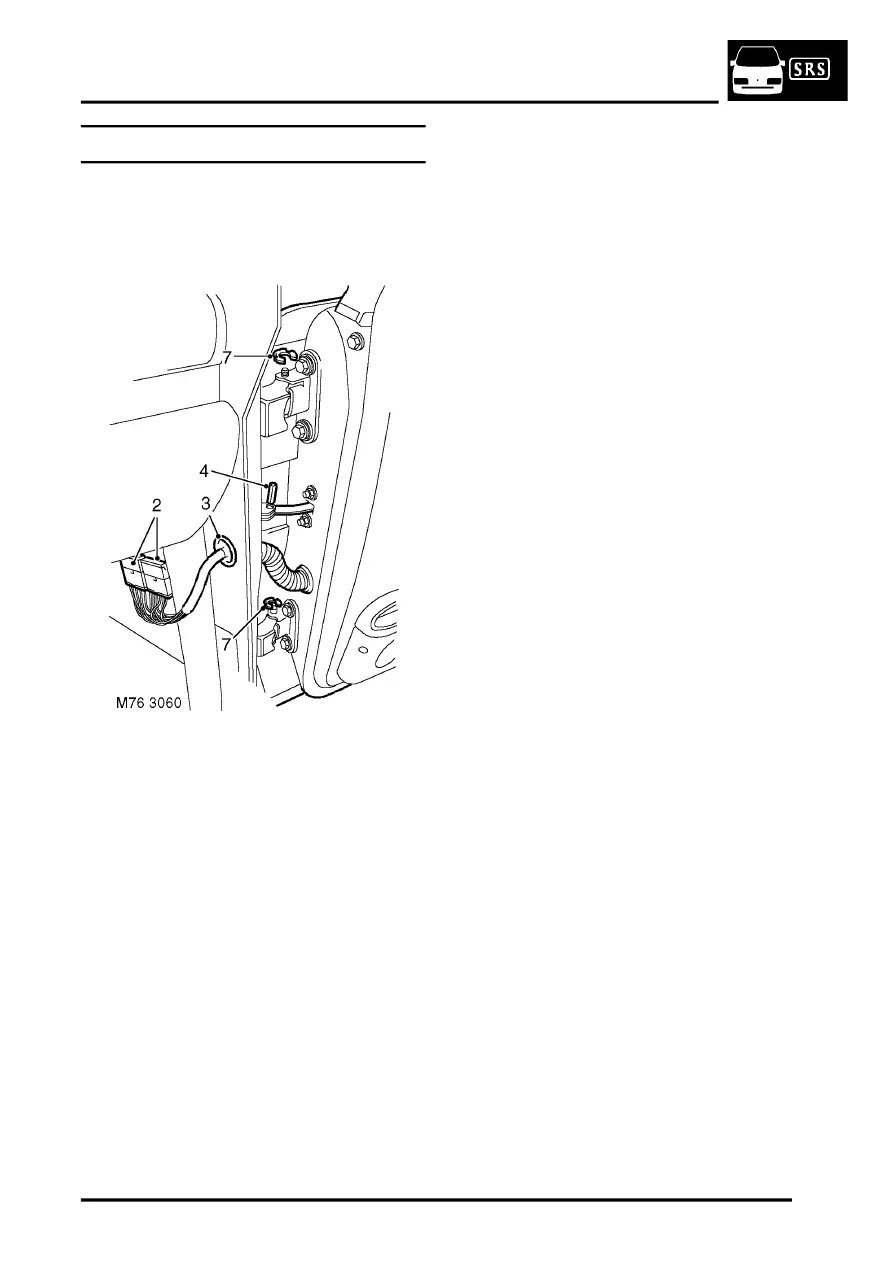
Remove
1. Release 'A' post lower trim and position aside.
2. Release and disconnect multiplugs from lower
'A' post.
3. Release harness sleeve and pull harness
through 'A' post.
4. Remove roll pin from door check strap.
5. Release check strap from 'A' post.
6. Discard roll pin.
7. Remove 2 'C' clips from door hinges.
8. With assistance raise and remove door.
Refit
1. With assistance position door to hinges.
2. Fit 'C' clips to hinge pins.
3. Position check strap to 'A' post and secure with
new roll pin.
4. Feed door harness through 'A' post.
5. Connect and secure multiplugs at lower 'A'
post.
6. Connect harness sleeve to 'A' post and door.
7. Fit 'A' post finisher.
8. Check door for flush fit to adjacent panels and
door edges for equal gap. If adjustment is
necessary:
a Open door
b Place a wooden block on jack and position
jack to support door lower edge.
c Loosen 4 bolts securing hinges to door.
d Loosen 2 Torx bolts securing door latch
striker.
e Use jack to assist with door alignment.
f Tighten hinge bolts.
g Remove jack, close door and check for
correct alignment.
h When alignment is correct, tighten door
hinge bolts to 30 Nm (22 lbf.ft).
i Adjust door latch striker and tighten Torx
bolts to 26 Nm (19 lbf.ft).