
300Tdi Discovery
ZF
1
ADJUSTMENT
ADD: 09/95
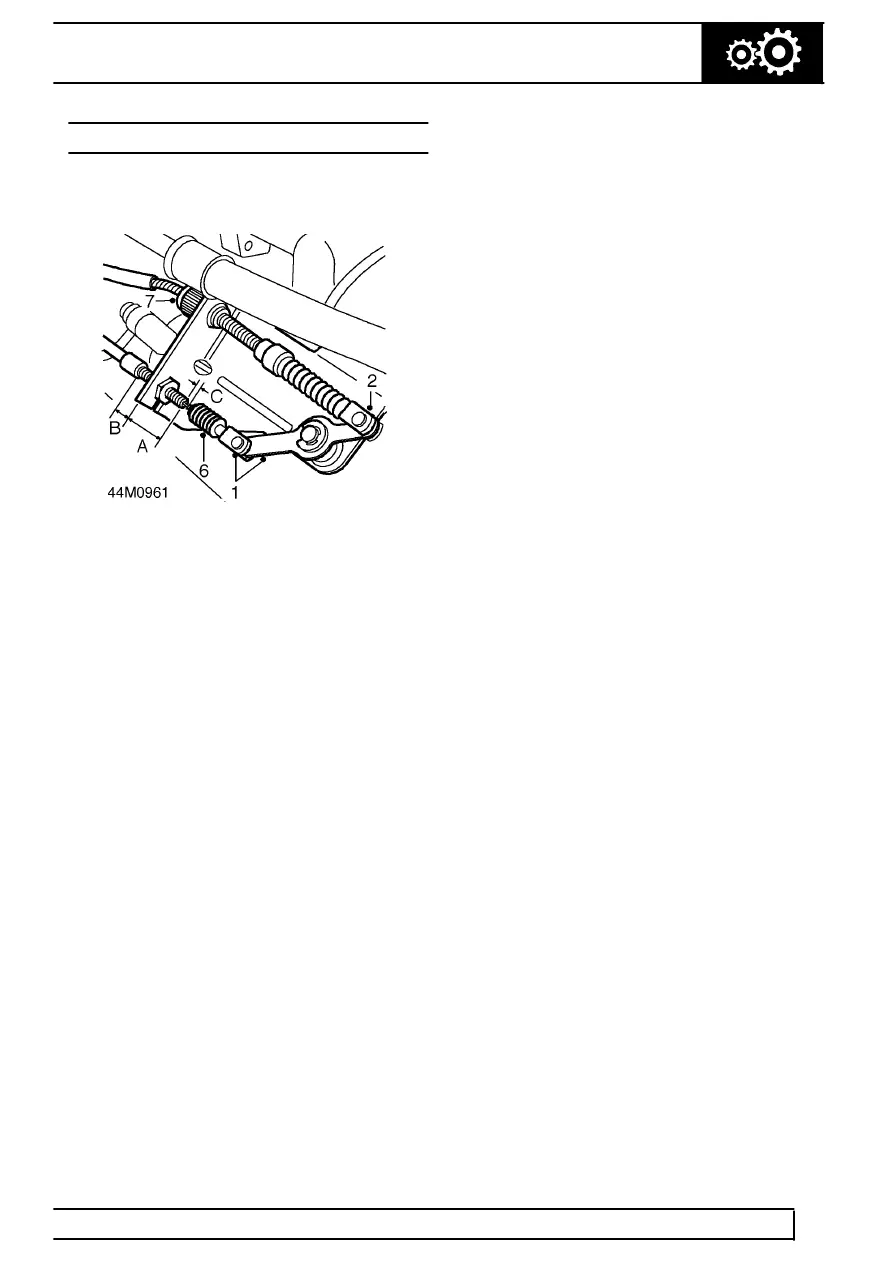
KICKDOWN CABLE ADJUSTMENT
1. Remove split pin, withdraw clevis pin and
disconnect kickdown cable from lever.
2. Remove split pin, withdraw clevis pin and
disconnect throttle cable from lever.
3. Adjust the position of the kickdown cable
locknuts so that dimension ’A’ is 28 mm. With
cable held in this position, there should be 6
threads exposed to the rear of the bracket,
(dimension ’B’).
4. Tighten both locknuts Connect the kickdown
cable to the lever and secure with clevis pin and
split pin.
5. Connect the throttle cable to the lever and
secure with clevis pin and split pin.
6. Pull back the rubber boot on the kickdown cable
until the crimped nipple is visible.
7. Rotate the knurled plug on the throttle cable until
the crimped nipple is 1 mm from the end of the
threads, (dimension ’C’).
8. Refit the rubber boot.