
Freelander Service Procedures
HOOD
REPAIRS
76-7-7
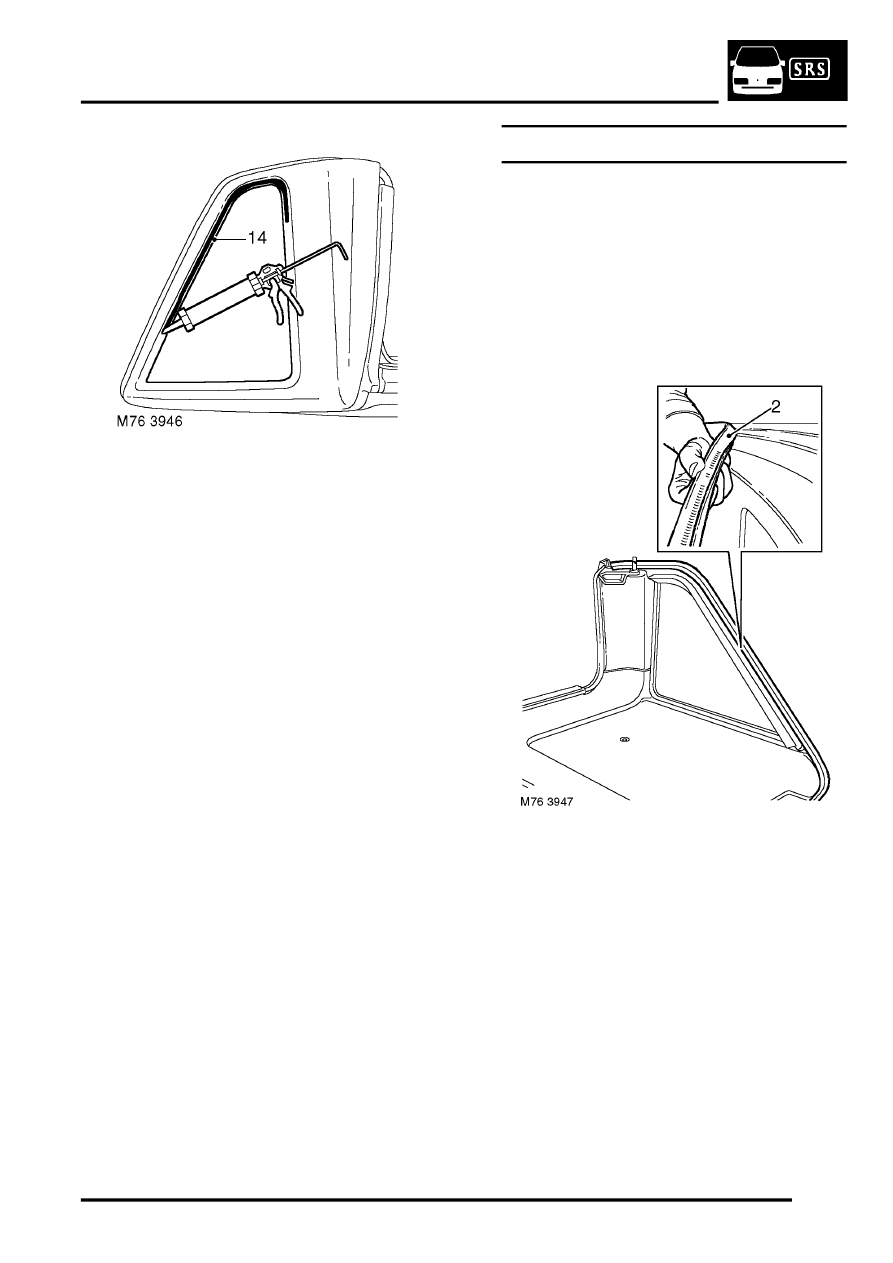
14. Apply a continuous bead of sealer around edge
of frame as shown. Make bead slightly thicker
at each corner.
15. Check for breaks and air bubbles in sealer.
16. Position glass to body and align to reference
tape.
17. Lightly press glass to fully seat sealer.
18. Secure glass with tape until sealer has cured.
19. Remove protective covers and tape.
20. Test seal for leaks, apply additional sealer if
necessary. If water is used, allow sealer to dry
before testing. Spray water around glass and
check for leaks. Dry affected area and apply
additional sealer if necessary.
21. Position headlining and locate hardback seal.
22. Secure headlining with Torx screws.
23. Position catches, fit Torx screws and tighten to
10 Nm (7.5 lbf.ft).
24. Fit 'E post finishers, engage in clips and secure
with screws.
cover - assembly - remove for access & refit.
Seal - hard back - primary
$% 76.61.34
Always position trim components on a soft
covered, clean work surface.
Remove
1. Remove hard back.
cover - assembly - remove for access & refit.
2. Release seal from flange around hard back
frame and remove seal.
Refit
1. Clean seal flange.
2. Position seal and secure to flange.
3. Secure ends of seal to hard-back frame using
Butyl Rubber adhesive if necessary.
4. Fit hard back.