
Freelander Service Procedures
REAR AXLE & FINAL DRIVE
51-2
REPAIRS
Refit
1. With assistance position differential assembly
to subframe and locate in mountings, fit bolts
but do not tighten at this stage.
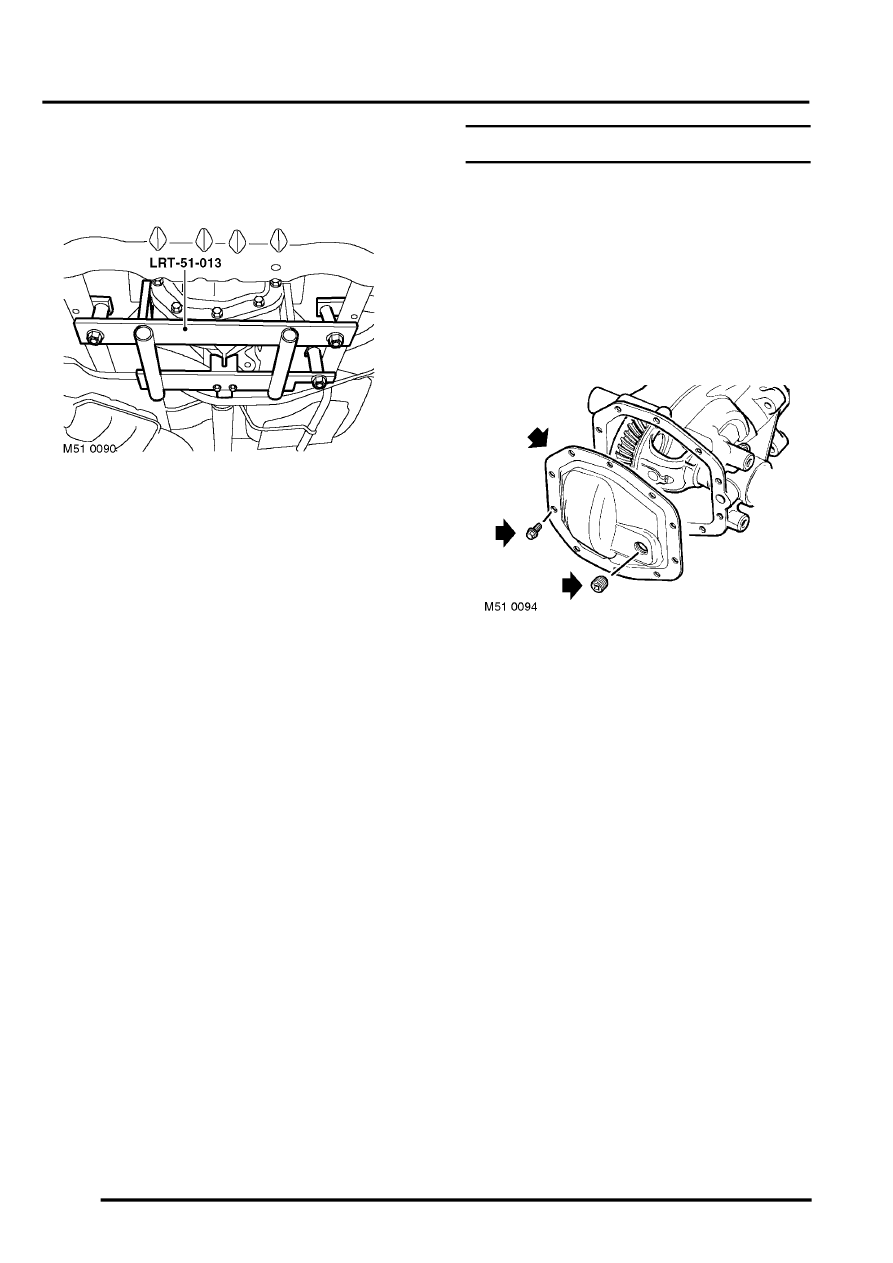
2. Position centralising jig LRT-51-013 to align
differential assembly.
3. Tighten forward bolts to 65 Nm (48 lbf.ft).
4. Tighten rearward bolts to 65 Nm (48 lbf.ft).
5. Remove LRT-51-013.
6. Connect breather pipe.
7. Position propeller shaft to rear axle and align
reference marks.
8. Fit and tighten nuts and bolt securing propeller
shaft to rear axle to 65 Nm (48 lbf.ft).
9. Fit drive shafts.
10. Check differential oil level.
Cover - rear - differential
$% 51.15.04
Remove
1. Raise rear of vehicle.
WARNING: Do not work on or under a
vehicle supported only by a jack. Always
support the vehicle on safety stands.
2. Position container to catch oil spillage.
3. Remove oil level plug.
4. Remove 10 bolts securing rear cover to
differential casing.
5. Remove rear cover.
Refit
1. Clean rear cover, mating face on differential
and sealant from bolts and bolt threads.
2. Apply sealant, Part No. STC 3811 to casing
and fit rear cover.
3. Apply sealant, Part No. STC 50552 to threads
of rear cover bolts.
4. Fit rear cover bolts bolts and tighten by
diagonal selection to 25 Nm (18 lbf.ft).
5. Fill differential with oil.
6. Fit level plug and tighten to 27 Nm (20 lbf.ft).
7. Remove stands and lower vehicle.