Freelander Service Procedures

WINDOWS
REPAIRS
86-5-1
WINDOWS
REPAIRS
Motor & control unit - front door - 3 door
$% 86.25.01
Remove
1. Remove upper plastic sheet.
DOORS, REPAIRS, Plastic sheet -
2. Remove lower plastic sheet.
DOORS, REPAIRS, Plastic sheet -
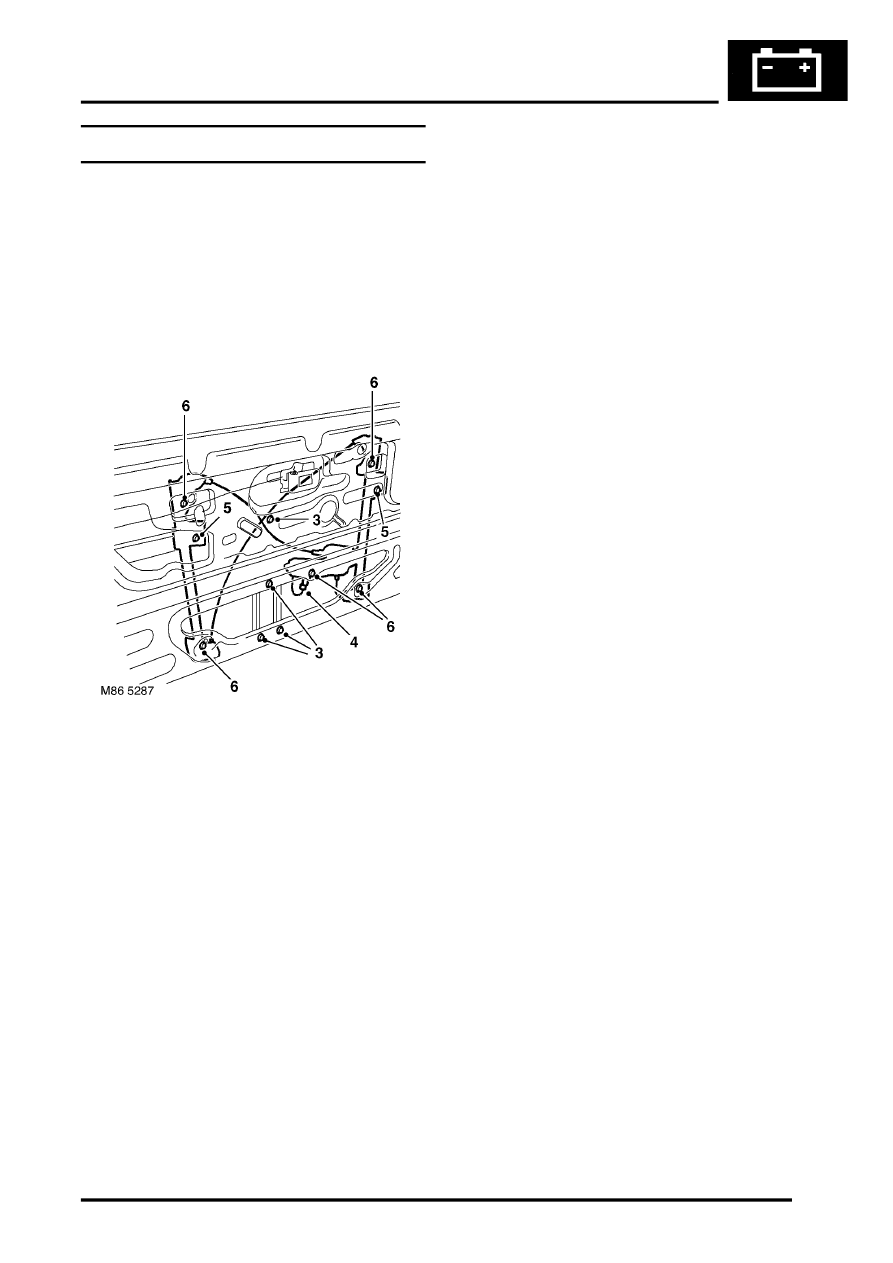
3. Remove 4 Torx screws securing door stiffener,
release bowden cable from clip and remove
door stiffener.
4. Disconnect multiplug from door glass motor.
5. Loosen 2 screws clamping control unit to glass
and release glass from clamps.
6. Remove 5 screws securing control unit to door.
7. Manoeuvre motor and control unit out from
door aperture.
Refit
1. Position motor and control unit in door aperture
and locate to glass.
CAUTION: It is very important when fitting
the control unit that the cable with the anti-
rattle sleeve is next to the trim casing and
the motor cable next to the glass.
2. Secure control unit to door with screws.
3. Tighten clamps securing control unit to glass, to
9 Nm (7 lbf.ft).
4. Connect multiplug to door glass motor.
5. Position door stiffener, fit and tighten Torx
screws to 9 Nm (7 lbf.ft).
6. Secure cable in door stiffener clip.
7. Fit lower plastic sheet.
DOORS, REPAIRS, Plastic sheet -
8. Fit upper plastic sheet.
