
L322 Range Rover Transfer Box Service Procedures
TRANSFER BOX
REPAIRS
41-15
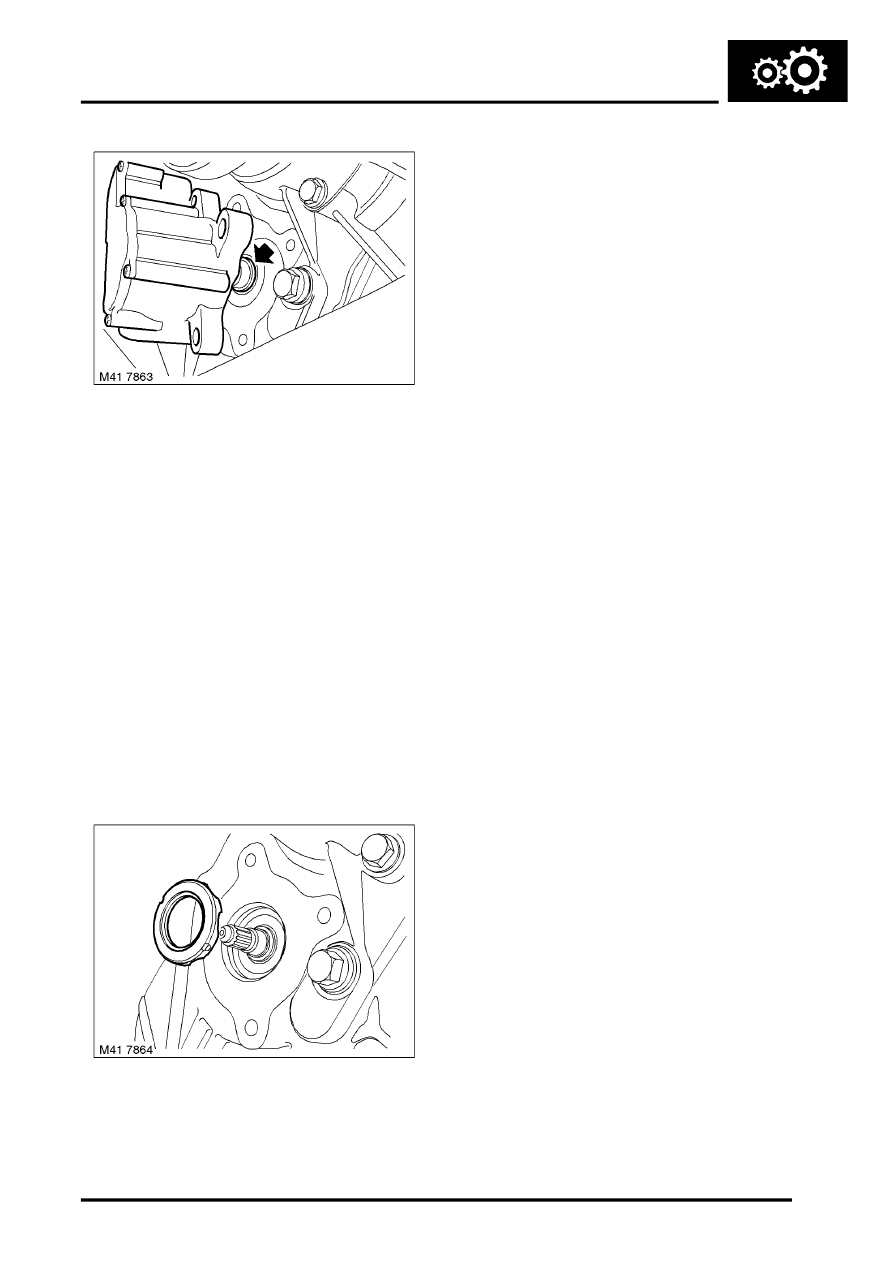
9. Avoid disturbing the lead screw which should
remain with the transfer gearbox. With extreme
care, slowly release the ratio control assembly
from the transfer gearbox. Use a small flat
blade screw driver to prevent the lead screw
moving out with the ratio control assembly, as
shown.
CAUTION: If the lead screw is rotated or
withdrawn internal transfer gearbox
damage may result.
10. Remove the 'O' ring.
11. Remove bearing only if released.
Refit
1. Ensure low range is selected by pushing
selector shaft fully into transfer gearbox.
CAUTION: If the lead screw is rotated or
withdrawn internal damage may result.
2. Clean bearing and mating face.
3. Lubricate and fit bearing, with 'legs' of bearing
pointing towards the transfer gearbox, as
shown.
4. Clean ratio control assembly and mating face
on transfer gearbox.
5. Use a new 'O' ring, engage splines and fit ratio
control assembly to transfer gearbox.
NOTE: The lead screw has a master spline.
6. Fit and tighten bolts securing ratio control
assembly to transfer gearbox to 28 Nm (21
lbf.ft).
7. Connect and secure multiplug to ratio control
actuator.
8. Lower the lift.
9. To calibrate a new ratio control assembly,
follow the steps below.
10. Fit spare fuse into position 37 in main fuse box.
11. With automatic gearbox in neutral, switch
ignition on.
12. Switch off ignition.
13. Remove fuse from position 37.
14. Switch ignition on.
15. Operate switch to perform a high to low shift
and back to high.
16. Drive vehicle to perform at least 3 high to low to
high shifts cycles at permissible speeds above
6 mph (10 km/h).