
Range Rover P38
CHASSIS AND BODY
91
REPAIR
CAUTION: Manoeuvre knife blade around 3
parcel tray support clips. Ensure aerial
amplifier and alarm receiver plugs do not
become damaged.
15. Attach suction lifters to glass. With assistance,
cut through sealant along top of edge glass.
16. Remove rear quarter glass.
Removal Using Cutting Wire Handles
17. Protect surrounding area of body using masking
tape.
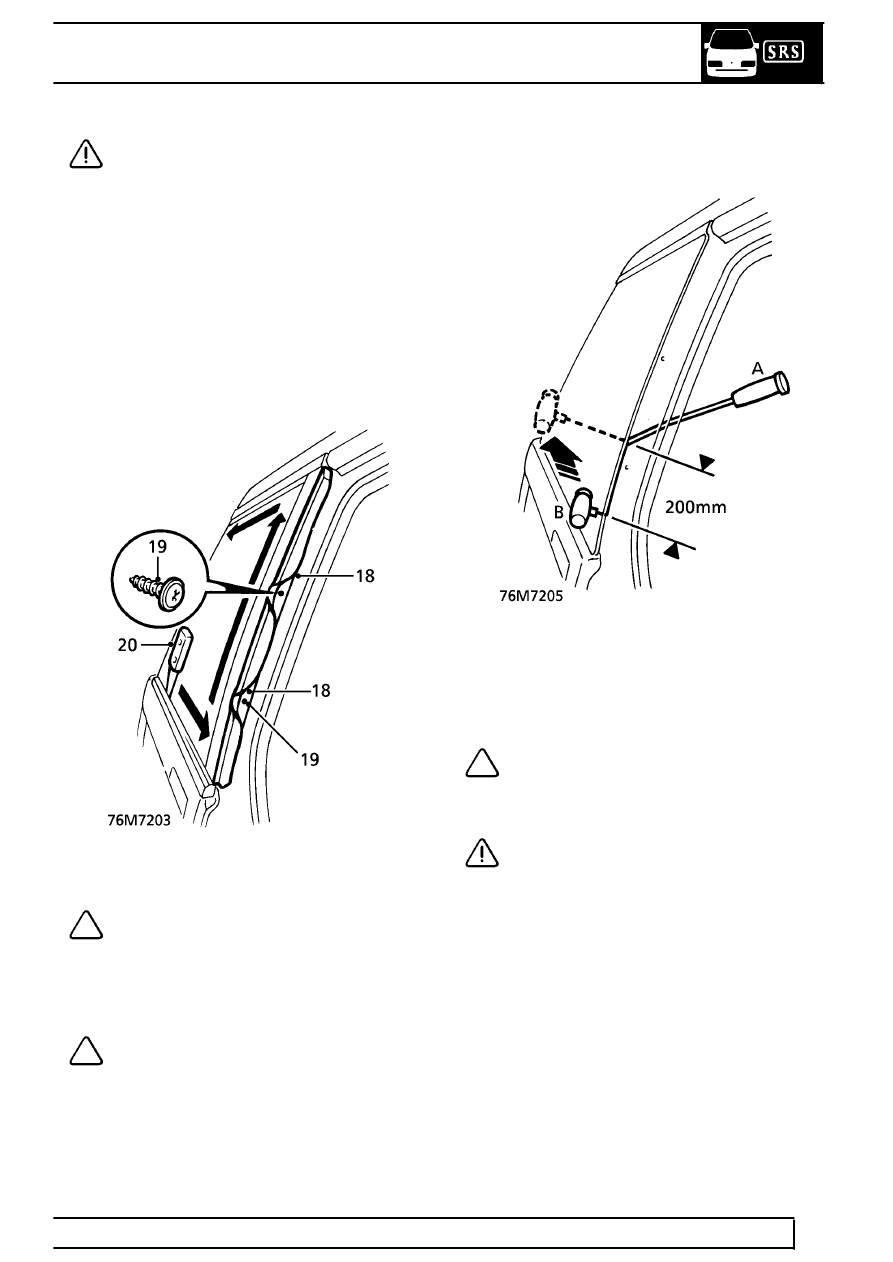
18. Lift flip seal to reveal trim fixings.
19. Remove 2 screws securing exterior trim to ’D’
post.
20. Carefully cut through adhesive bead between
glass and trim using a sharp knife.
NOTE: A reciprocating blade cutting tool,
such as ’FEIN Special Cutter’ will ease the
removal of the trim. Use a cranked blade
with an effective length of not more than 22mm.
21. Remove and discard quarter light trim.
NOTE: Rear quarter lights are supplied
with finisher fitted. Finisher is not
available separately.
22. Using a sharp knife, cut through P.U. sealer at
forward edge of quarter glass.
23. Insert cutting wire through knife cut and fit
handles, as shown, with approximately 200mm
of wire between handles.
24. With assistance, wedge tube of handles ’A’
between glass and body, ahead of the cutting
position, and carefully cut the sealer using a
continuous pull on handle ’B’ from the outside.
Cut side and top edges first. Attach suction lifters
as last sealant is cut.
NOTE: When cutting along lower edge,
manoeuvre wire between glass edge and
parcel tray support clips to reduce strain
on wire.
CAUTION: Ensure aerial amplifier and
alarm receiver plugs do not become
damaged.
25. Remove rear quarter glass.