
Aviator 2WD V8-4.6L DOHC (2003)
Impact Sensor: Service and Repair
General Procedures
Missing Weld Nut
WELD NUT REPAIR - MISSING WELD NUT
CAUTION: Installing a J-nut in place of a weld nut is not a recommended repair.
NOTE: C-pillar repair shown, others similar.
1. Remove the component from where the weld nut is to be repaired.
2. Drill three equally spaced 5/64 in (1.75 mm) holes in close proximity to where the weld nut face will be plug welded back to the sheet metal.
3. Obtain the appropriate 6 mm (0.24 in) or 8 mm (0.32 in) weld nut.
4. Obtain the appropriate 6 mm (0.24 in) by 1.0 or 8 mm (0.32 in) by 1.25 grounding screw (self-tapping).
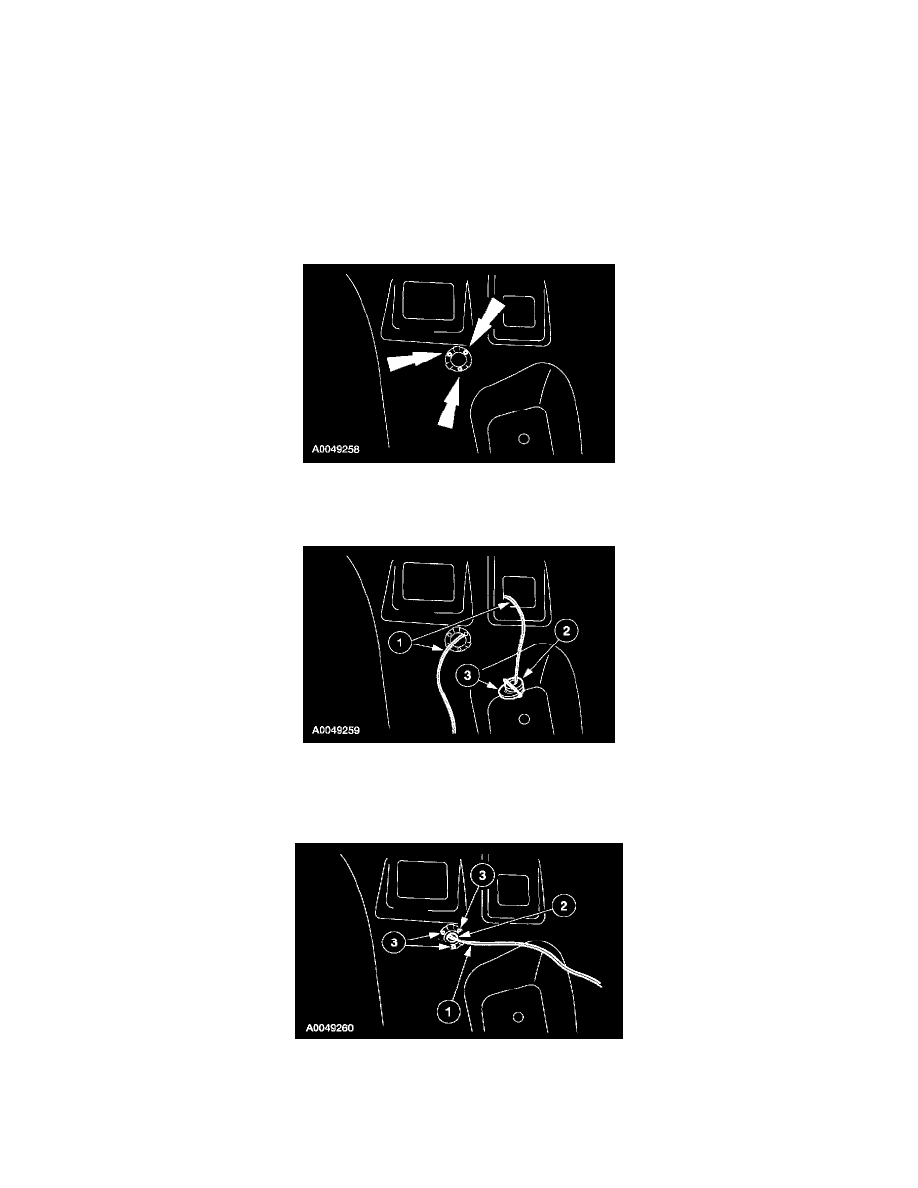
5. Set up for the positioning of the weld nut.
1
Route a sufficient length of wire through the weld nut clearance hole and back out an adjacent access hole.
2
Position a weld nut, shoulder end up, onto the wire.
3
Position a flat washer onto the wire and secure it so it cannot be pulled off.
6. Plug weld the weld nut into position.
1
Pull the welding wire back through the clearance hole, allowing the weld nut and flat washer to follow the welding wire through and stop
against the sheet metal.
2
Make sure the weld nut shoulder is aligned through the clearance hole in the sheet metal.
3
With the weld nut firmly held in position, plug weld the weld nut at the three holes drilled previously.