
Aviator 2WD V8-4.6L DOHC (2003)
Use a suitable tool and pry only in the area shown to separate the flange yoke from the pinion flange.
Item 5: U-Joint Spider Removal Note
1. Index-mark the components at the U-joints for reassembly.
2. Position the driveshaft in the special tool. Using the special tool, press out a bearing cup.
3. If necessary, use a pair of pliers to remove a bearing cup if it cannot be pressed all the way out.
4. Rotate the driveshaft and press on the spider to remove the remaining bearing cup.
Item 7: U-Joint Spider Installation Note
1. Check the U-joints for freedom of movement. If binding, strike the yoke with a brass or plastic hammer. Do not strike the bearing.
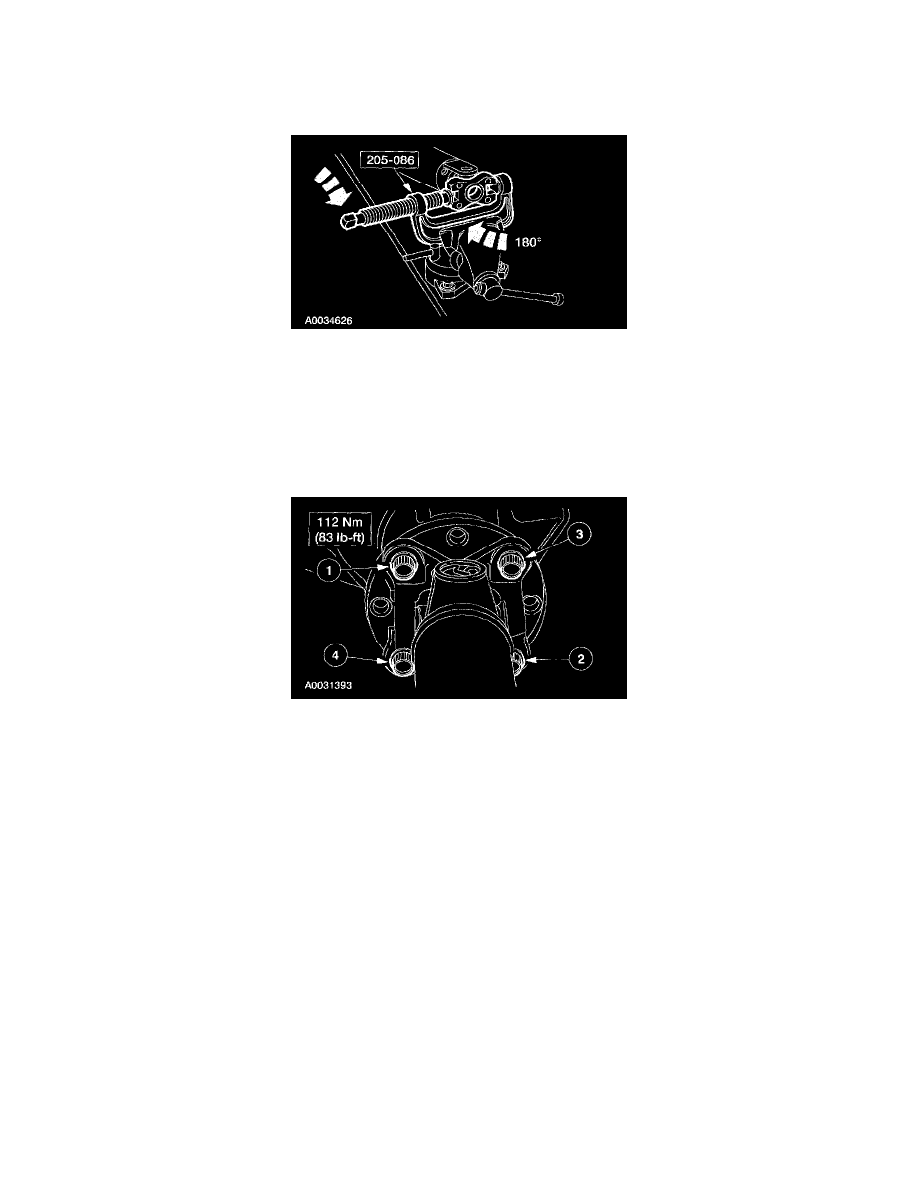
Item 1: U-Joint Flange Bolt Installation Note
1. CAUTION: If new bolts to retain the driveshaft to the axle are not available, coat the threads of the original bolts with threadlock and sealer.
CAUTION: The driveshaft flange fits tightly on the rear axle pinion flange pilot. To make sure that the driveshaft flange seats squarely on the
pinion flange, tighten the bolts evenly in a cross pattern as shown.
Install the driveshaft flange bolts in the order and specification shown.