Aviator AWD V8-4.6L DOHC VIN H (2003)

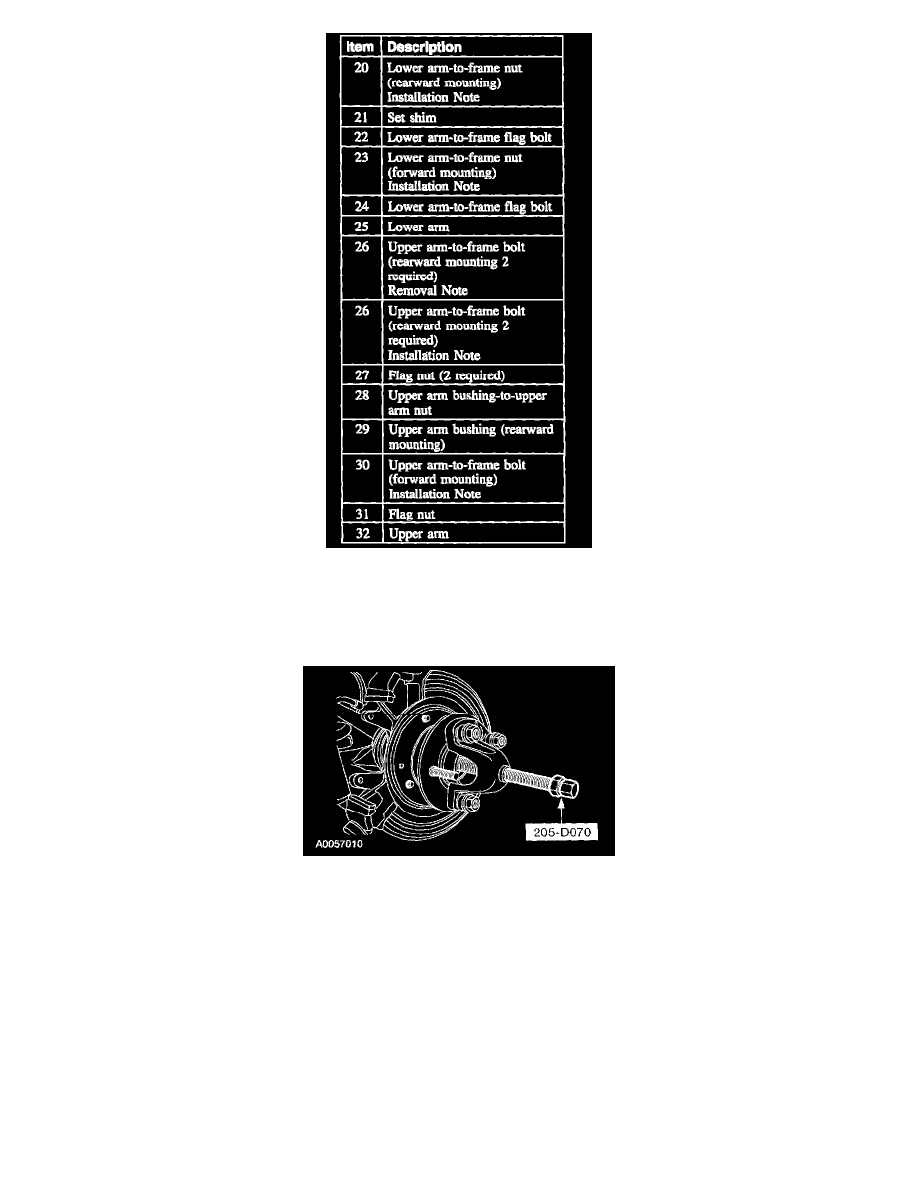
5. Illustration 3 of 3. Remove the components in the order indicated in the illustration and table.
6. To install, reverse the removal procedure.
7. Check and, if necessary, align the rear end.
Item 1: Axle Nut Removal Note
1. CAUTION: Do not use a hammer to separate the outboard CV joint from the hub. Damage to the threads and internal CV joint components can
result.
Using the special tool, press the outboard CV joint until it is loose from the hub
Item 3: Toe Link-to-Wheel Knuckle Bolt Removal Note
1. CAUTION: Do not damage the boot while separating the toe link from the wheel knuckle.
Remove the bolt and separate the toe link from the wheel knuckle
Item 5: Upper Arm-to-Wheel Knuckle Bolt Removal Note
1. CAUTION: Do not damage the boot while separating the ball joint from the wheel knuckle.
Remove the bolt and separate the upper arm from the wheel knuckle
