
Continental V8-302 5.0L (1984)
19.
Install five (5) screws into reinforcements to hold wiper pivot mounting bracket to the cowl top panel, Figure 5.
20.
Apply DITZLER Metal Prep DX579 to reworked cowl top area and reinforcements. Allow the Metal Prep to dry.
21.
Brush on touch-up primer to cowl top area, reinforcements and screws.
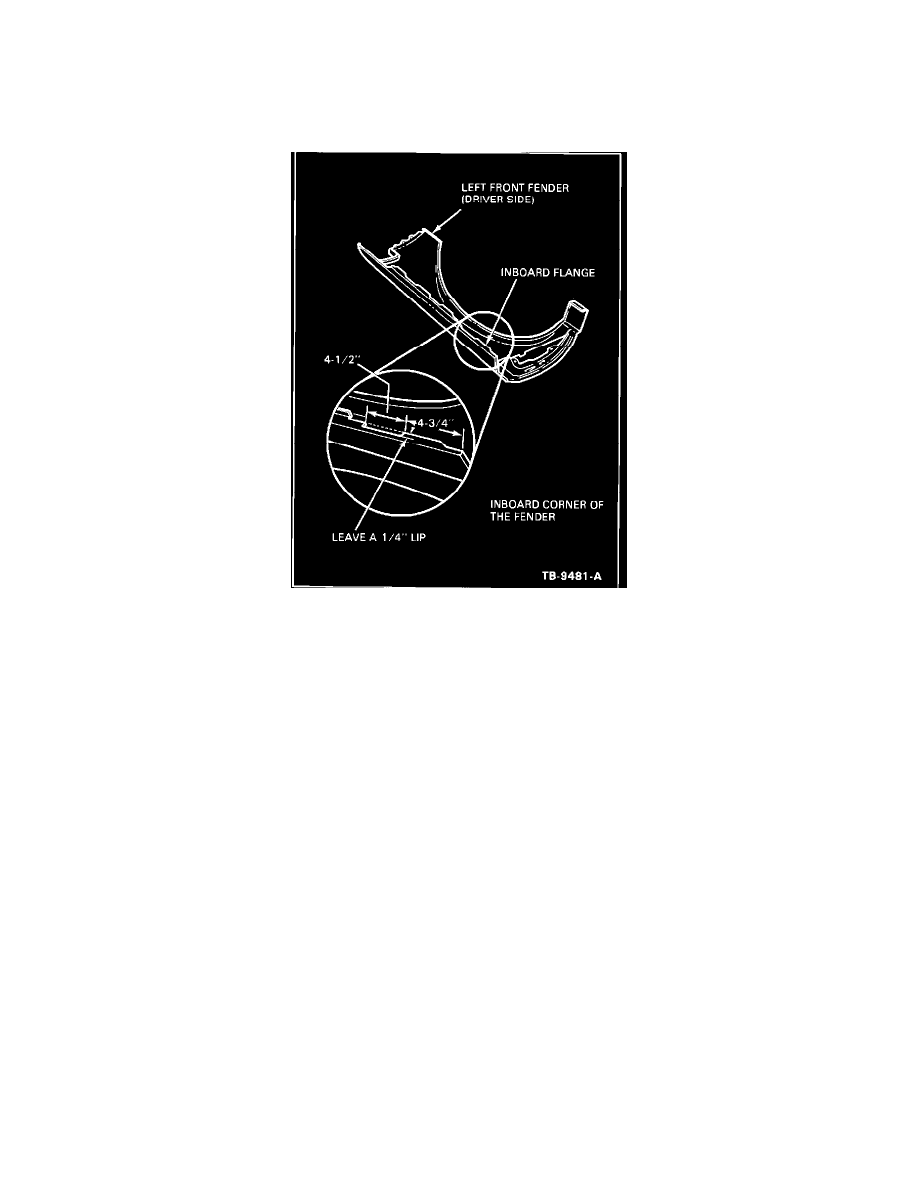
FIGURE 6
22.
Spray the appropriate color paint on the reworked area.
23.
Measure 4-3/4" (120.6 mm) forward from the inboard corner of the left front fender, Figure 6. Mark the location with a grease pencil on the
inboard flange.
24.
Measure 4-1/2" (114.3 mm) forward of the mark made in Step 23 and mark this point with a grease pencil.
25.
Cut out the 4-1/2" (114.3 mm) section on the inboard flange, Figure 6.
NOTE:
Make sure to leave a 1/4" (6.3 mm) lip on the inboard flange, Figure 6.
26.
Clean burrs off the fender.
27.
Apply DITZLER Metal Prep DX579 to reworked left front fender area.
28.
Apply touch-up primer to reworked area of the left front fender.
29.
Spray appropriate color paint to reworked area of left front fender.
30.
Reinstall wiper motor.
31.
Reinstall the wiper arm and pivot shaft.
32.
Reinstall the wiper arm and blade assembly.
33.
Temporarily connect the negative battery terminal and make sure the wiper system operates correctly.
34.
Disconnect the negative battery terminal.
35.
Reinstall the left front fender. Refer to the appropriate Car Shop Manual, Section 47-12 for service details.