
Continental V8-4.6L DOHC (1995)
Evaporator Case: Service and Repair
REMOVAL
1. Record User 1 and User 2 preset radio frequencies for reprogramming installation.
2. Disconnect battery ground cable.
3. Drain coolant from radiator into a clean container.
4. Discharge refrigerant from A/C system. Observe all safety precautions.
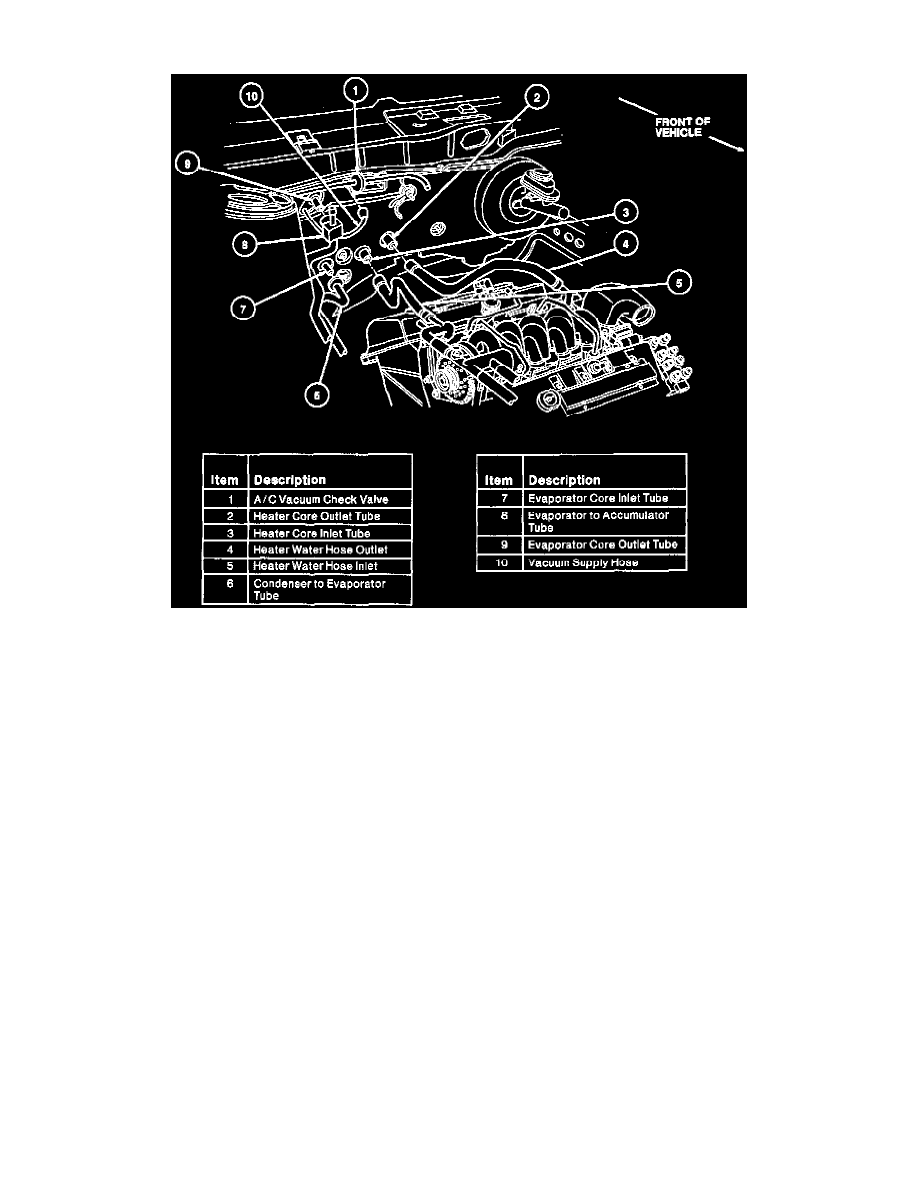
5. Disconnect heater water hoses from heater core. Plug heater core tubes or blow any coolant from heater core with low-pressure air.
6. Disconnect vacuum supply hose (black) from in-line A/C vacuum check valve in engine compartment.
7. Recover refrigerant.
8. Disconnect condenser to evaporator tube and evaporator to accumulator tube from A/C evaporator core at dash panel. Cap refrigerant lines and
A/C evaporator core to prevent entrance of dirt and moisture.
9. Remove instrument panel.
10. Remove rear seat airflow duct.
11. Disconnect the electrical connections from the A/C evaporator housing.
12. Remove three nuts retaining A/C evaporator housing to dash panel in engine compartment.
13. Remove two screws retaining support brackets to cowl top panel in passenger compartment.
14. Remove two bolts retaining instrument panel center support bracket and position bracket aside.
15. Carefully pull A/C evaporator housing away from dash panel and remove evaporator case from vehicle.